Zapier
Connect Atarim to thousands of apps with Zaps — starting with one step the other integrations don’t have.
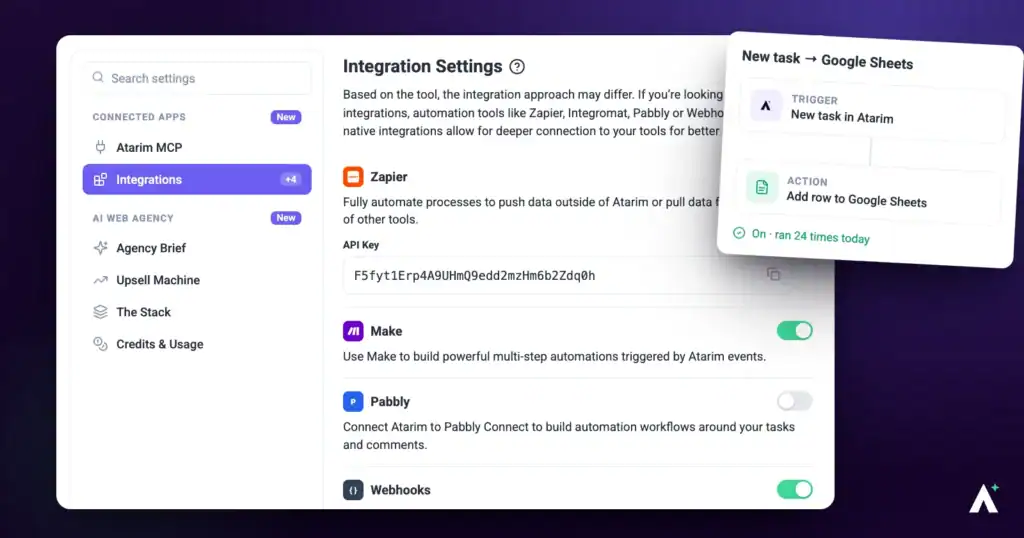
Zapier connects Atarim to thousands of other applications, pushing task data out or pulling data in. One step is unique to this integration and catches most people out: Atarim’s Zapier app is invite-only, so it will not appear in Zapier’s directory until you have accepted the invite.
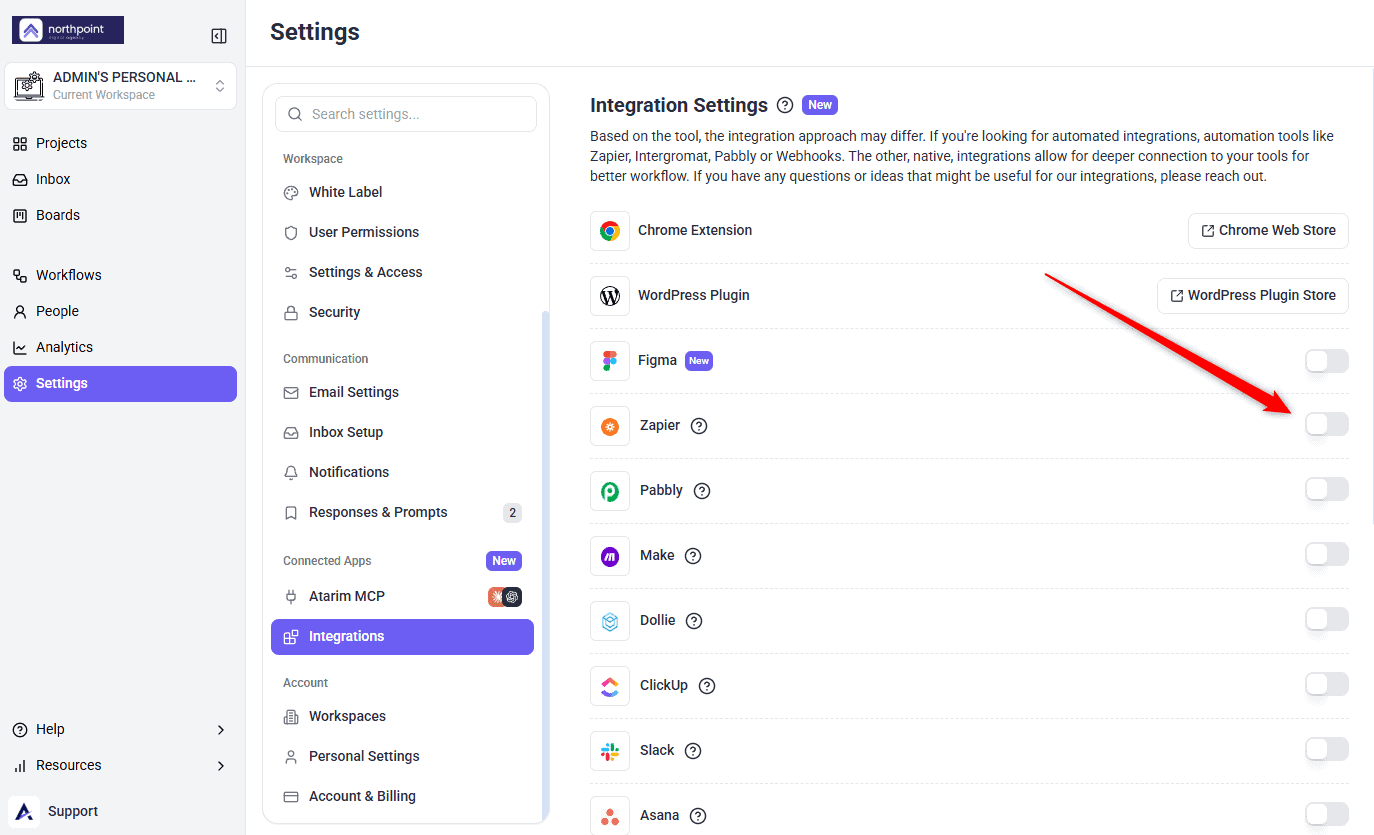
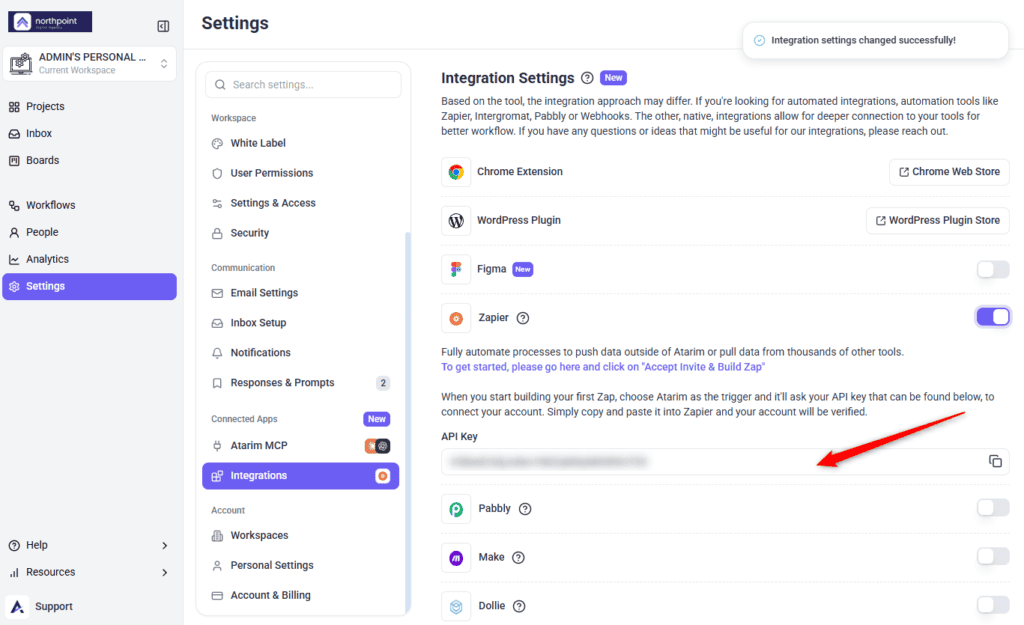
The API key appears once the integration is switched on.
Zapier connects Atarim to thousands of other applications. As the integration describes it in Atarim, it lets you fully automate processes to push data outside of Atarim, or pull data from thousands of other tools.
Enable Zapier and Copy Your API Key
The API key is what authorises Zapier to act on your account, so treat it like a password.
Instructions:
Connect Atarim to Zapier
This is a one-time connection. Every Zap you build afterwards reuses it.
Instructions:


Set Up a Trigger from Atarim
A trigger is the event in Atarim that starts your Zap.
| Trigger event | Fires when |
|---|---|
| New Task | A task is created. |
| New Comment | Someone comments on a task. |
| New Note | An internal note is added. |
| Add Tag | A tag is applied. |
| Status Change | A task’s status changes. |
| Urgency Change | A task’s priority changes. |
| New Website | A website is added. |
| New Time Entry Logged | Time is logged against a task. |
The trigger decides which event in Atarim starts the Zap running.
Instructions:


Choose an Action in Another App
The action is what Zapier does with the data once Atarim hands it over.
Instructions:


Test and Publish
A tested Zap is not a live one — publishing is the step that turns it on.
Instructions:


Running a Zapier Action on Demand
Everything above is Atarim starting a Zap. This is the other direction: asking for a single Zapier action to run once, when you need it — send one Slack message, add one row to a sheet, create one CRM record — without building a Zap for it. Ask for it in chat, or from an assistant connected over MCP.
What you need first. A Zapier MCP token saved in Settings > Integrations. That is a separate thing from the API key above. Which actions are available is decided inside Zapier, not in Atarim — if you have not added any yet, you will be told so and pointed at the Zapier configuration page rather than getting an empty list.
Who can run one. Workspace Owners and Administrators, and nobody else. Edit rights on the workspace are not enough — Contributors, Collaborators and Website Owners get nothing here however your permissions are set, because these actions reach the agency’s whole Zapier account rather than one project. They also spend the workspace owner’s Zapier task quota.
If it stops working. A rejected token usually means it has been rotated or revoked. Generate a new one in Zapier and save it again in Settings > Integrations; the connection is per workspace, so one token covers everyone who can use it.
If You Are Configuring Webhooks by Hand
Most Zaps need nothing beyond the steps above. If you are building something custom with Zapier’s own Webhooks app rather than the Atarim app, two format settings matter.
webhook-token header, and each action has its own required parameters. Use the Atarim app in Zapier unless you specifically need the manual route. Explore Webhooks
Benefits
| Benefit | In practice |
|---|---|
| Thousands of destinations | If Zapier supports the app, Atarim can feed it. |
| Data moves both ways | Push task data out, or pull data in from other tools. |
| No code required | Zaps are built visually, so this is not a developer task. |
| Connect once | The API key is used to connect, and the connection is reused across Zaps. |
| Multi-step automation | One Atarim trigger can drive several actions in sequence. |
Example Use Cases
| Situation | Zap to build |
|---|---|
| A team that works in chat | New Atarim task, then post it to your channel. |
| Clients expecting acknowledgement | New task, then send a confirmation email. |
| Work tracked in another tool | New task, then create a matching item there. |
| Reporting outside Atarim | Append each task to a spreadsheet as it arrives. |
| Escalating urgent work | Filter on priority, then notify whoever is on call. |
Known Limitations
FAQs
Why can’t I find Atarim in Zapier?
The app is invite-only. Follow the link in Atarim’s Zapier row and select Accept Invite & Build a Zap first.
Do I need to accept the invite more than once?
No, but it applies to your Zapier account. Colleagues on separate Zapier accounts each need to accept it.
Which API key does it use?
Your Atarim key, copied from the Zapier row in Integrations and pasted into Zapier when it asks you to connect.
Where do I find the API key again later?
In Settings → Connected Apps → Integrations, in the Zapier row beneath its description.
Do I need to configure webhooks as well?
Not for most Zaps. Use the Atarim app in Zapier unless you specifically need a custom webhook.
Can I use one connection for several Zaps?
Yes. Once connected, Zapier reuses it.
What happens if I turn the integration off?
Zaps relying on that connection stop receiving data. Switch it back on and confirm the key in Zapier still matches.
Common issues
- Atarim is not in Zapier’s app list — use the invite link in the Zapier row in Atarim and select Accept Invite & Build a Zap.
- The trigger test fails — Zapier pulls an existing record, so create at least one task in Atarim first.
- The Zap tested fine but never runs — testing does not activate it. Select Publish Zap.
- Integrations is not in your settings sidebar — your role does not have access. Ask an Administrator.
- The Zapier toggle is locked — your plan does not include integration connectors. The lock names the minimum plan required.
- Zapier rejects the API key — re-copy it with the copy icon rather than selecting the text, in case a space crept in.
- The trigger never fires — confirm the Zap is switched on rather than just saved, then create a task to test it.
- Fields arrive empty — a mapping problem. Re-run the test and check which field came through blank.
- A colleague cannot find Atarim in Zapier — the invite is per Zapier account. They need to accept it on theirs.
- The connection stopped working — the API key may have been regenerated. Update the connection in Zapier with the current key.
Conclusion
Zapier is a three-part setup: switch the integration on and copy your key, accept the Atarim invite, then build a Zap with Atarim as the trigger.
The invite is the step people miss, and it produces a confusing symptom — an app that simply is not there. Do that first and the rest is ordinary Zapier work. Discover The Make Integration
Tips & best practices
- Accept the invite before looking for Atarim in Zapier’s app list.
- Name each connection after its Atarim workspace.
- Map one or two fields first, then add more once data arrives correctly.
- Test with a real Atarim task rather than sample data.
- Publish the Zap — testing alone does not activate it.
- Apply filters in Zapier so only the task updates you care about trigger actions.
- Configure error handling so you are alerted when a Zap fails.
- Review your Zaps periodically to confirm they are still running.
- Keep the API key out of email and chat.
- Update the Zapier connection if you regenerate the key.