Admin access to the target site, if installing the WordPress plugin
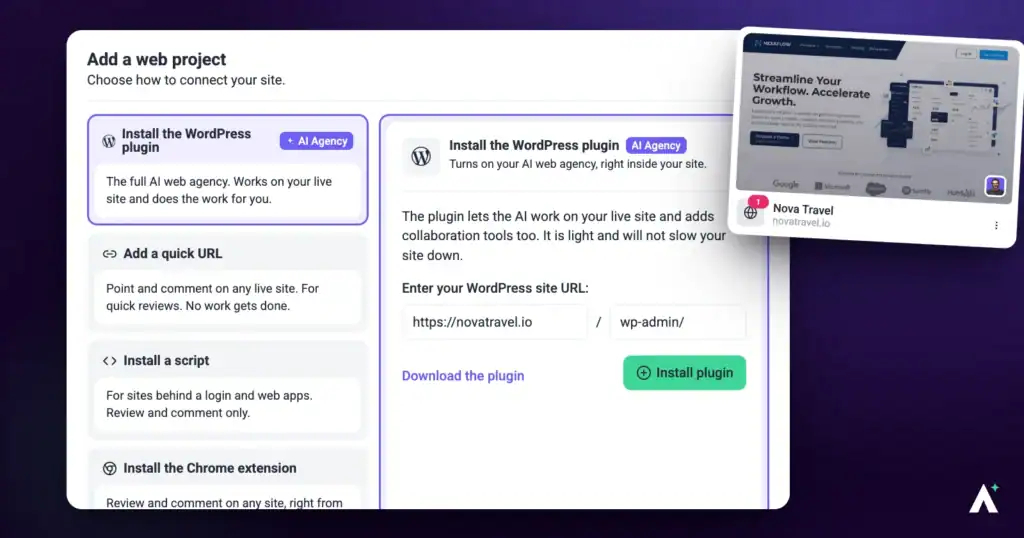
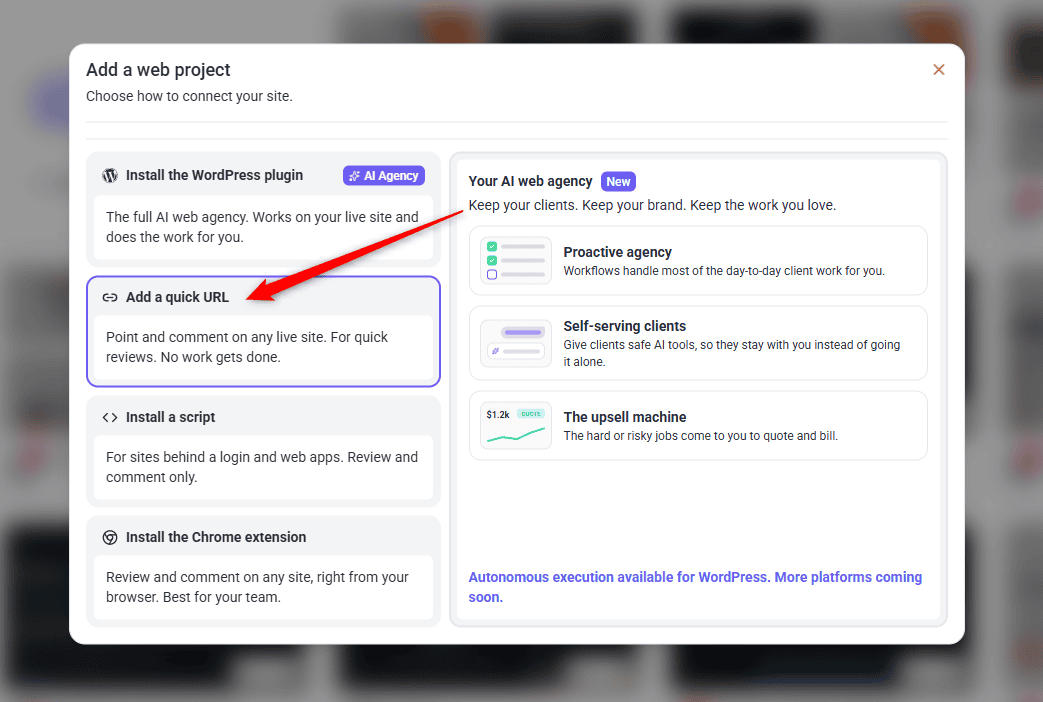
Click “Add Website” and you land on “Add a web project — choose how to connect your site.” Four options are offered side by side, but they're not interchangeable: only one of them unlocks direct AI execution, and the modal itself is upfront about that distinction. This walkthrough covers each option, attaching the project to a client, and what happens right after.
Step-by-Step Guide
Option 1: Install the WordPress Plugin — The Full AI Web Agency
Labeled in the modal: “The full AI web agency. Works on your live site and does the work for you.”
Instructions:
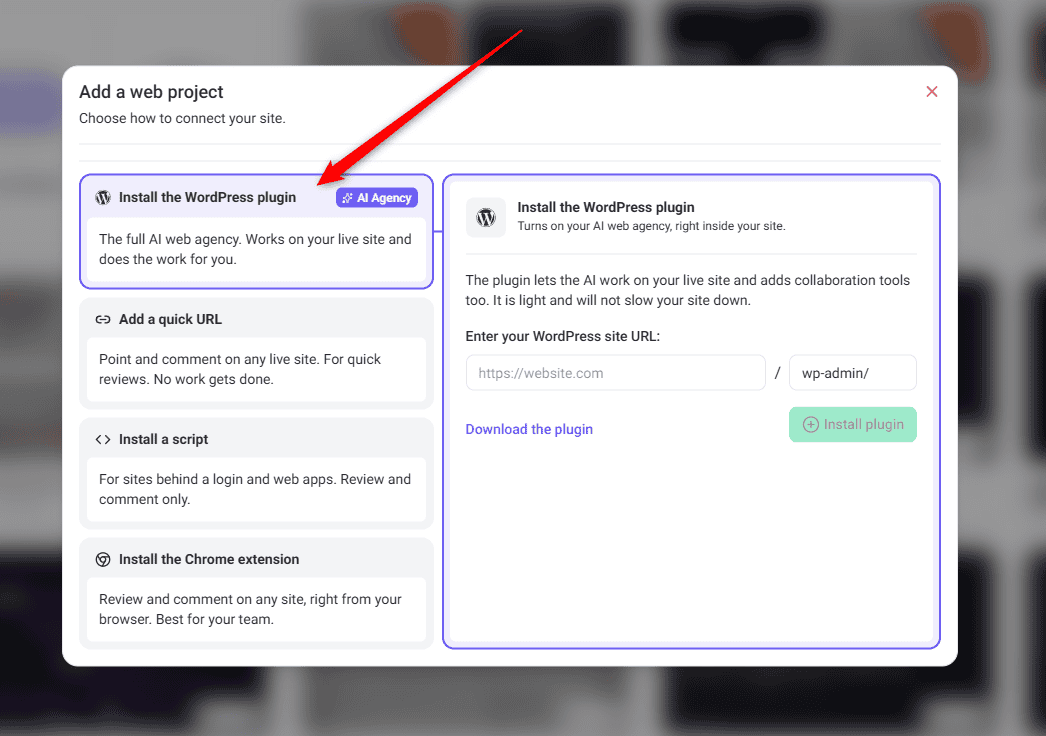
From “Add a web project,” select Install the WordPress plugin.
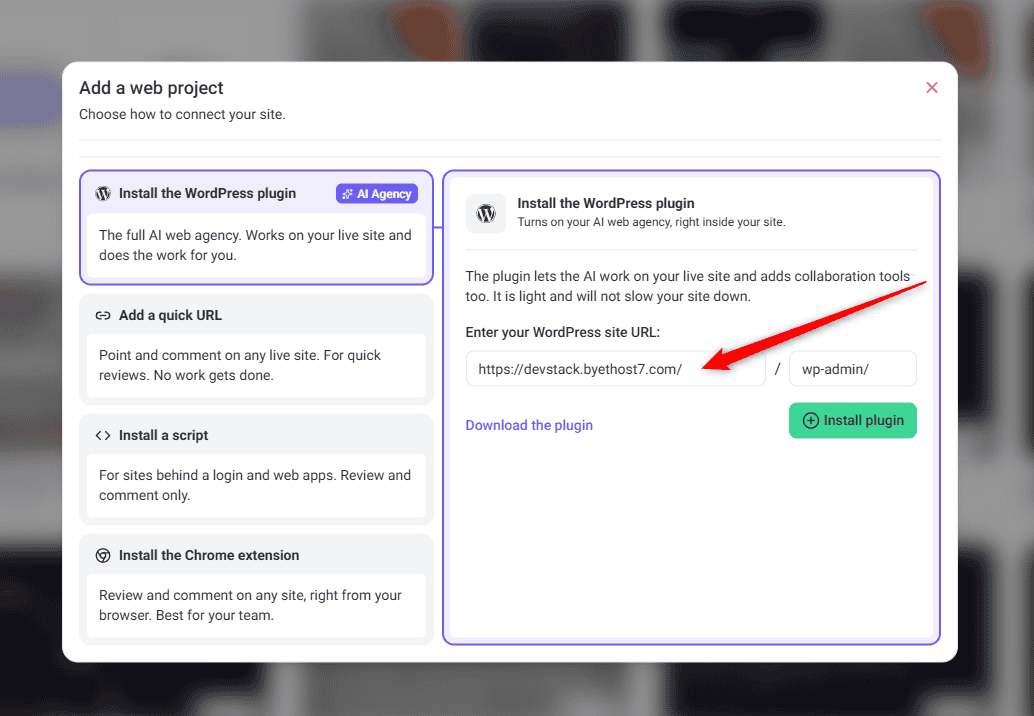
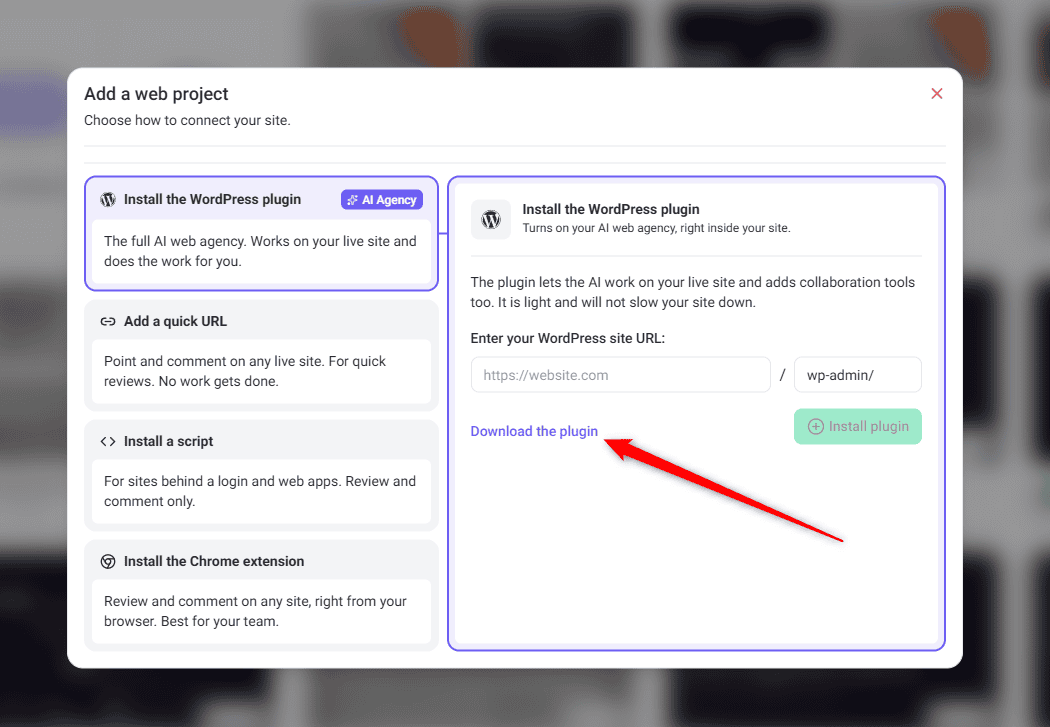
Enter your WordPress site URL. The panel addresses the performance question directly: “The plugin lets the AI work on your live site and adds collaboration tools too. It is light and will not slow your site down.”
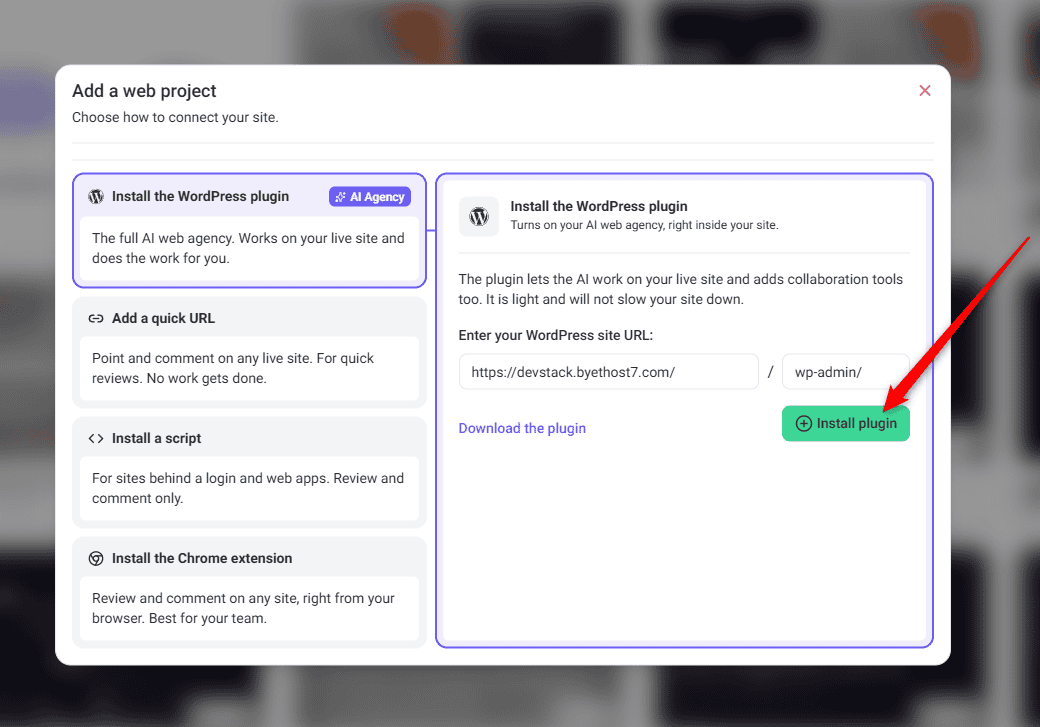
Follow the install prompts to install and activate the plugin on your site.
WordPress plugin connection option
your WordPress site URL
Install the WordPress plugin
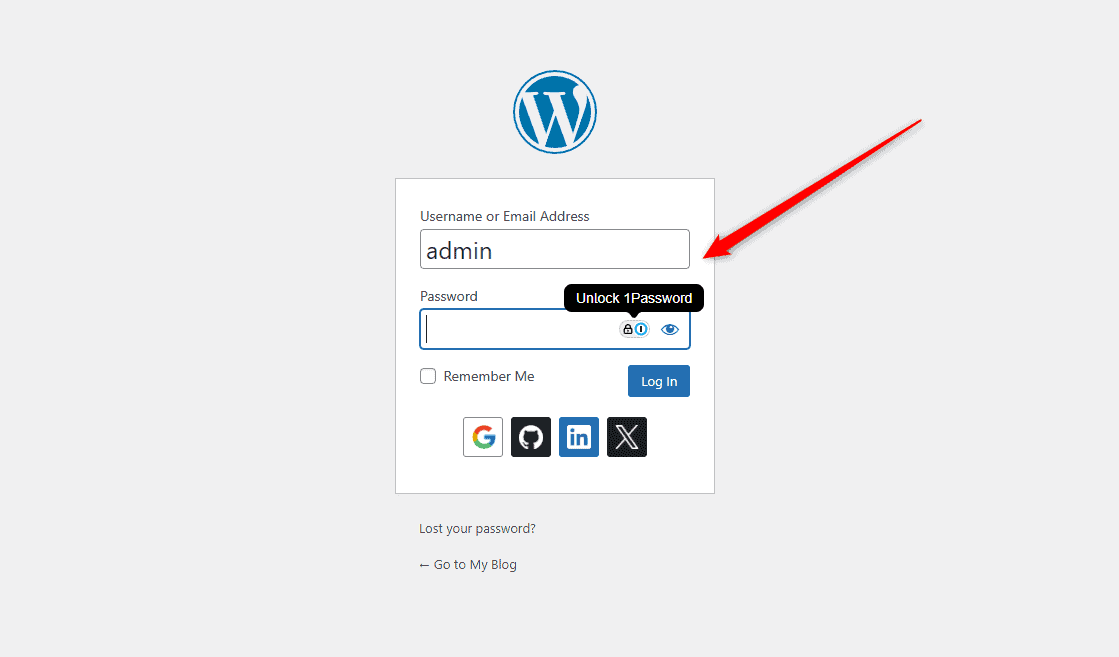
Installing the plugin requires you to be logged into WordPress. If prompted, sign in with your WordPress admin account — you’ll be returned to the plugin installation page automatically.
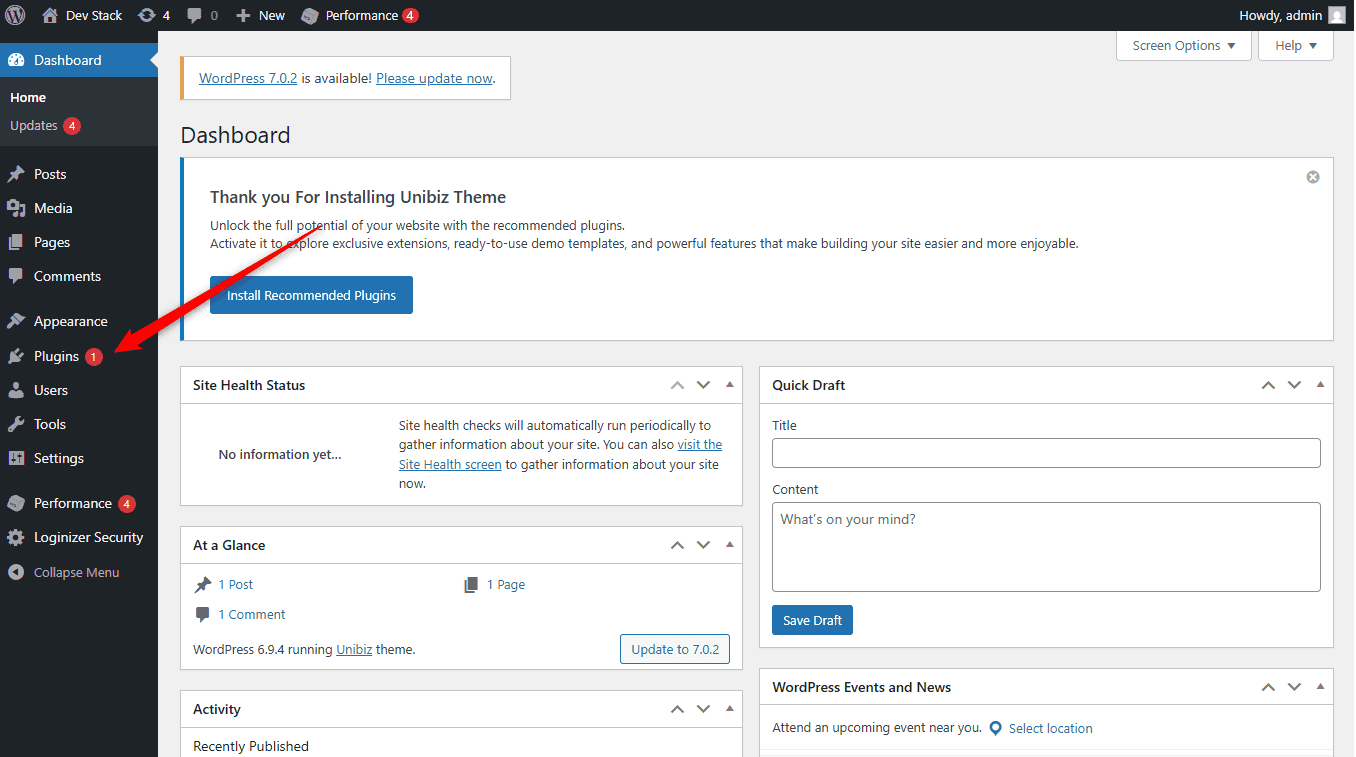
Plugins menu
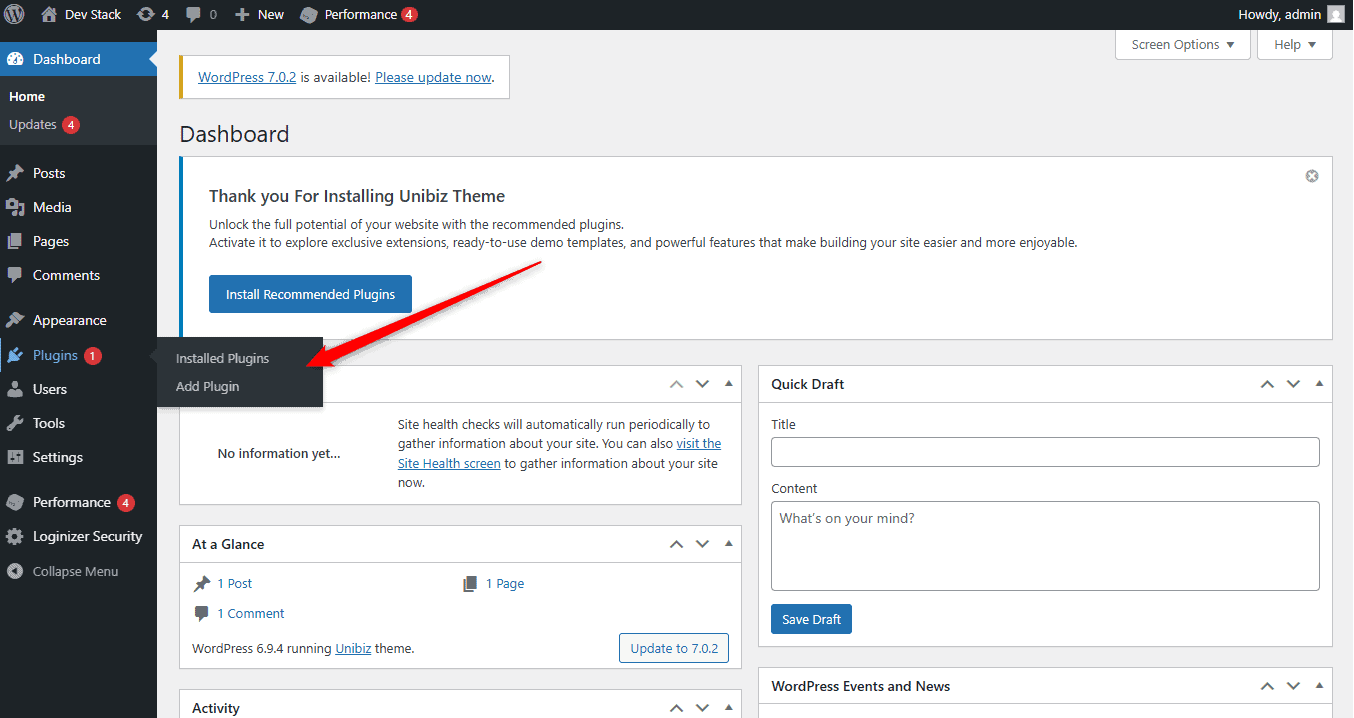
Add Plugin
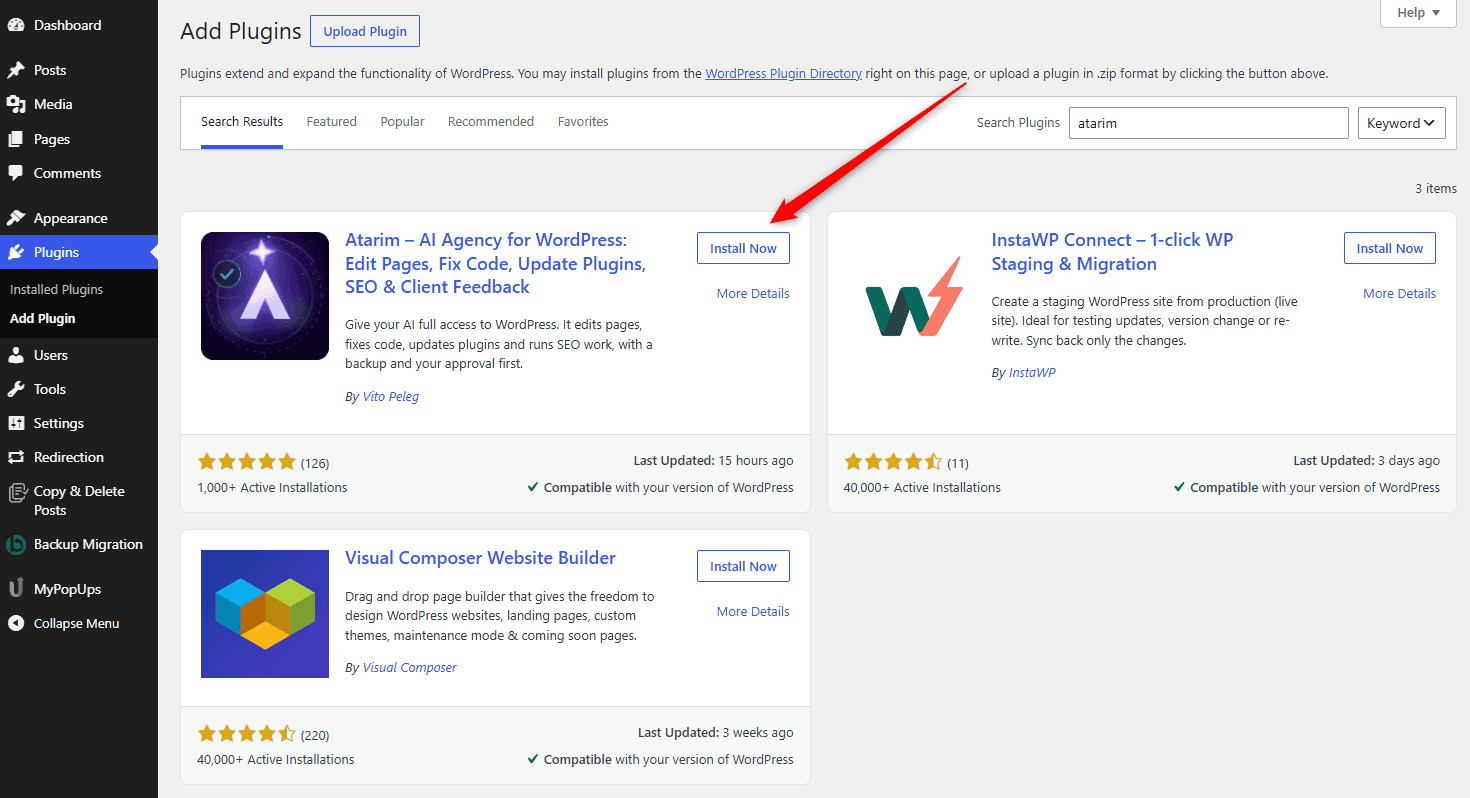
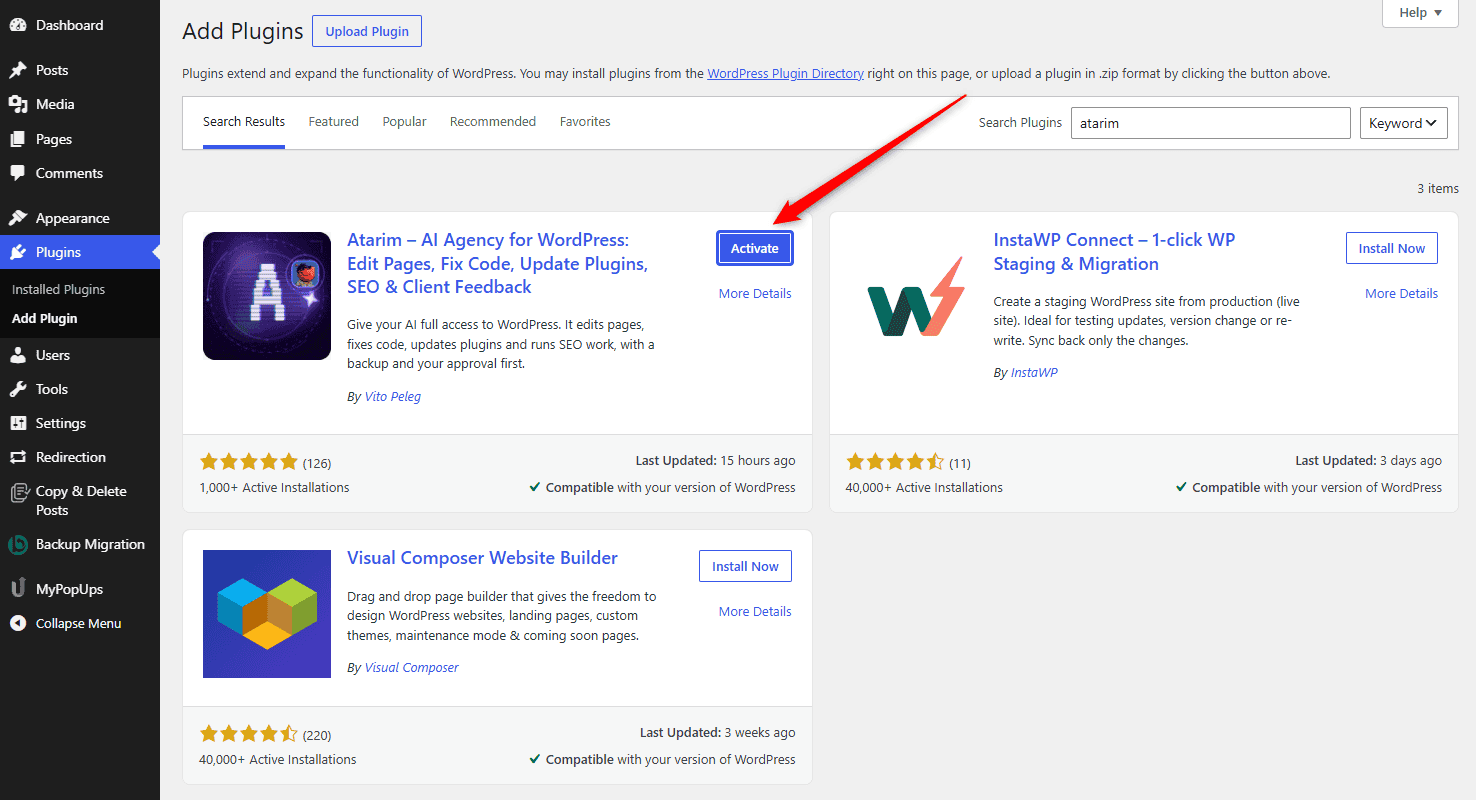
Search for Atarim, then click Install Now and Install.
Activate to enable the Atarim plugin
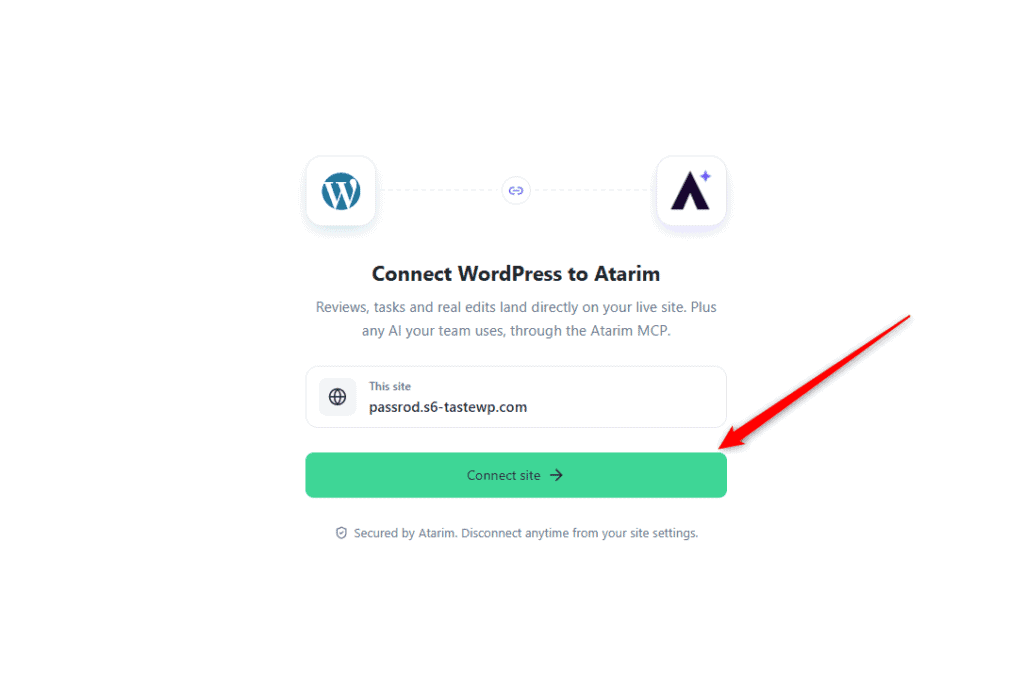
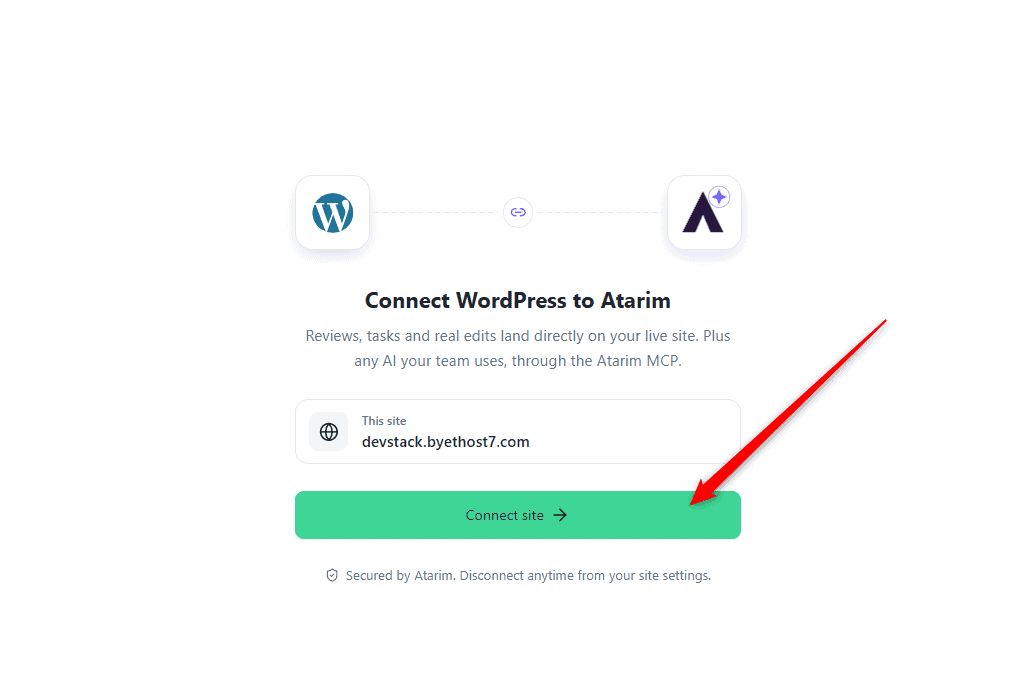
Connect WordPress to Atarim screen showing the site address and a Connect site button
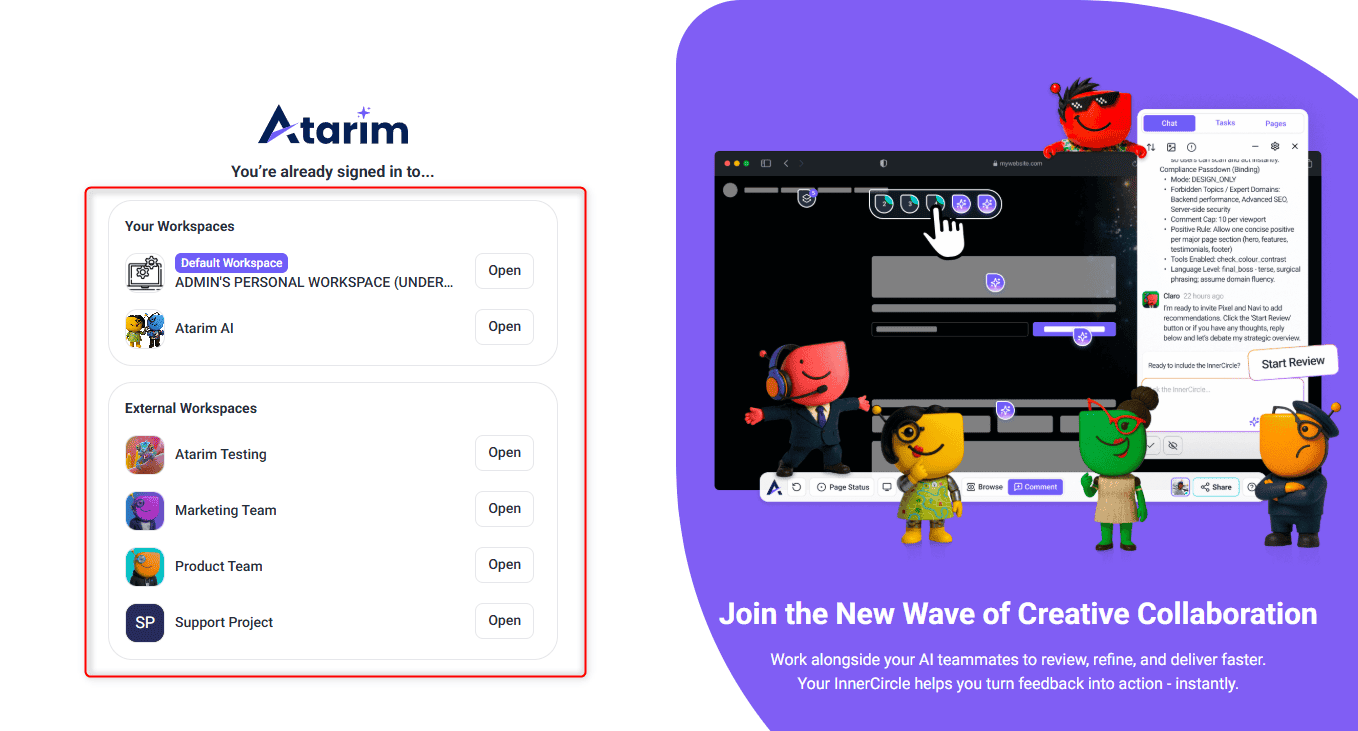
Choose the Workspace for Your Project
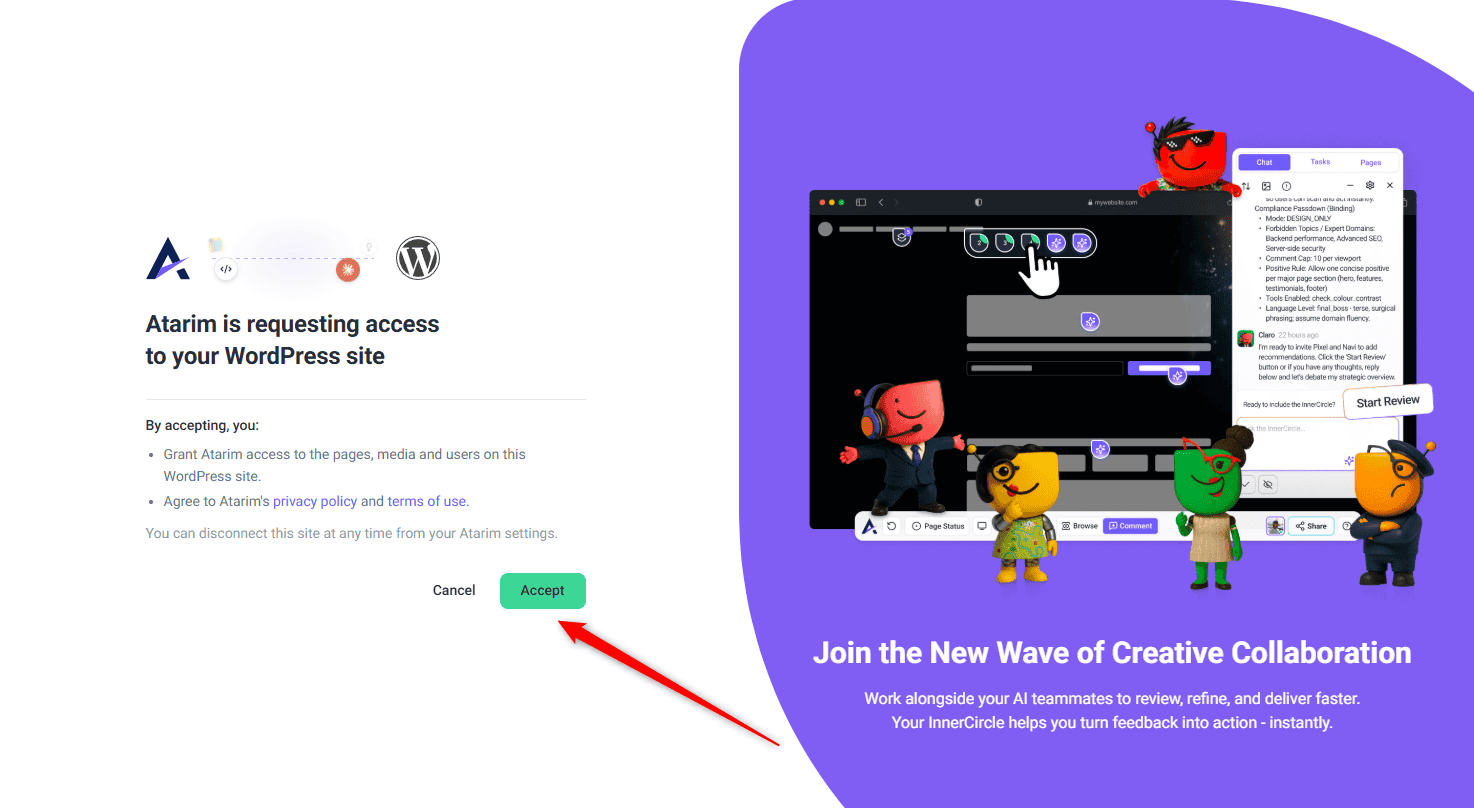
Atarim consent screen requesting access to a WordPress site, listing what access is granted and showing Cancel and Accept buttons
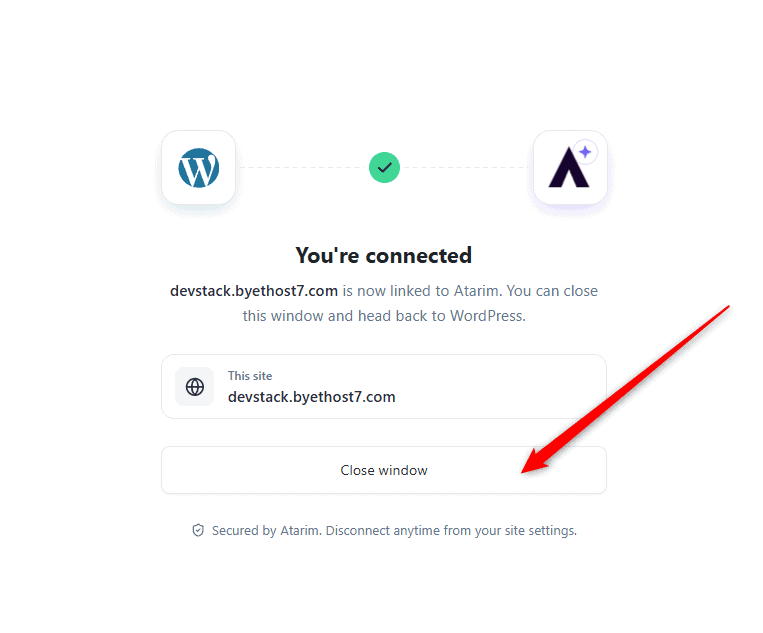
Connection confirmation screen showing the WordPress and Atarim logos joined by a green tick, the linked site address, and a Close window button
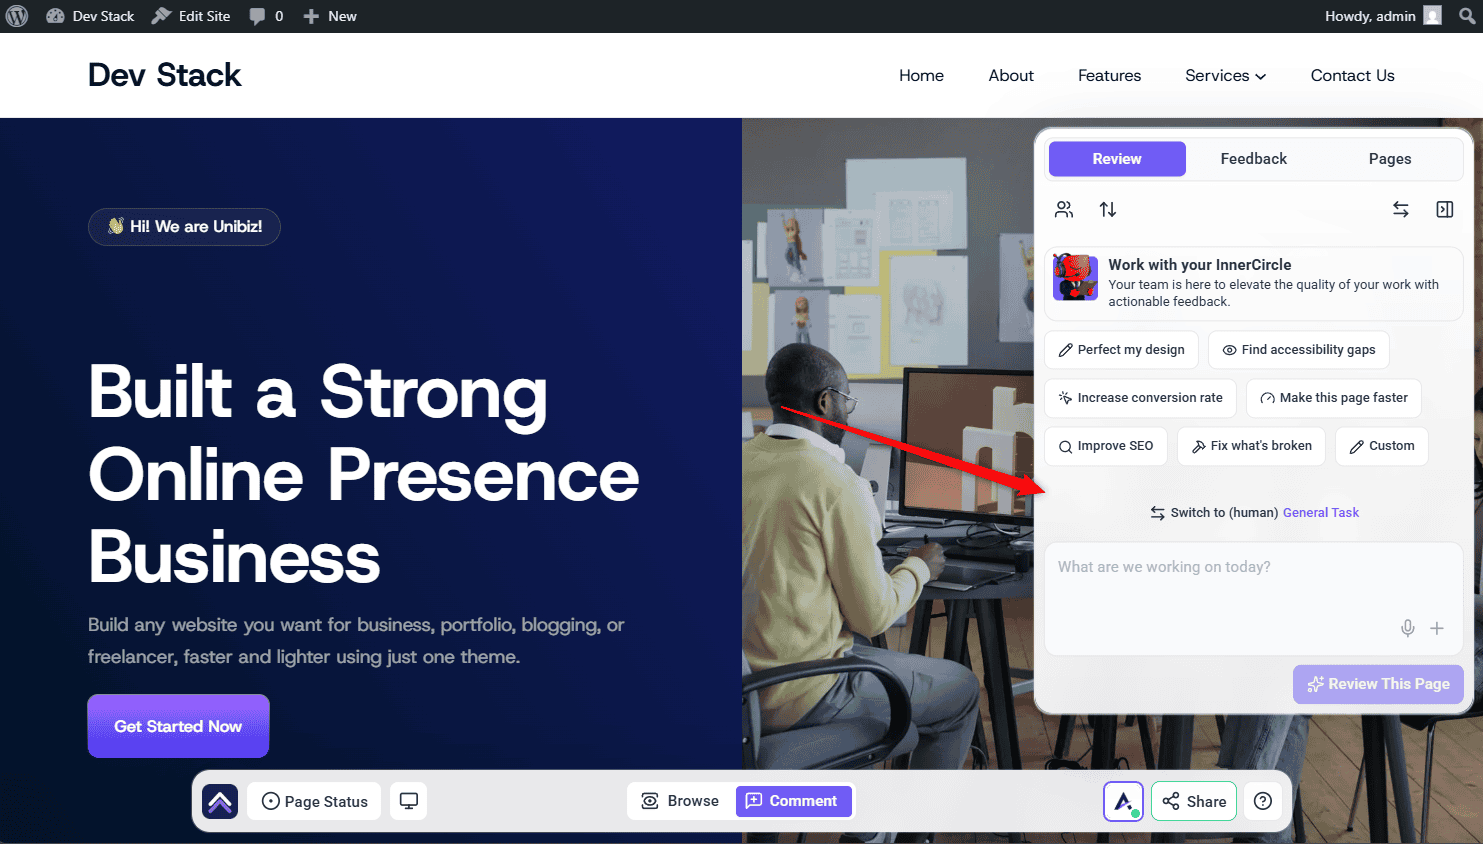
You’ll see the Atarim plugin installed on your site
Once connected, this unlocks the full Do It execution layer plus one-click Autologin into any site in your fleet, so team members don’t need to share WordPress credentials. Execution abilities span content, core, metadata, media, navigation, taxonomies, users, settings, and plugin management (install free WordPress.org plugins, activate, update, deactivate, delete), plus block-level and template-level control: block navigation, patterns, templates, theme files, themes, global styles, and Gutenberg blocks.
Warning
If a site was already added as a URL-based project, installing the plugin later upgrades it in place — no duplicate project is created. The URLs need to match, so add the project using the same address WordPress reports (including https:// and www if applicable); a mismatch creates a separate project instead.
Note
Installing the plugin redirects you to your own WordPress admin site partway through — double-check that URL is actually your site before proceeding, especially if you manage many client sites and could have several tabs open.
Note
If the site’s plugin is already bound to another Atarim dashboard, the wizard says so before you continue and offers to open the plugin settings so you can disconnect it there first — connecting it here will not take effect until you do.
Install via Plugin Download (Manual Upload)
Install the Atarim plugin by downloading the latest plugin file and manually uploading it to your WordPress site. Learn More About The Plugin Settings.
Instructions:
From “Add a web project,” select Install the WordPress plugin.
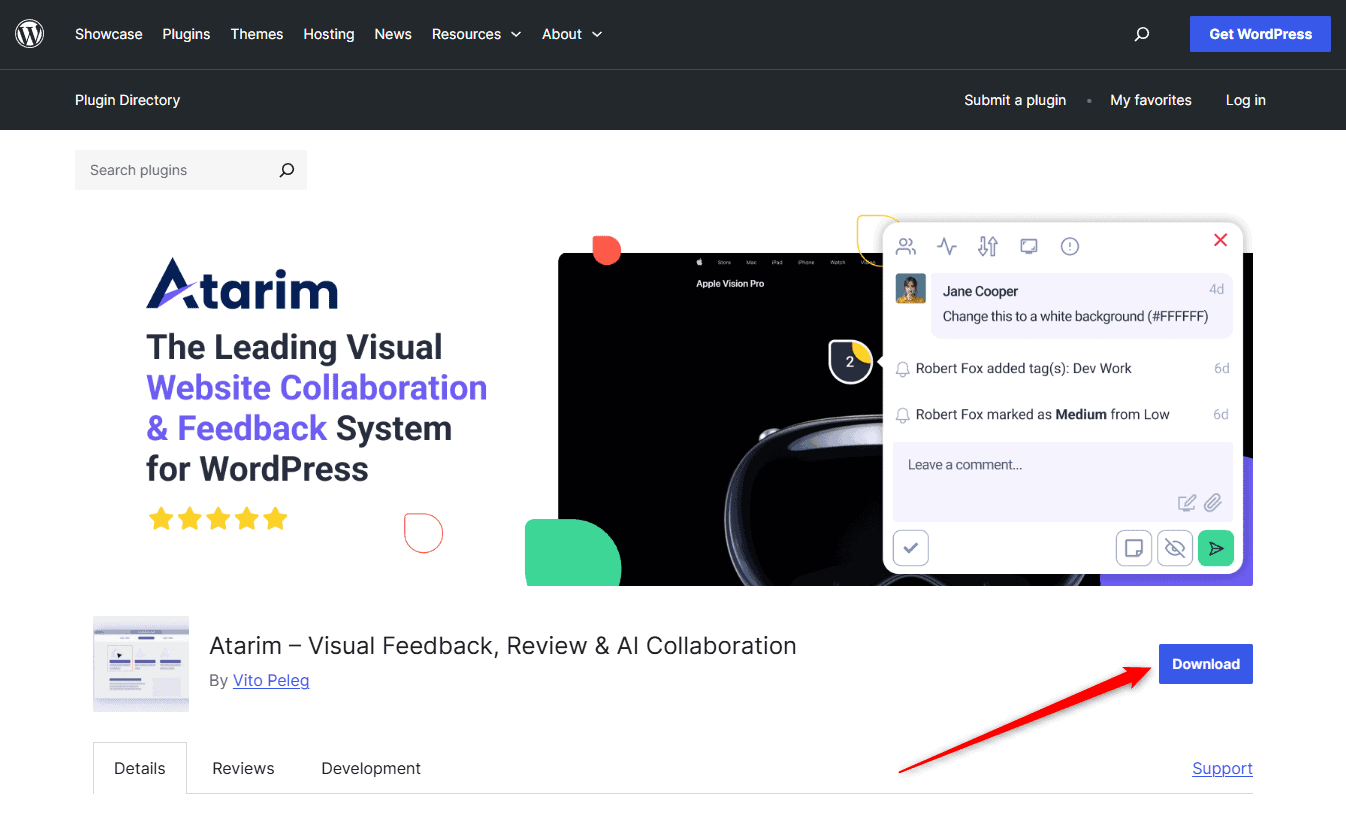
Click Download Plugin (WordPress Plugin) to download the latest version.
Log in to your WordPress Dashboard and go to Plugins → Add Plugin.
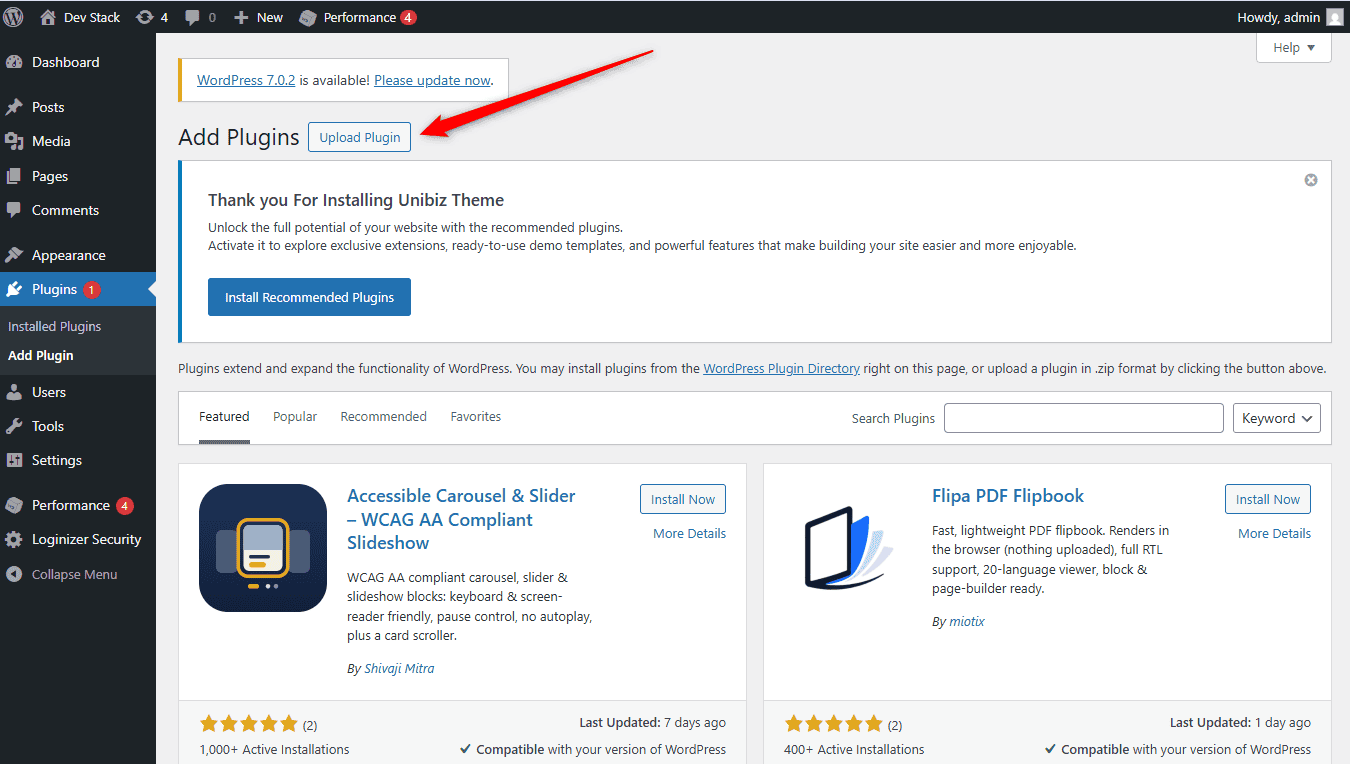
Click Upload Plugin.
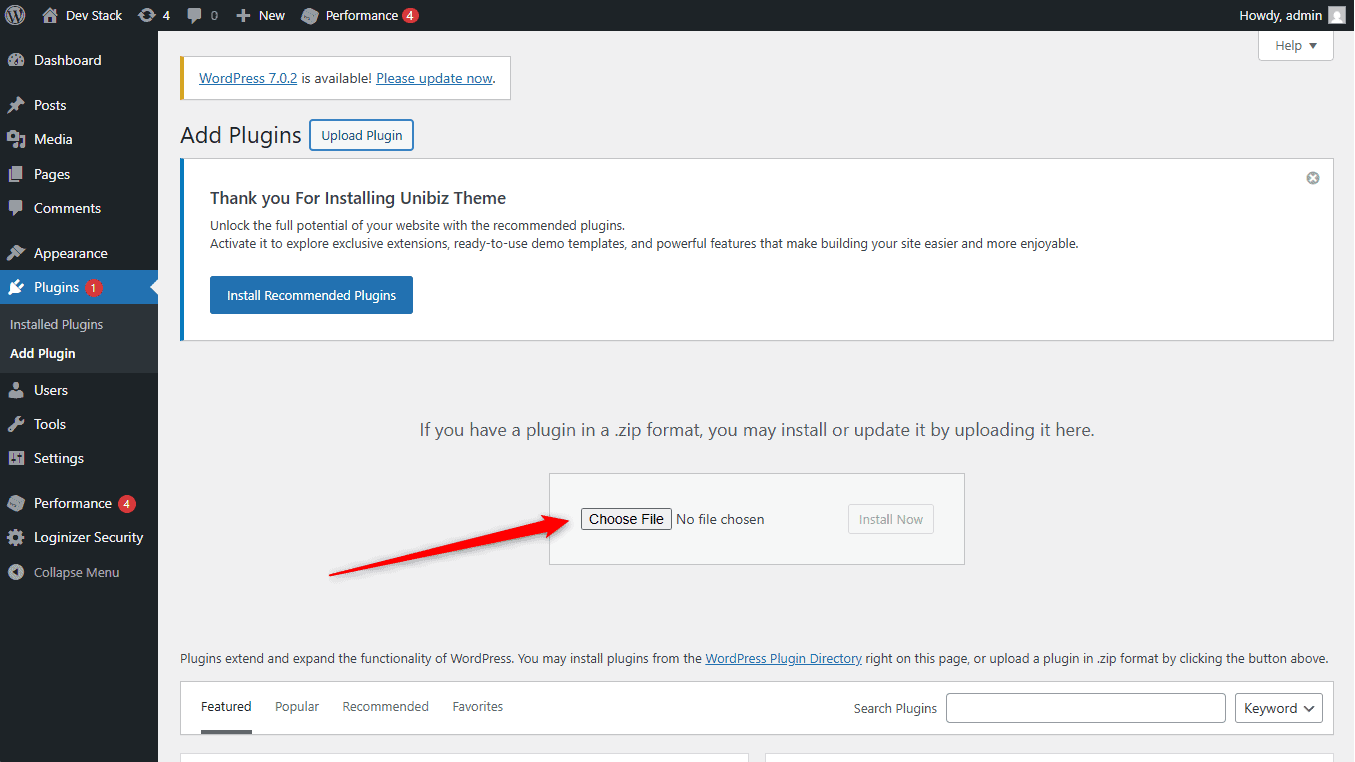
Click Choose File and select the downloaded Atarim ZIP file.
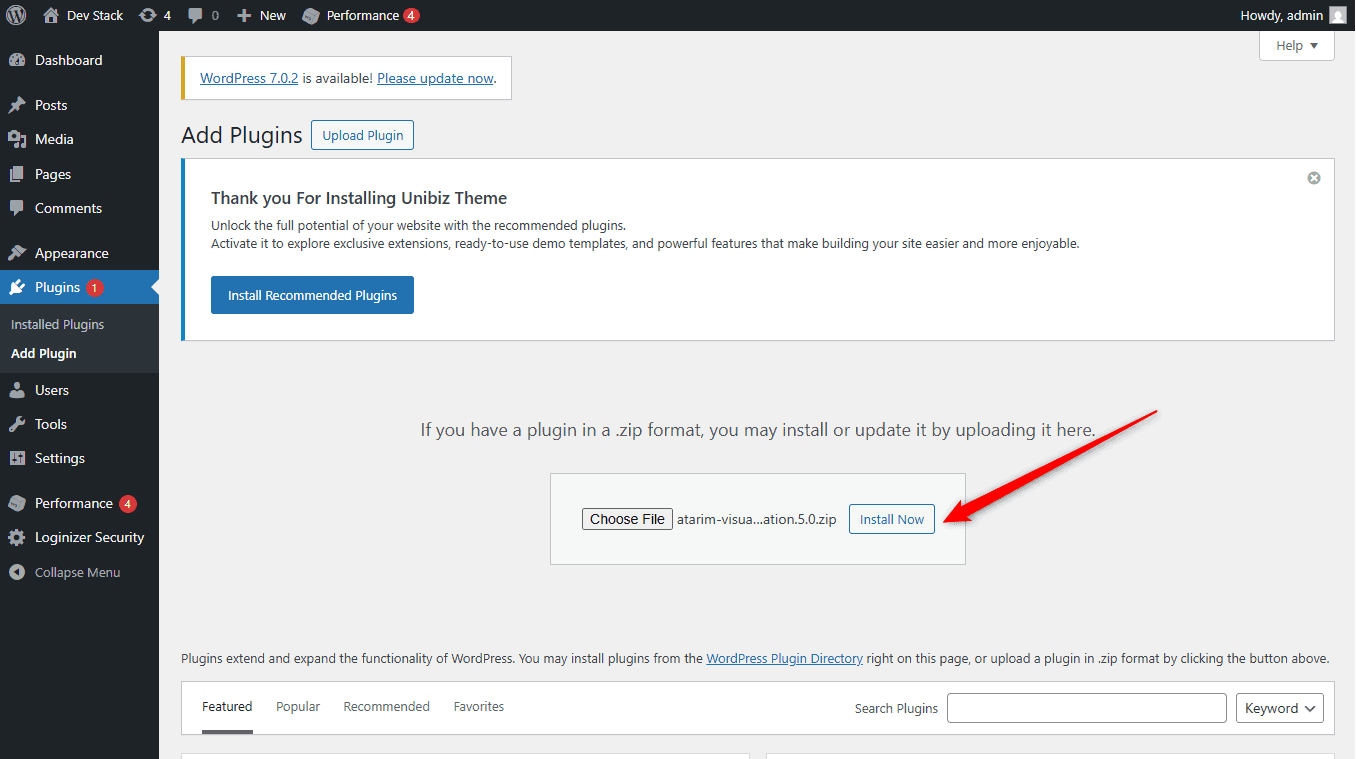
Click Install Now.
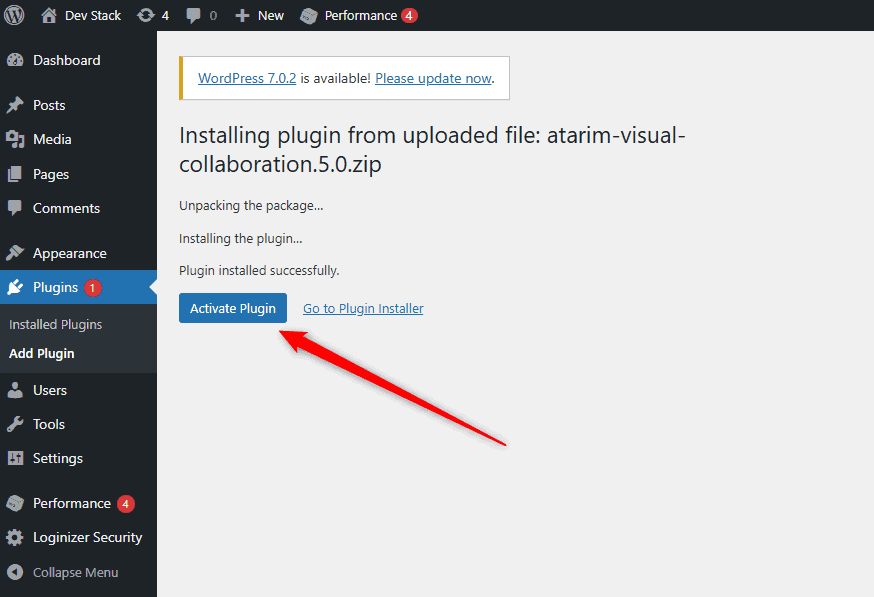
Once installation is complete, click Activate Plugin.
On the connection screen, click Connect site.
Choose the workspace where you want to add the project.
Close the confirmation window and return to your website. You’ll see the Atarim plugin installed on your site.
Manual WordPress plugin download option
Atarim plugin download page
Plugins menu
Add Plugin
Select Upload Plugin
Choose the Atarim plugin ZIP file
Install the Atarim plugin
Click Activate Plugin
WordPress connection screen
Choose the Workspace for Your Project
WordPress Successfully Connected to Atarim
You’ll see the Atarim plugin installed on your site
What you get with the plugin
Works on secure and login-protected pages, since it runs inside WordPress rather than fetching the page externally
Collaboration works in the WordPress admin too, not just the front end
Auto-login from the Atarim dashboard into wp-admin
Guest Mode — clients can comment without a WordPress account
Recommendation
Use the plugin (rather than the script) whenever you have wp-admin access — it’s the only option that covers backend feedback, guest access, and auto-login in one install.
Note
After activating the plugin, connect it to your Atarim account to finish setup — an active plugin isn’t linked until you complete this step.
Option 2: Add a Quick URL
Labeled in the modal: “Point and comment on any live site. For quick reviews. No work gets done.”
Instructions:
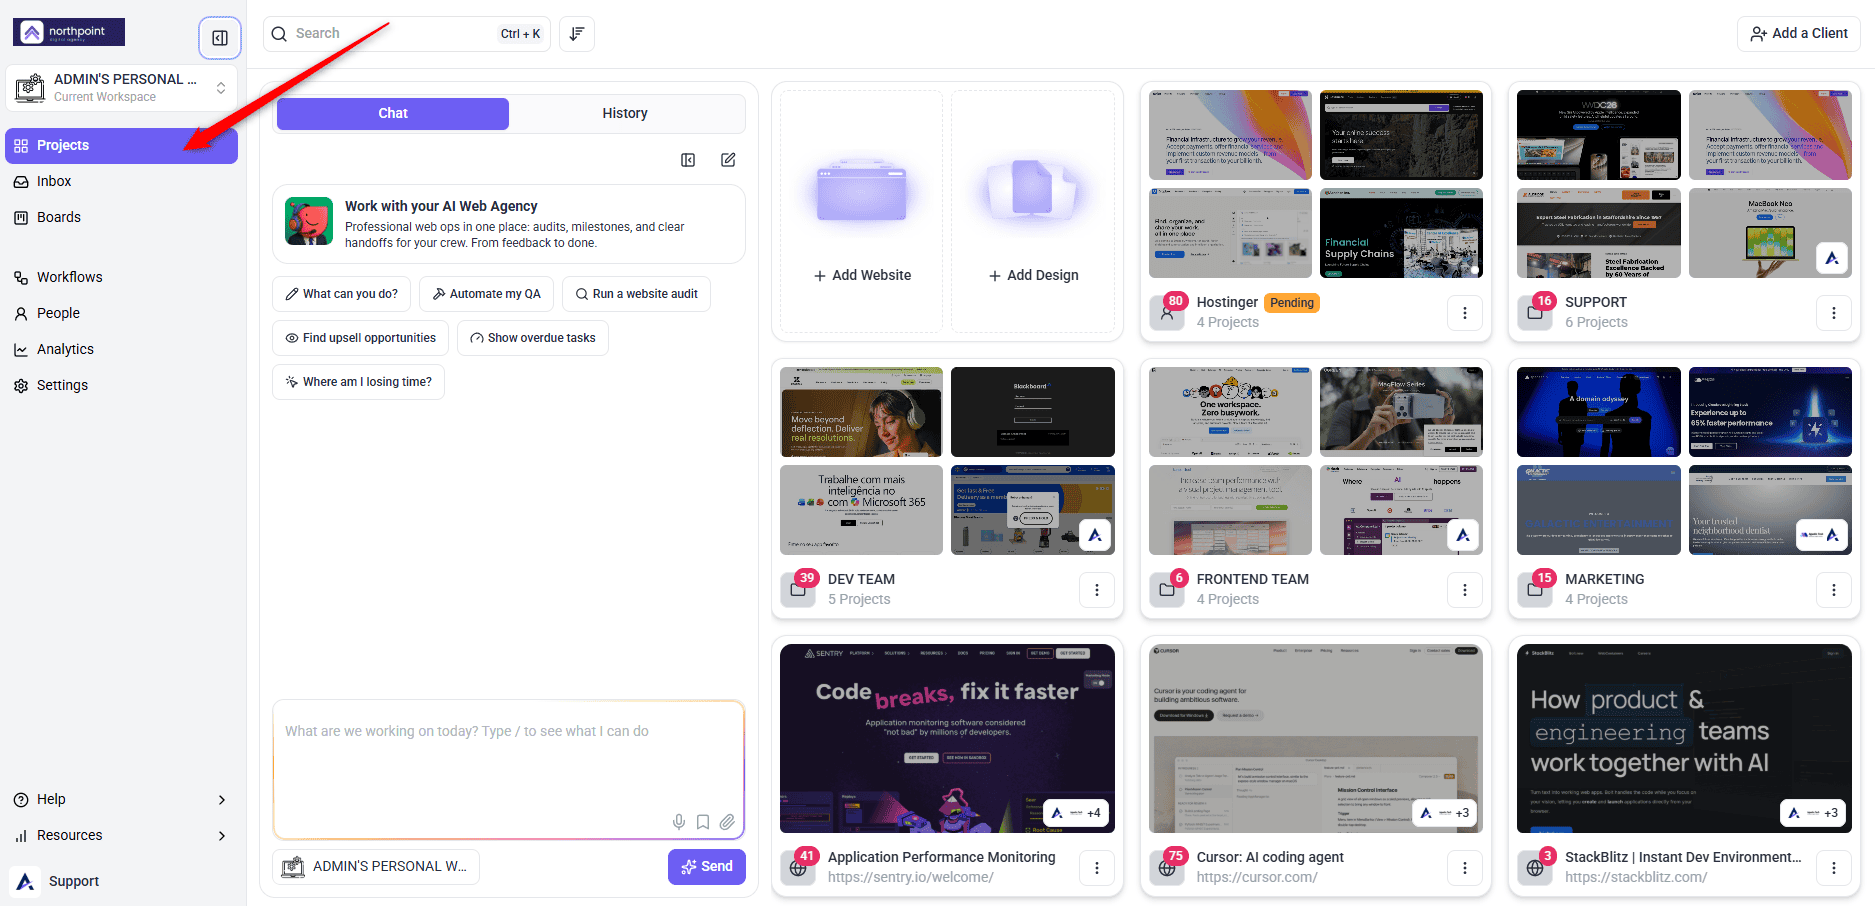
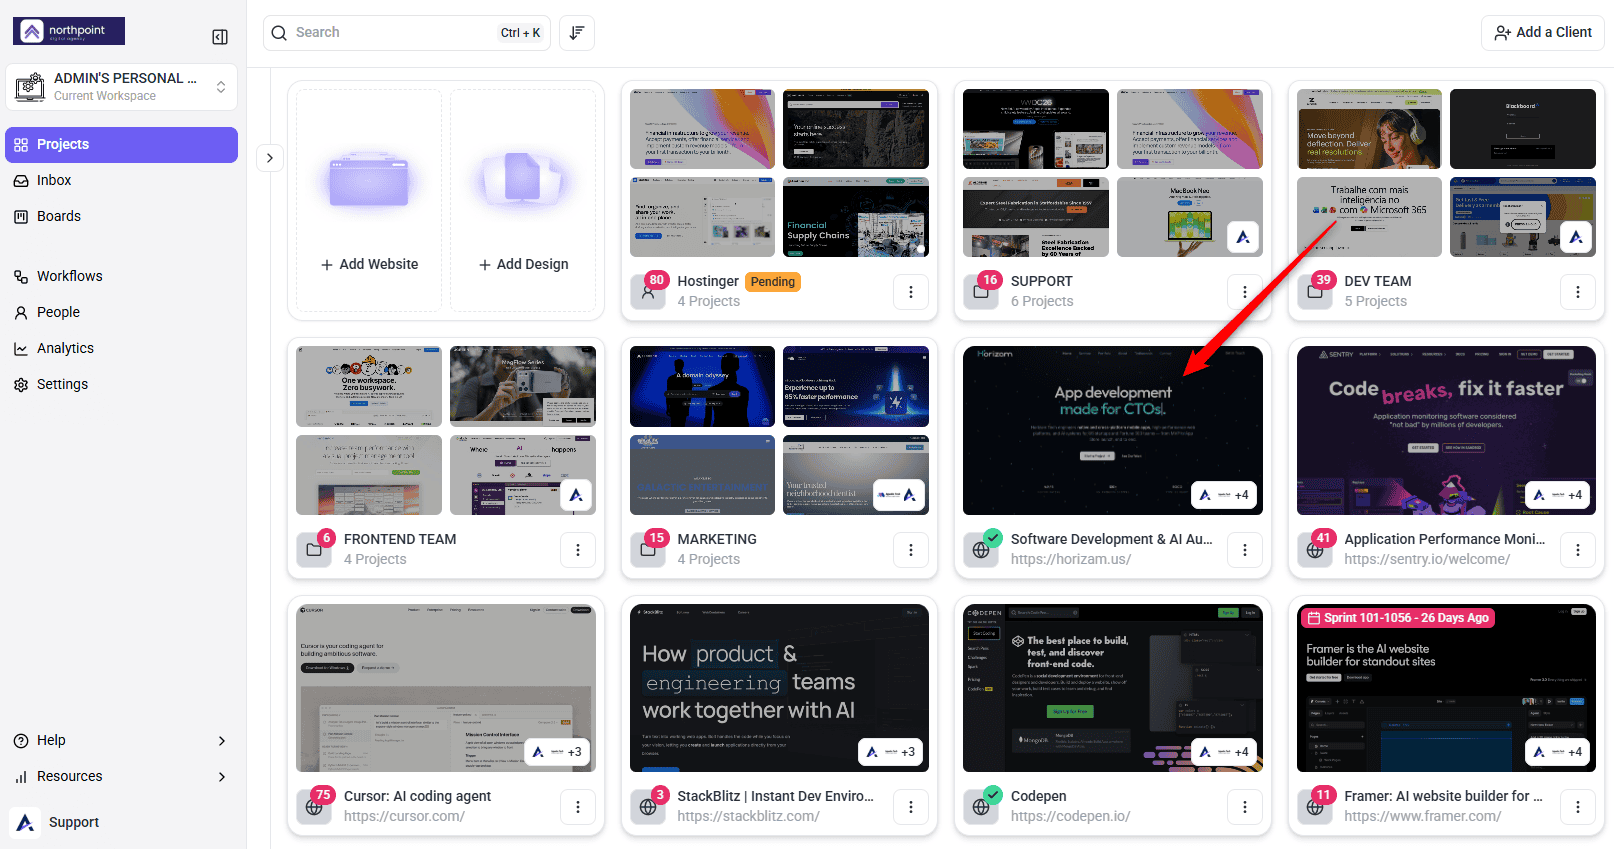
From the Projects screen
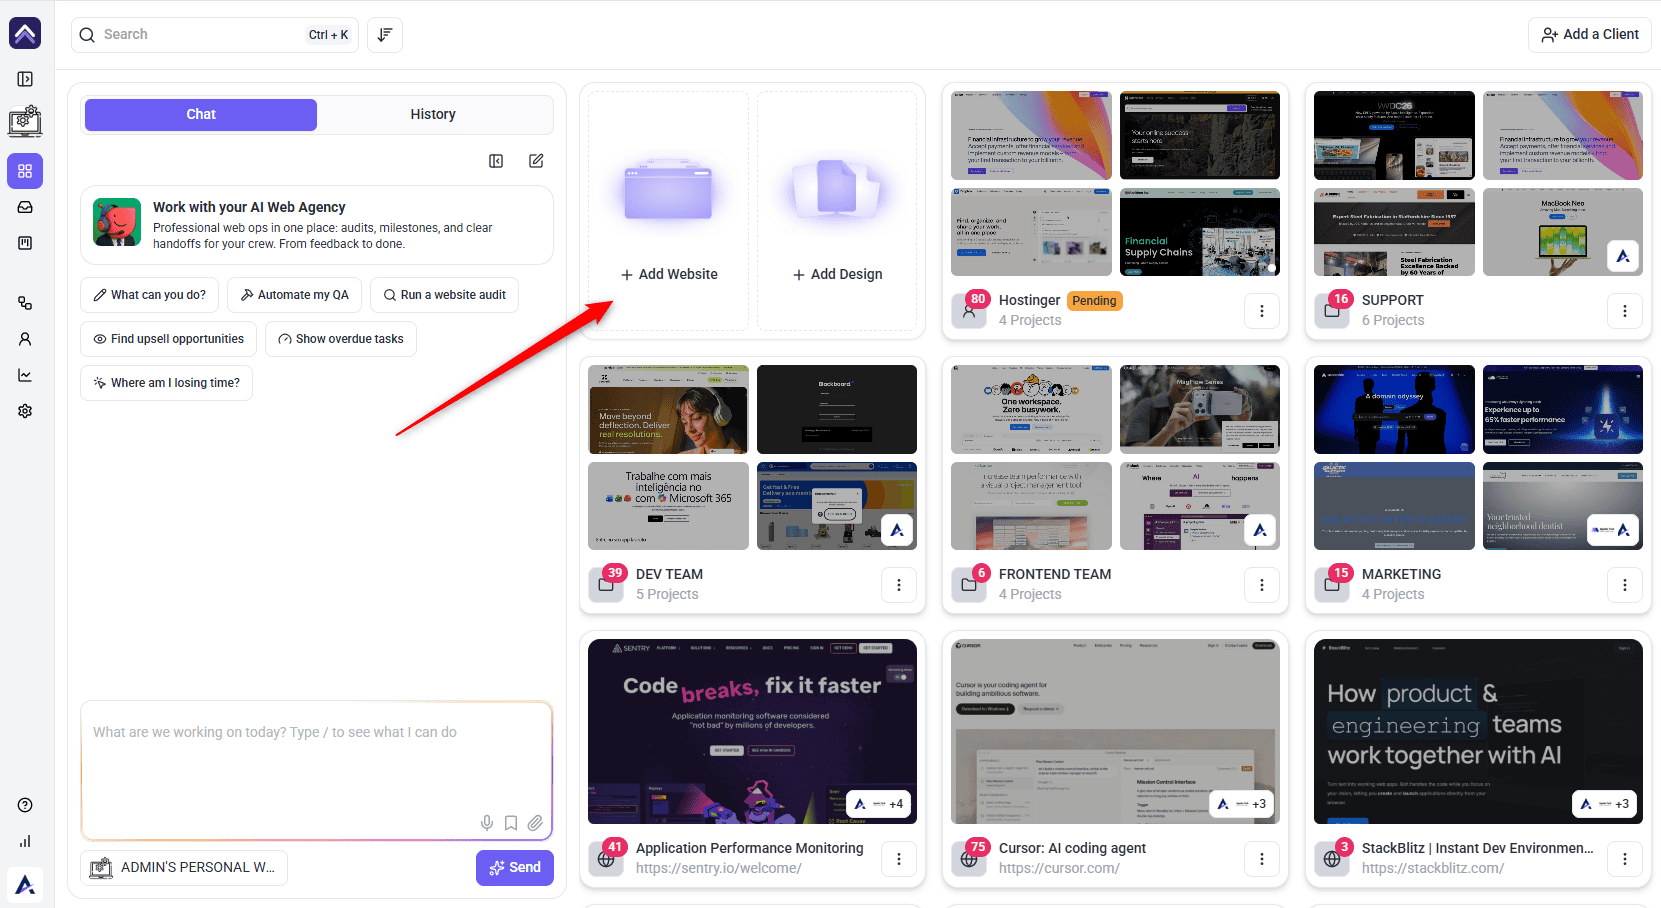
Click Add website
Select Add a quick URL.
Paste the website URL and confirm
Tip
Paste the website URL and confirm. The project is created right away, and discovery runs in the background. When it finishes, you can use visual feedback and AI review — direct edits require the WordPress plugin.
Projects navigation
Add Website option
Add a live site by URL
Website URL ready to add
Website added to Projects
This is the right starting point for non-WordPress sites, or a WordPress site where installing the plugin isn’t yet possible.
Tip
URL-based collaboration only sees what’s publicly accessible — it can’t get past a login screen, a maintenance page, or password protection. Use the WordPress plugin or a logged-in script instead for anything behind a wall like that.
Warning
Enter the full URL. If you type just the domain, Atarim assumes https:// — for a site that only runs on HTTP, type the http:// prefix explicitly.
Option 3: Install a Script
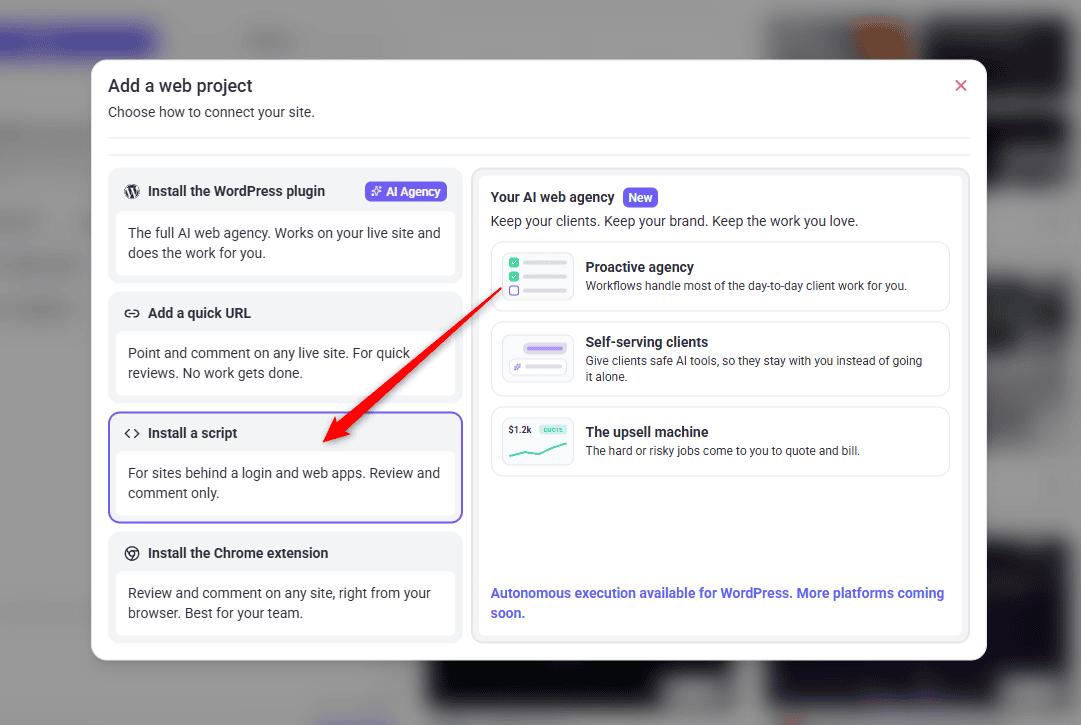
Labeled in the modal: “For sites behind a login and web apps. Review and comment only.”
Tip
Best for non-WordPress sites — anywhere you can add a script to the page, such as Webflow, Shopify, Wix, React apps, or static sites.
Instructions:
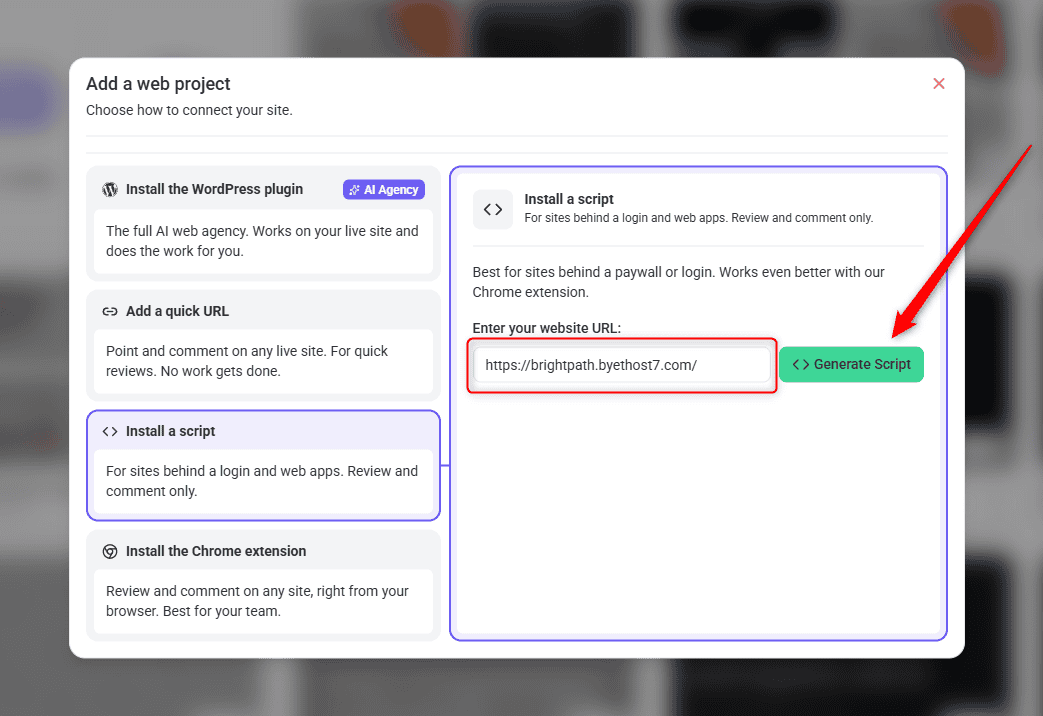
In Add a web project
Select Install a script.
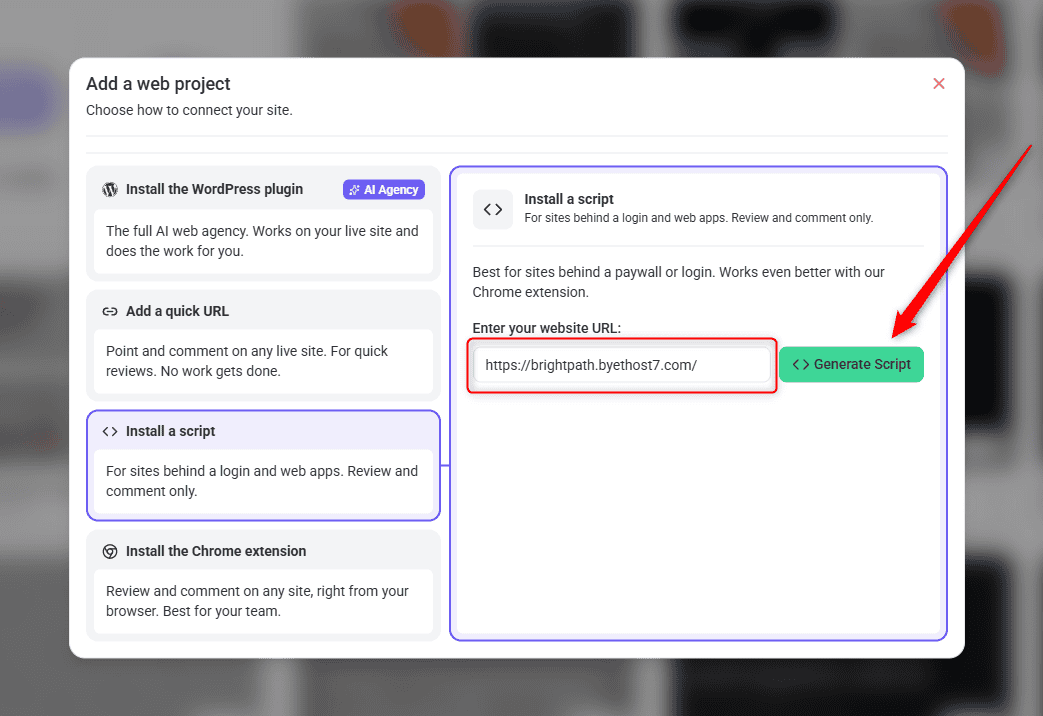
Enter your website URL.
Click Generate Script.
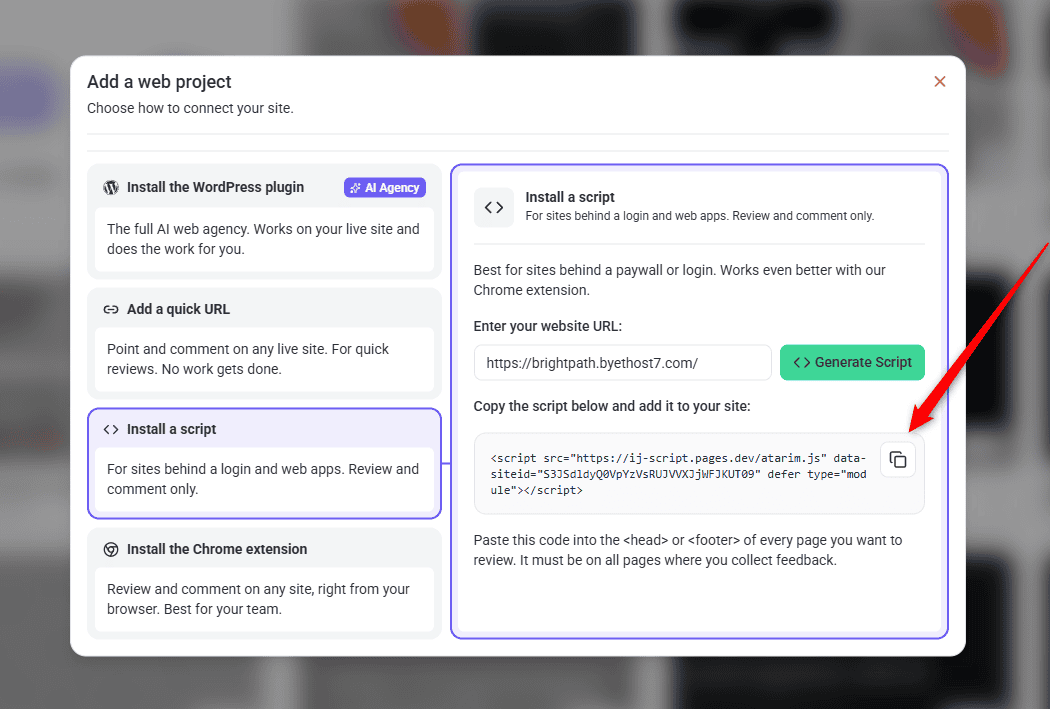
Copy the generated script tag.
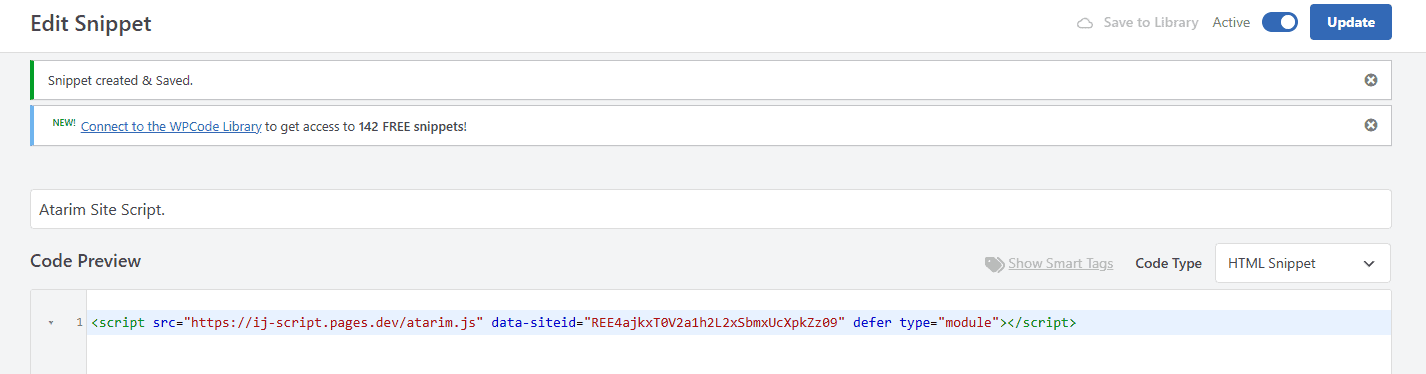
Paste the script into the <head> or footer of every page where you want to collect feedback. Add it to each relevant page, not only the homepage.
Install a script
Website URL entered and ready to generate the script
Generated script ready to copy and install
Script added in the footer
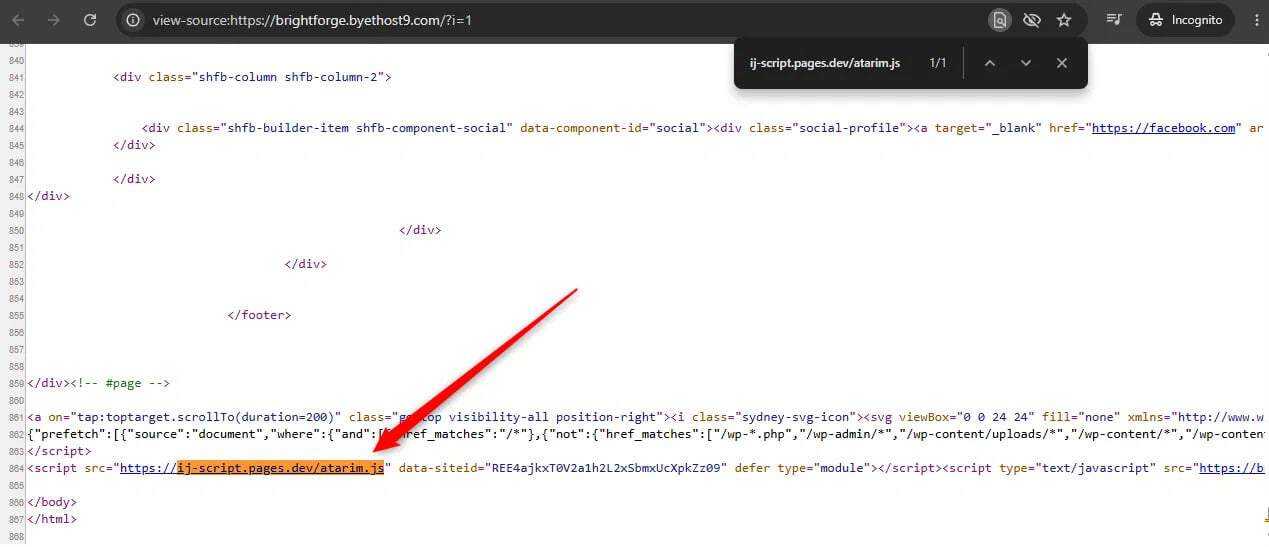
Using Page Source to Confirm the Script Is Active
Best suited for internal tools, staging environments behind auth, or single-page apps a plain URL can’t reach. Like Quick URL, this is review-and-comment only.
What you get with the script
Works on any platform where you can add a script to the page — not just WordPress
Loads Atarim on the actual live page, not inside a proxy or iframe
Works on login-protected pages, using the viewer’s own session — so they’ll need to be logged in to collaborate there
Note
The script allows you to collaborate on secured areas of the website, ensuring comprehensive feedback across all site sections.
Recommendation
The modal itself notes this option “works even better with our Chrome extension” — useful if you need to review a page behind a login without adding the script to every single page first.
Option 4: Chrome Extension — For a Quick, No-Install Review
Labeled in the modal: “Review and comment on any site, right from your browser. Best for your team.” The extension’s own panel adds more detail: “Review and comment on any site or web app, straight from your browser. No plugin or script needed.”
Instructions:
From “Add a web project,” select Install the Chrome extension, or install it directly from the Chrome Web Store.
Browse to the live site you want to review — no installation needed on the site owner’s side.
Use it for ad hoc reviews of sites you don’t manage directly, or a fast first look before a formal project exists.
Chrome extension connection
Atarim on the Chrome Web Store
Warning
It doesn’t unlock Do It, and doesn’t replace adding the site as a proper project once the relationship becomes ongoing.
Tip
Use the Chrome Extension when collaborating on pages that require authentication, load dynamic content, or block external requests. The extension attaches directly to your live browsing session, ensuring everything loads exactly as it should.
Note
You can add comments and collaborate directly on the site without an Atarim account — guests just enter their name and email to get started. Opening a site in the extension doesn’t create a project for it on its own. To track a site over time, add it as a project through one of the other options.
FAQs
Can I create multiple projects at once?
Yes — you can add as many projects as your plan allows, each as its own URL or design upload. They’re added one at a time rather than in bulk.
What if my client has never used Atarim?
You can share a link that lets clients view and comment on the project without needing an account or anything installed on their side.
Which method should I use for a new client site?
For WordPress sites, install the plugin as soon as possible for full “Do It” capability. For anything else, URL is the right starting point. The Chrome Extension is best reserved for one-off reviews of sites you don’t manage directly.
Does using the Chrome Extension require the client to install anything?
No — the extension is installed on your side only, which is exactly why it’s useful for a quick, no-install look — but it doesn’t unlock direct AI execution.
What happens if I don’t assign a project to a client?
It’s created as a plain internal folder — you can still organize it under a client later.
Do Website Owner-created projects need agency approval?
No — they’re created immediately and simply appear in the agency’s workspace under the existing Client relationship.
Where do I approve workflows and set a budget for a new client project?
Open the project’s dashboard and use the Scheduled Work panel’s “Review the plan” button to approve workflows, and “Set monthly budget” if one hasn’t been set yet. The top-bar “+ Get More Done” button is for credit allocation, not workflow review.
Conclusion
Creating a project is instant regardless of method, but the connection method you choose determines how much the AI can do directly — the WordPress plugin unlocks the most, URL collaboration is the flexible default for everything else, and the Chrome Extension is a fast, no-install option best reserved for one-off reviews. Whether it lives inside a Client folder or not determines whether the full client experience is active on it from day one.
Tips & best practices
Install the WordPress plugin whenever the site supports it — it's the difference between feedback and direct execution.
Always attach new client work to a Client folder rather than leaving it unassigned, so the Client
Dashboard and related features activate correctly.
Review the AI's discovery findings before saving the Project Brief — they're editable, not final.
To provide the best experiences, we use technologies like cookies to store and/or access device information. Consenting to these technologies will allow us to process data such as browsing behavior or unique IDs on this site. Not consenting or withdrawing consent, may adversely affect certain features and functions.
Functional
Always active
The technical storage or access is strictly necessary for the legitimate purpose of enabling the use of a specific service explicitly requested by the subscriber or user, or for the sole purpose of carrying out the transmission of a communication over an electronic communications network.
Preferences
The technical storage or access is necessary for the legitimate purpose of storing preferences that are not requested by the subscriber or user.
Statistics
The technical storage or access that is used exclusively for statistical purposes.The technical storage or access that is used exclusively for anonymous statistical purposes. Without a subpoena, voluntary compliance on the part of your Internet Service Provider, or additional records from a third party, information stored or retrieved for this purpose alone cannot usually be used to identify you.
Marketing
The technical storage or access is required to create user profiles to send advertising, or to track the user on a website or across several websites for similar marketing purposes.