How To Create Task In Atarim
Ten ways a task gets created — the ones you trigger, and the ones that happen on your behalf.
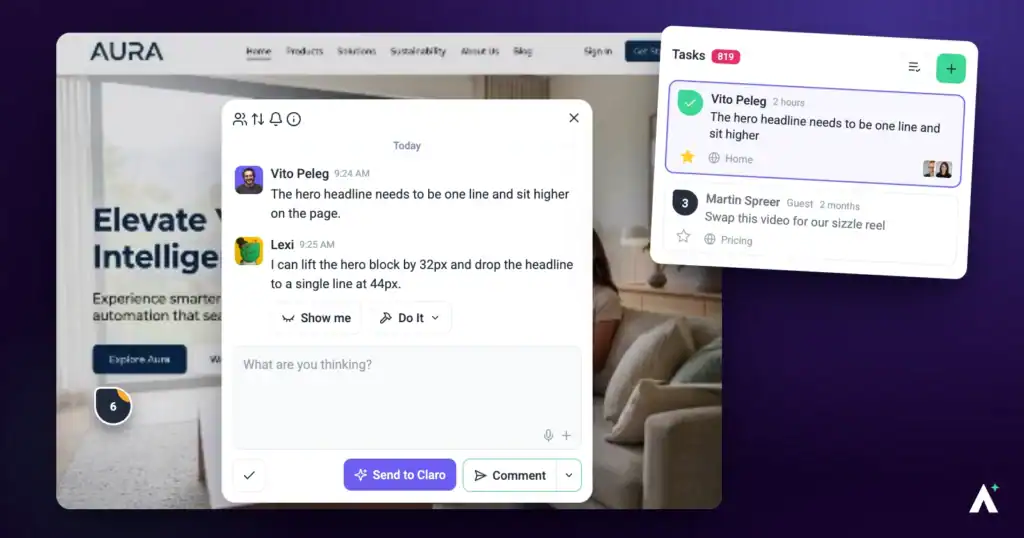
Tasks land in the same underlying system no matter how they start. Some you create directly — a click on a page, a form in the Inbox, a message to the AI. Others arrive without anyone opening Atarim, because a review found something, an email came in, or an automation ran on schedule.
Once a task exists, everything works the same way regardless of how it started. Managing it from there is covered in How to Manage Tasks in Atarim.
Where You Can Leave Feedback From
You’re rarely required to go anywhere specific to create a task.
Whichever surface you’re on, the task that gets created is the same, and it lands in the same Inbox and Boards.
Step-by-Step Guide
Atarim supports multiple ways to create tasks, combining human feedback with AI-powered reviews to ensure clarity, context, and speed.
Method 1: On a Live Page
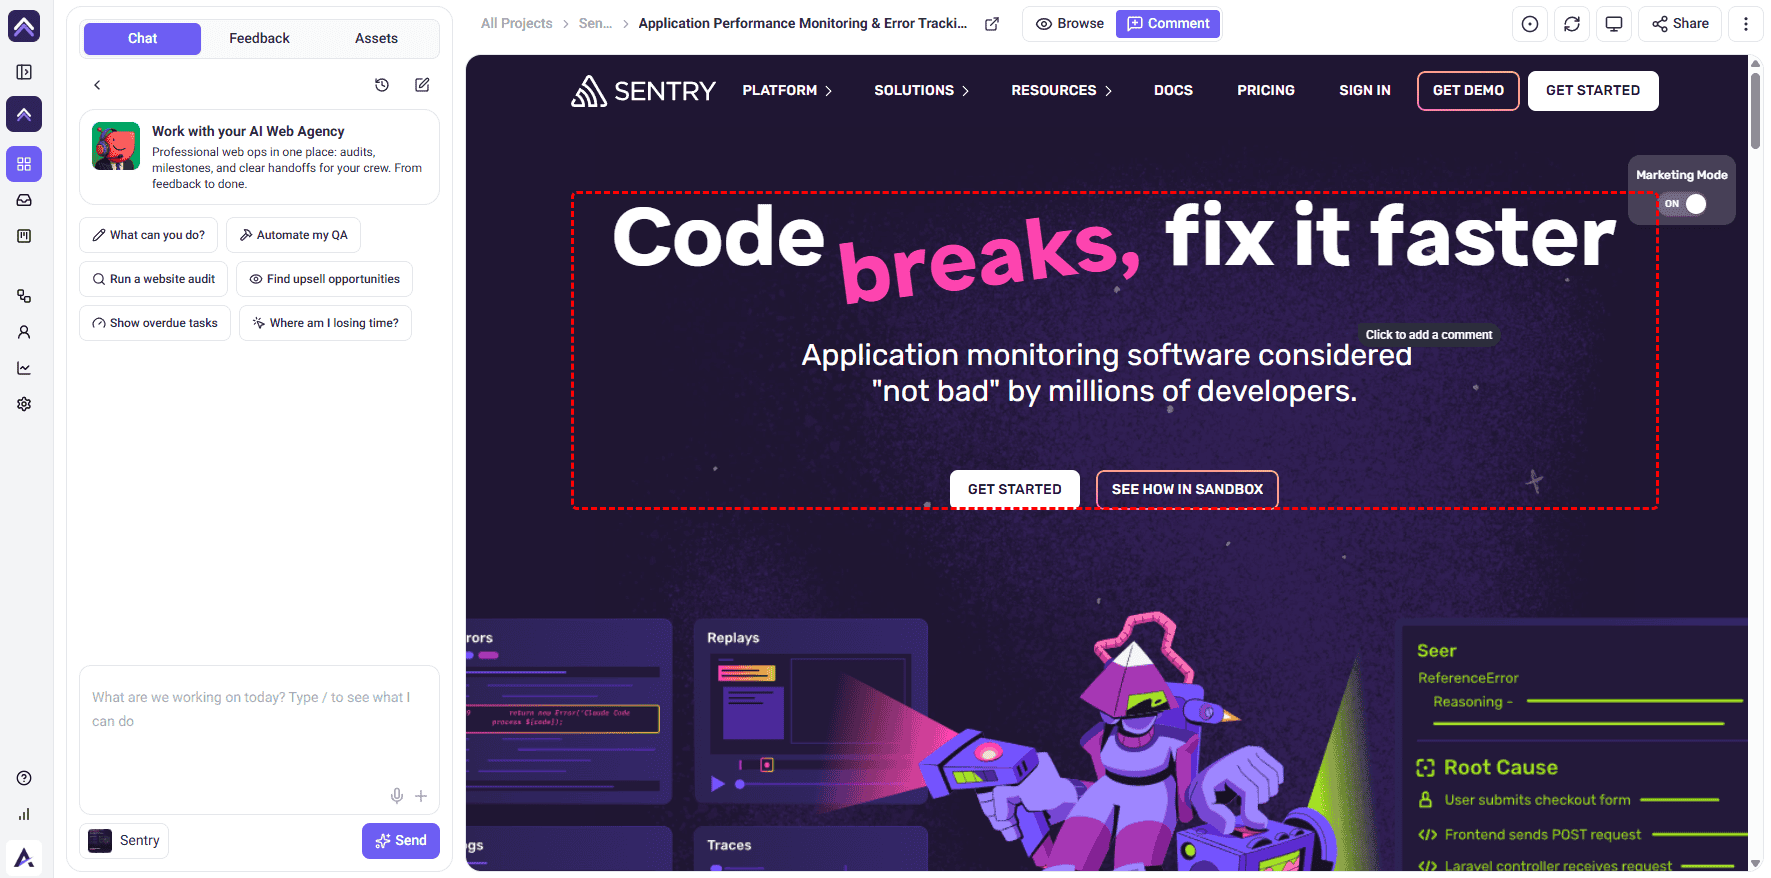
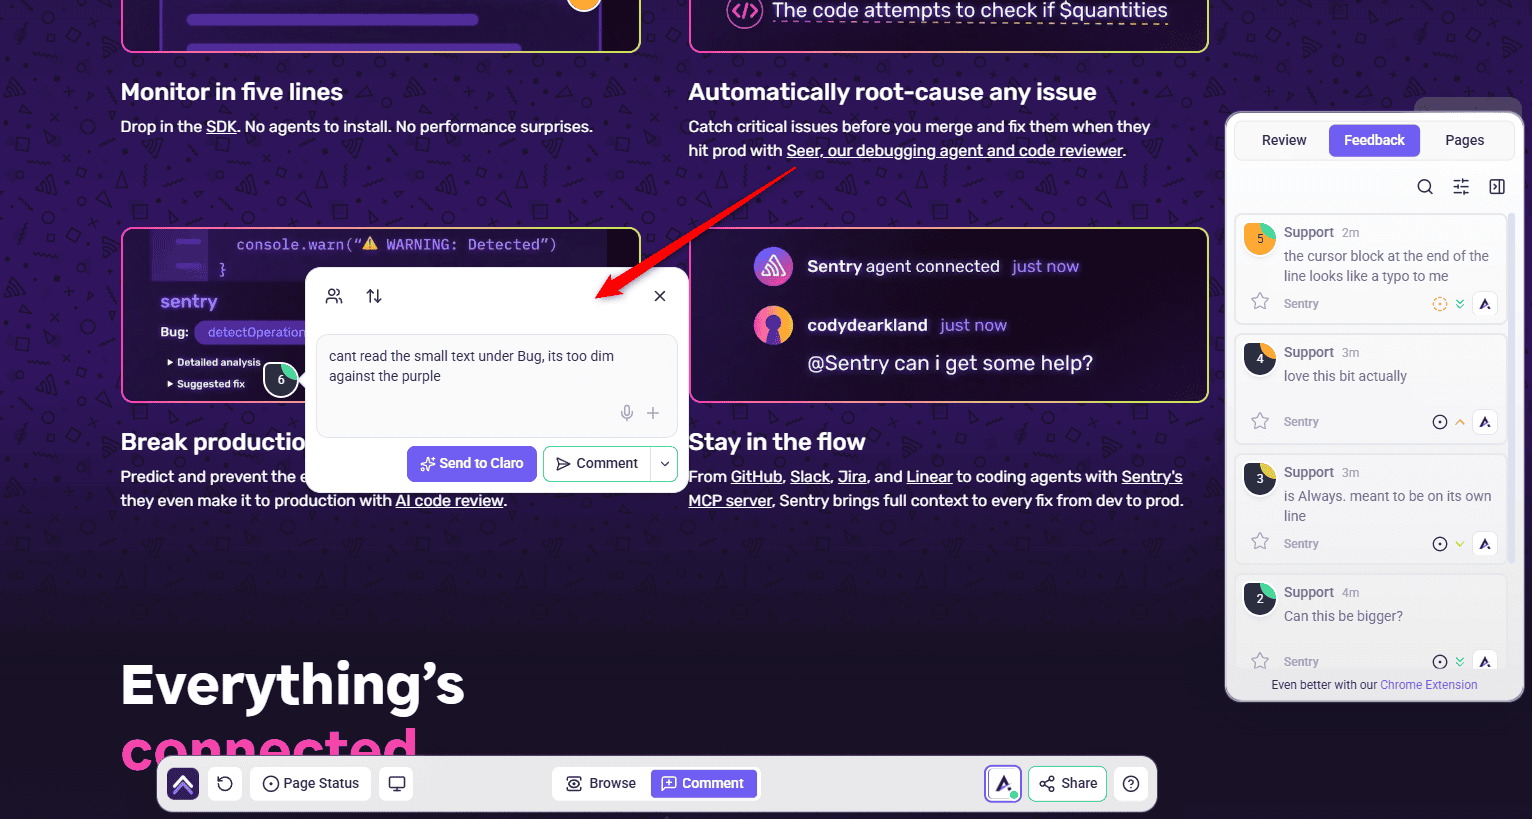
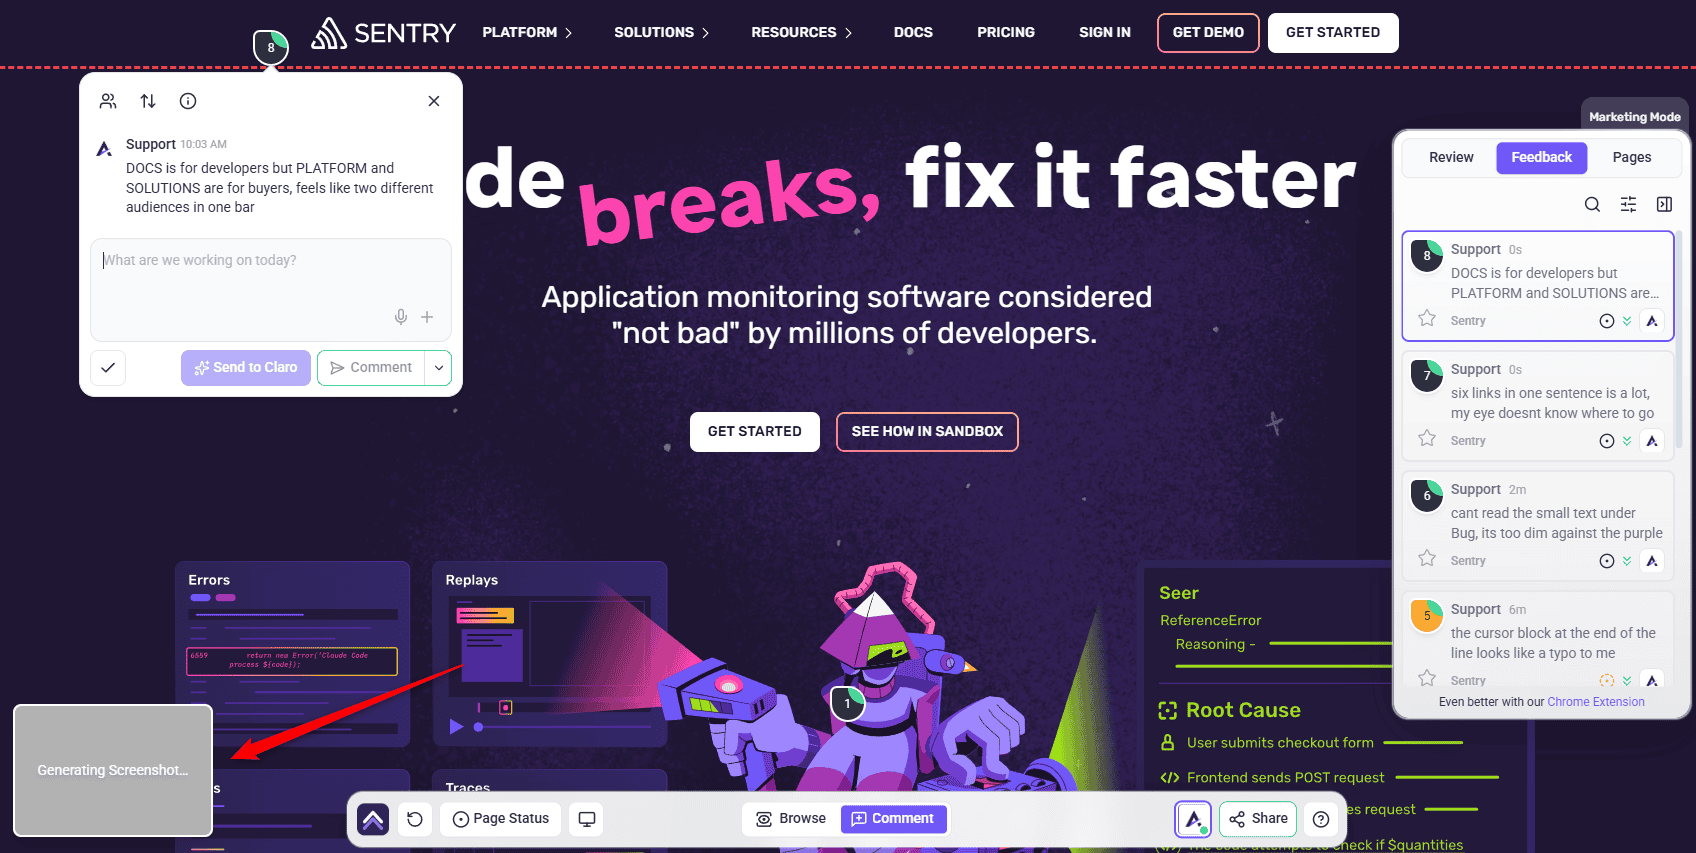
Leave a comment on any live web page and it becomes a task automatically. Atarim captures a screenshot and highlights the exact area you clicked. This removes ambiguity and helps your team understand exactly what needs to be addressed.
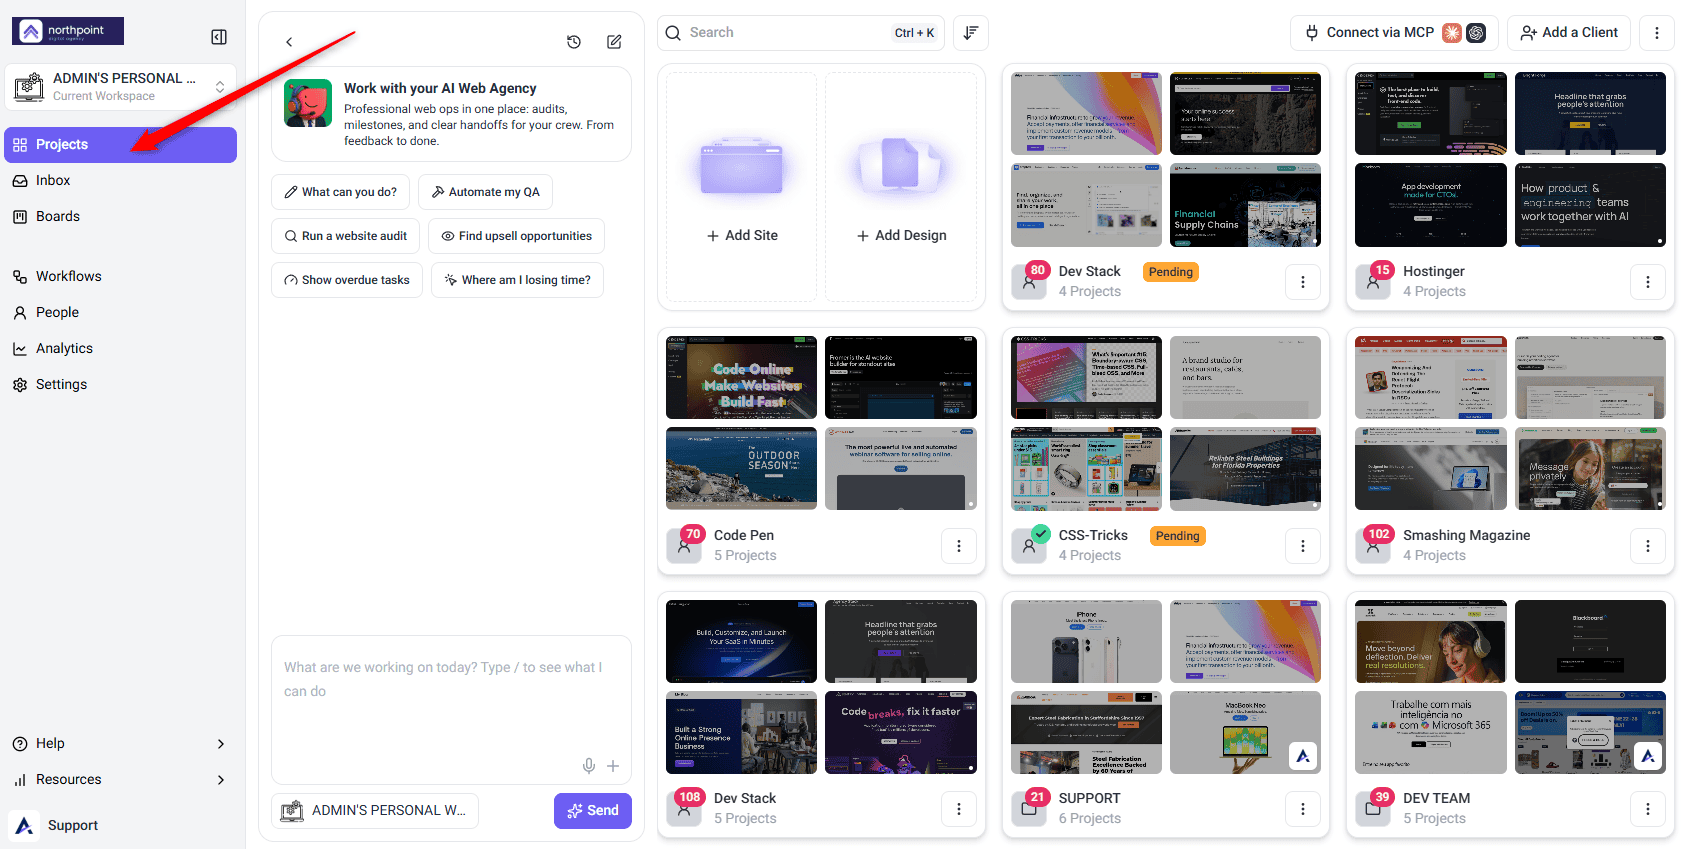
You don’t need to open the website separately to do this. Clicking a project opens the page right there on the Projects screen, in place of the project grid, with the AI chat panel alongside it.
Instructions:

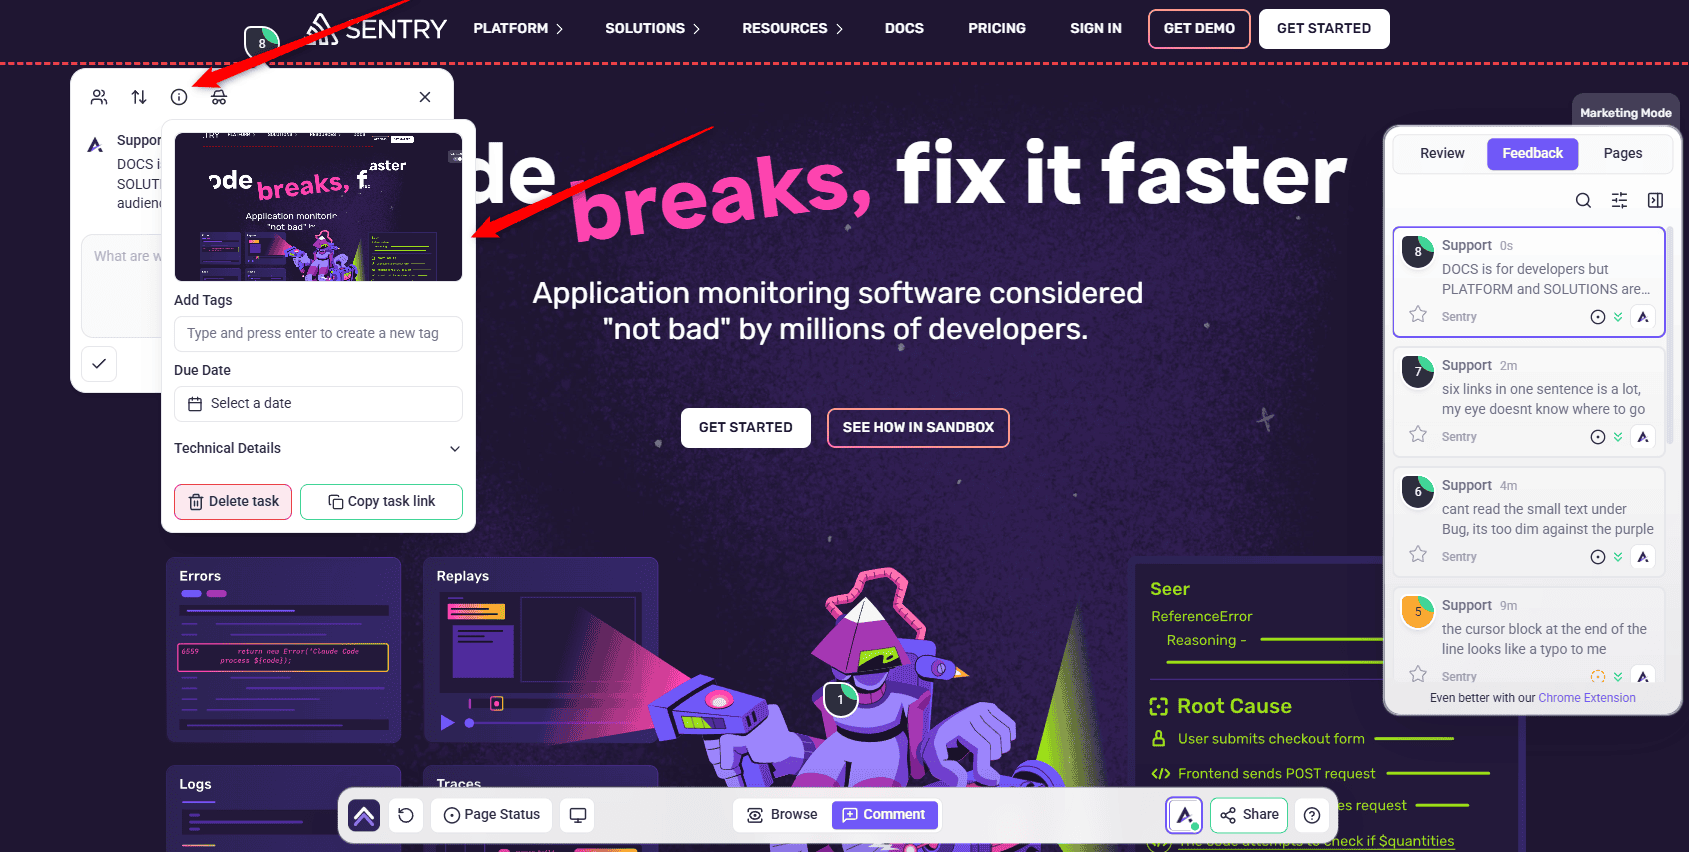
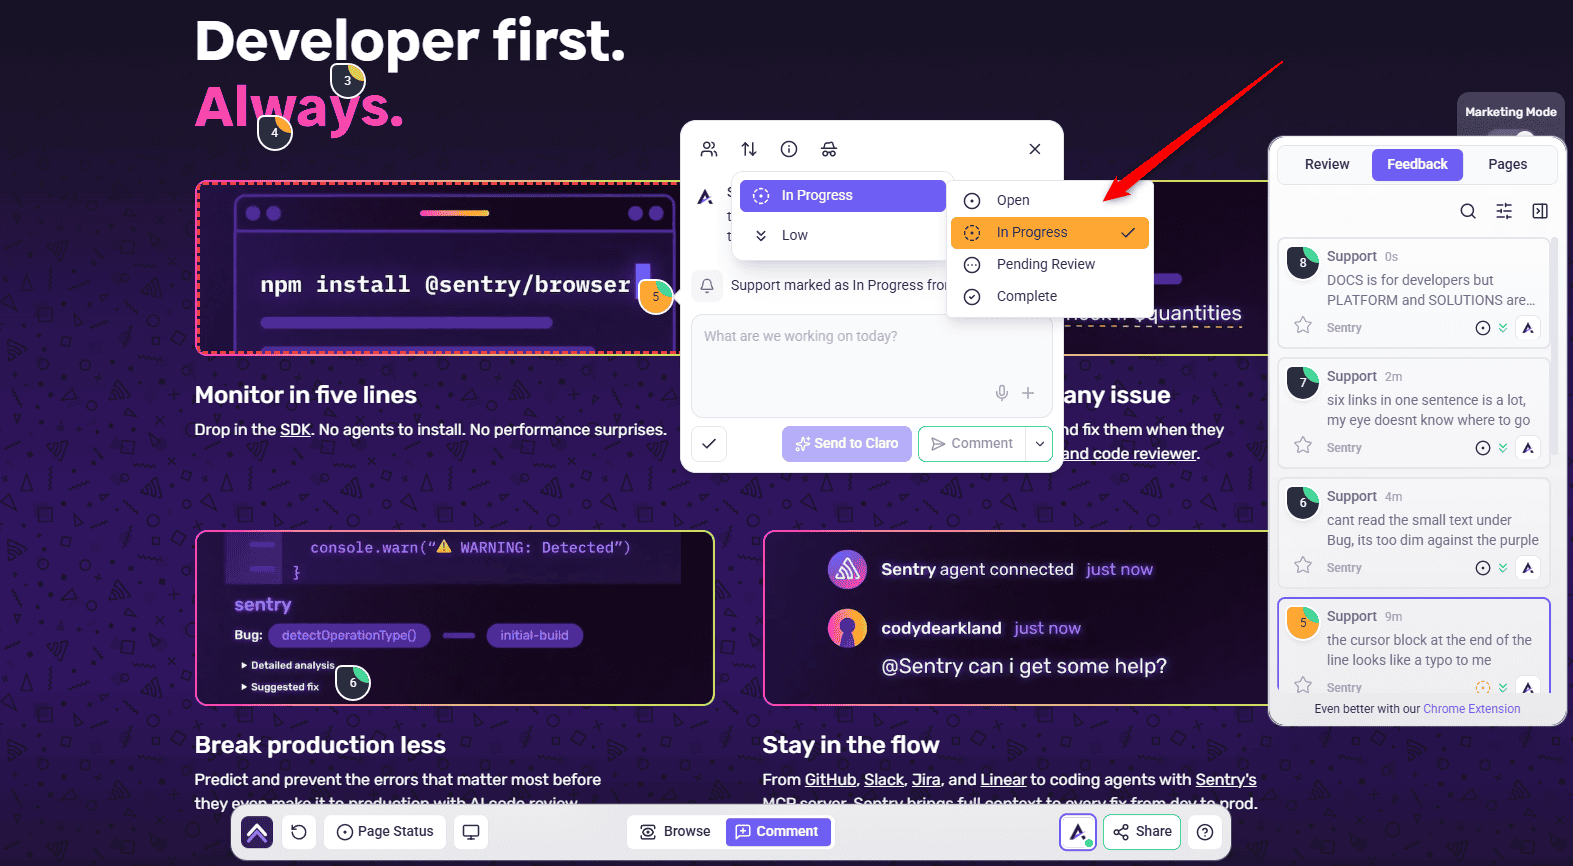
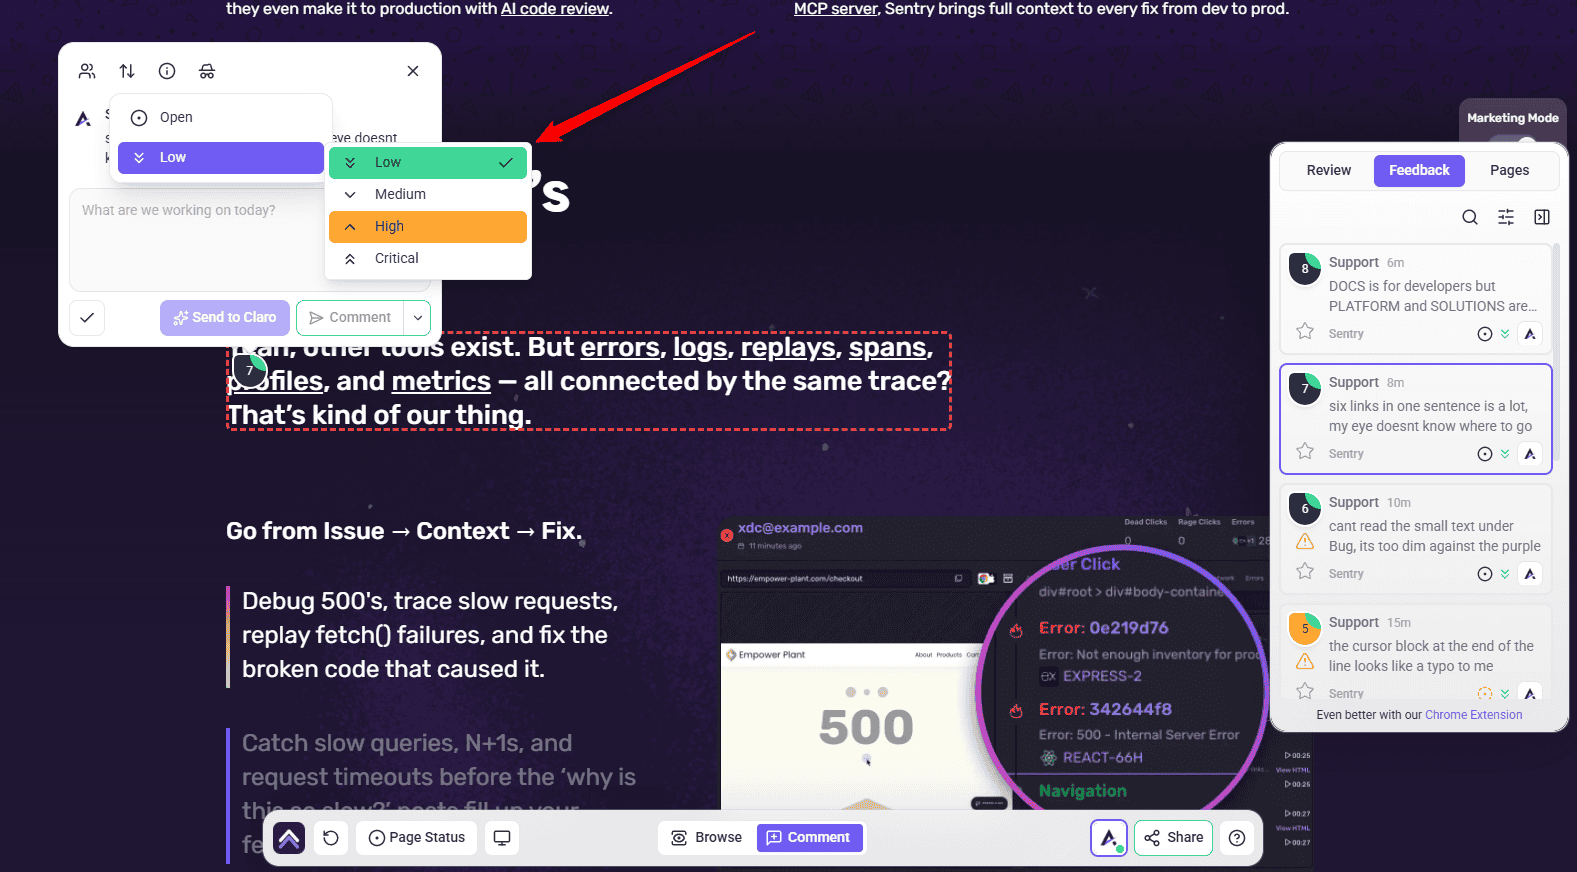
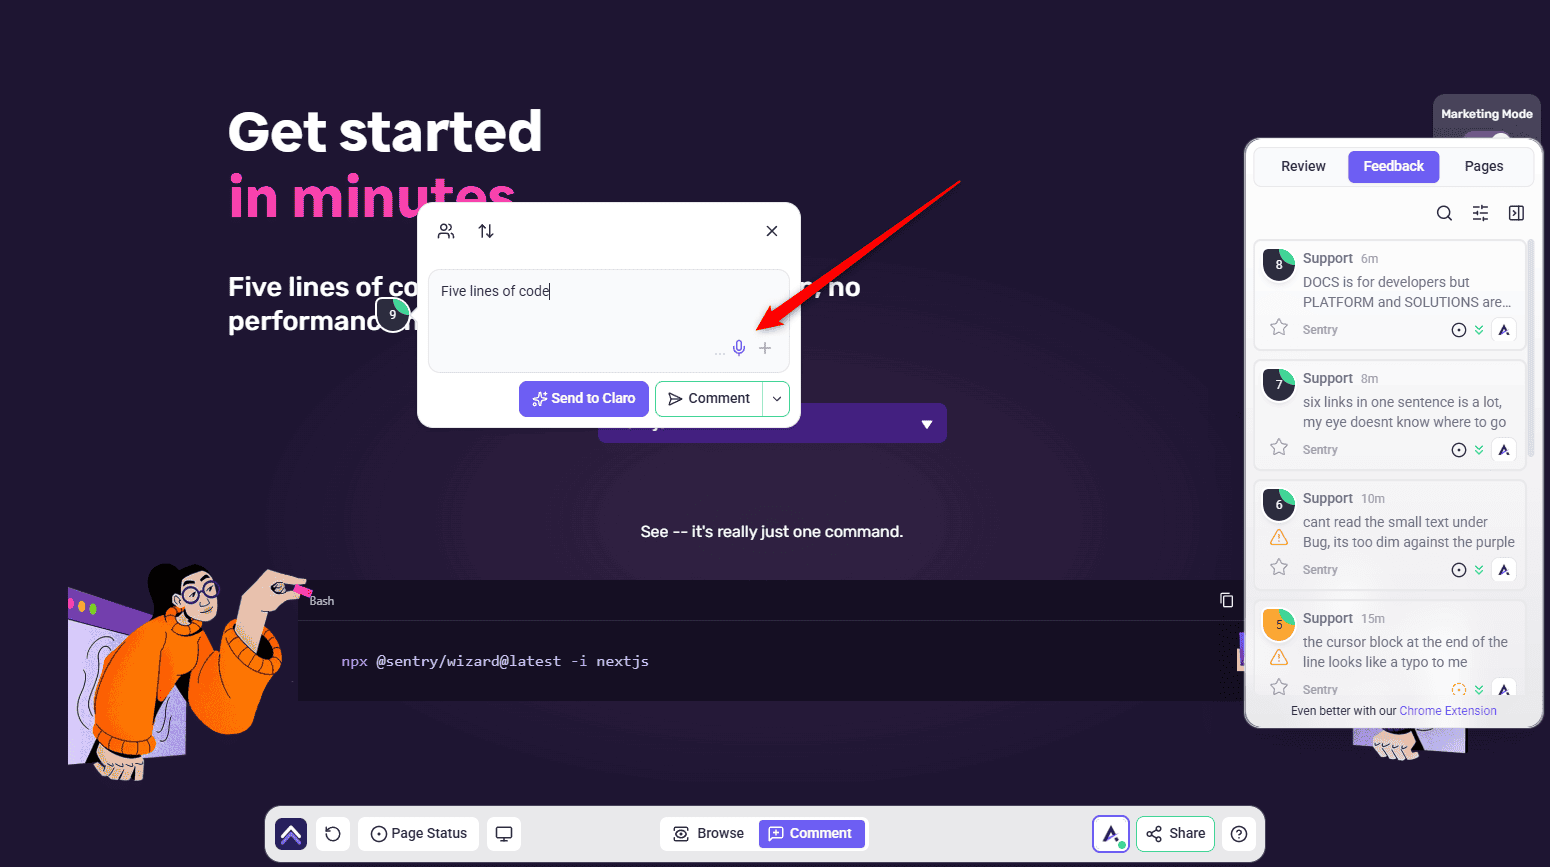
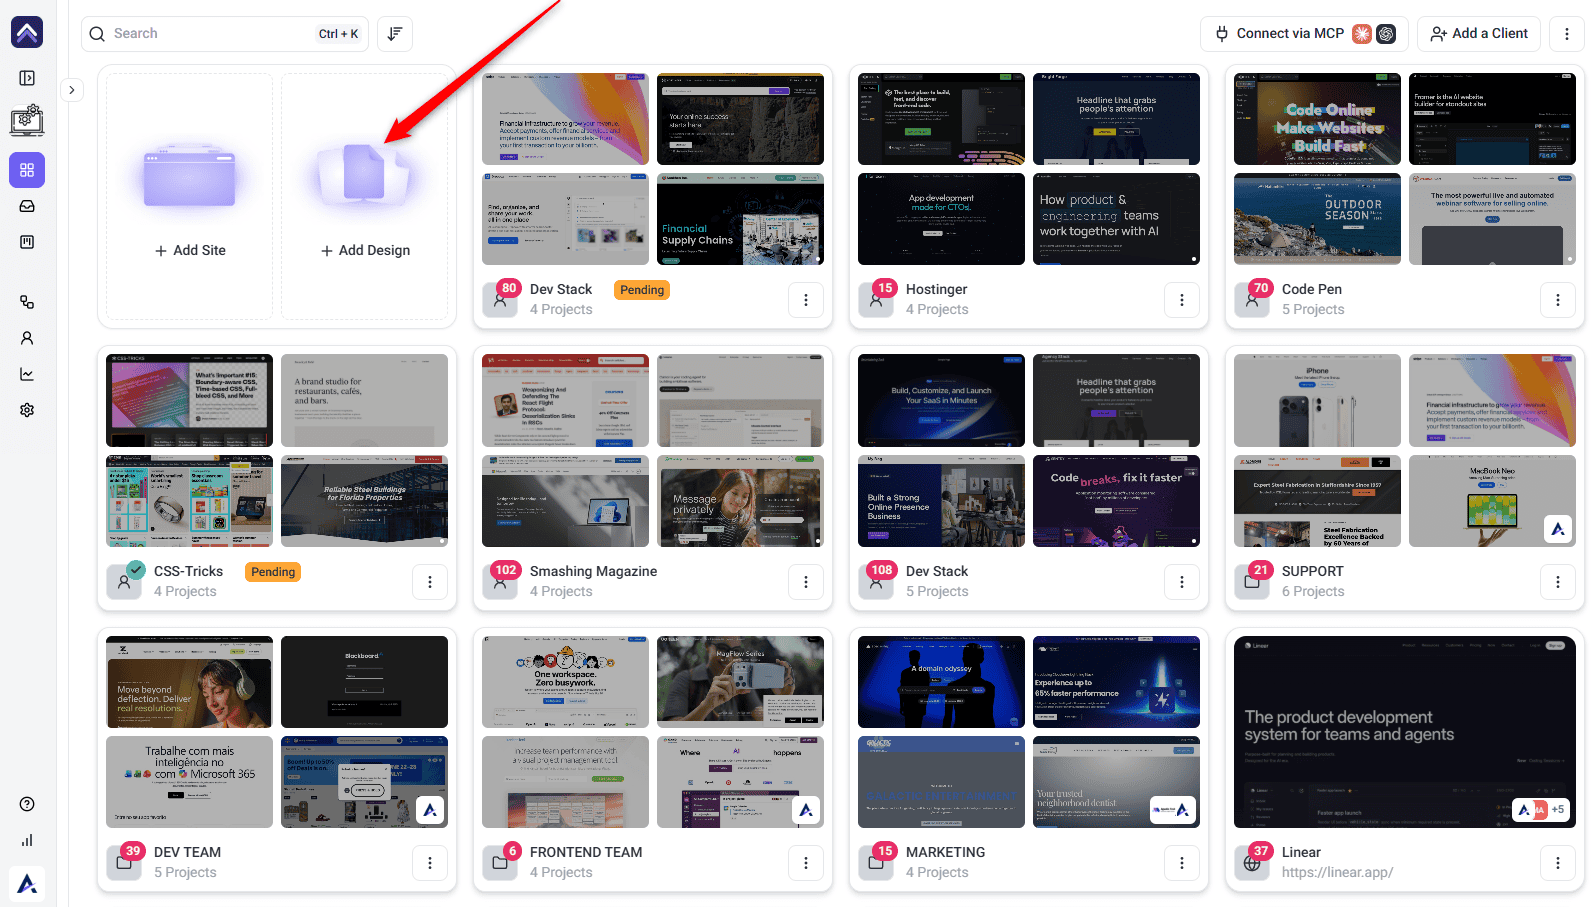
Method 2: On a Design or Image Project
The same pin-and-comment mechanic works on uploaded designs and images, not just live web pages.
Instructions:
Option A — Upload your design files
Option B — Work inside Figma


Once the project exists — creating a task on the design
Once Figma is connected, comments sync both ways
You don’t have to leave Figma to create work. A comment left on a linked Figma file arrives in Atarim as a task on that design project, and replies you add in Atarim are sent back to the Figma thread. Designers stay in Figma, everyone else stays in Atarim, and neither side has to copy anything across.
Method 3: From a Kanban Board Column
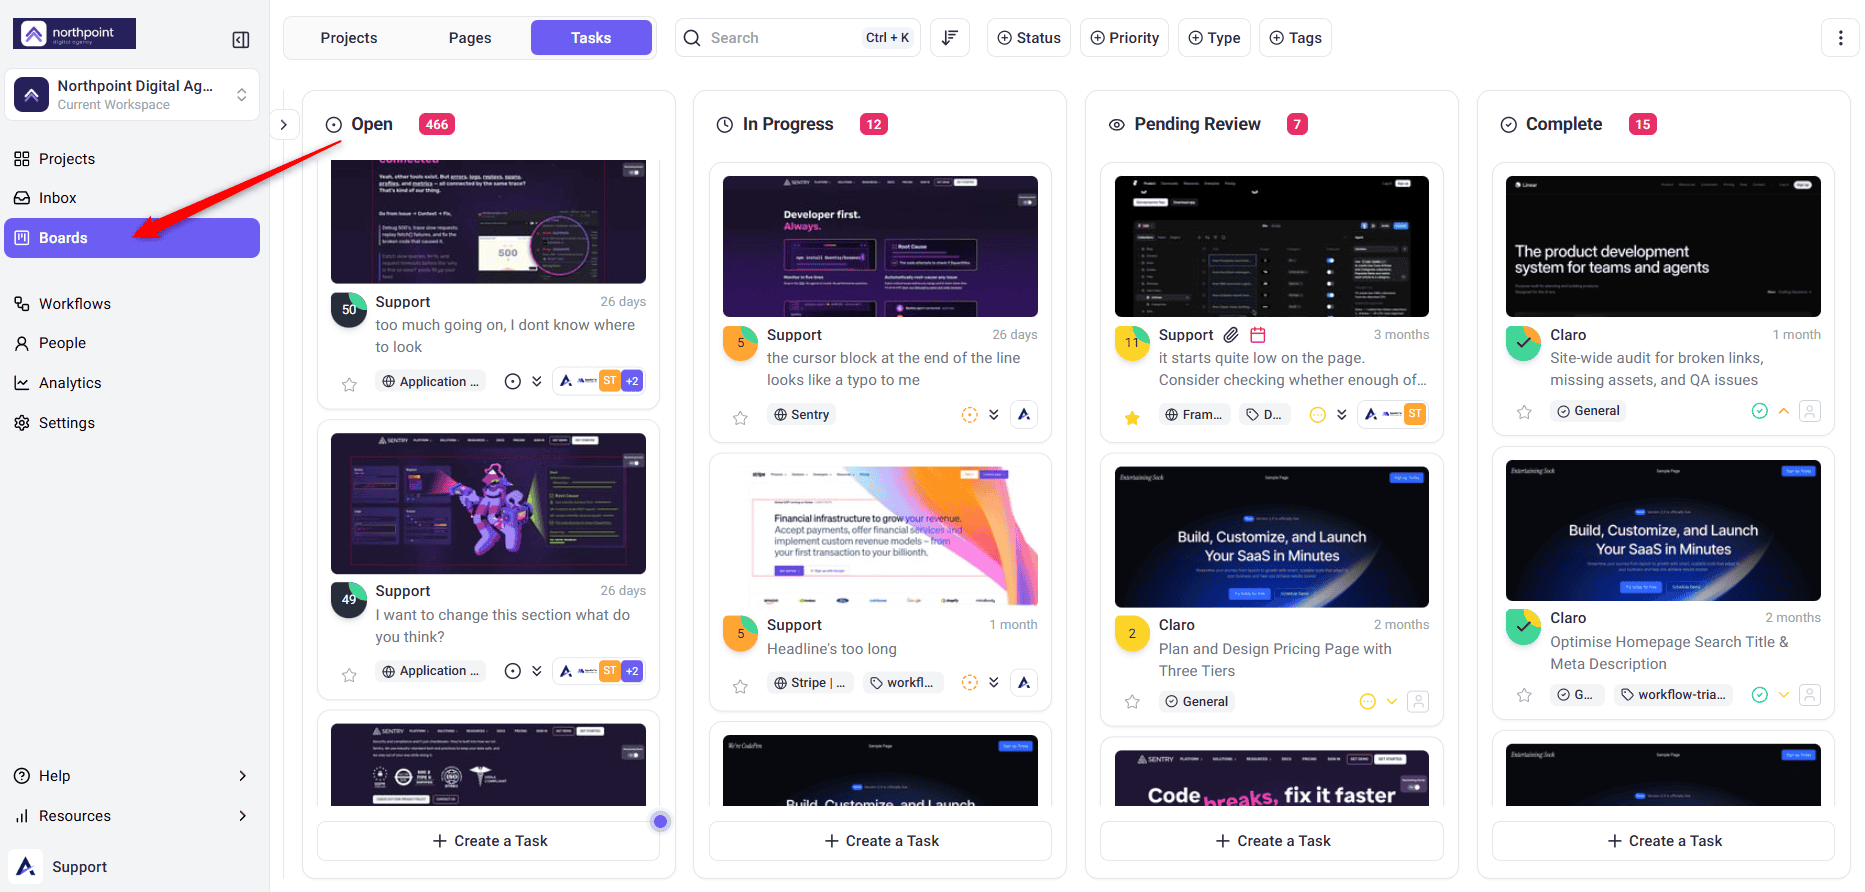
A board’s columns each represent a status, and you can create a task straight from one — it opens already set to that column’s status.
Instructions:
A task created from a board column automatically uses that column’s status. For example, creating it from In Progress sets the task status to In Progress.

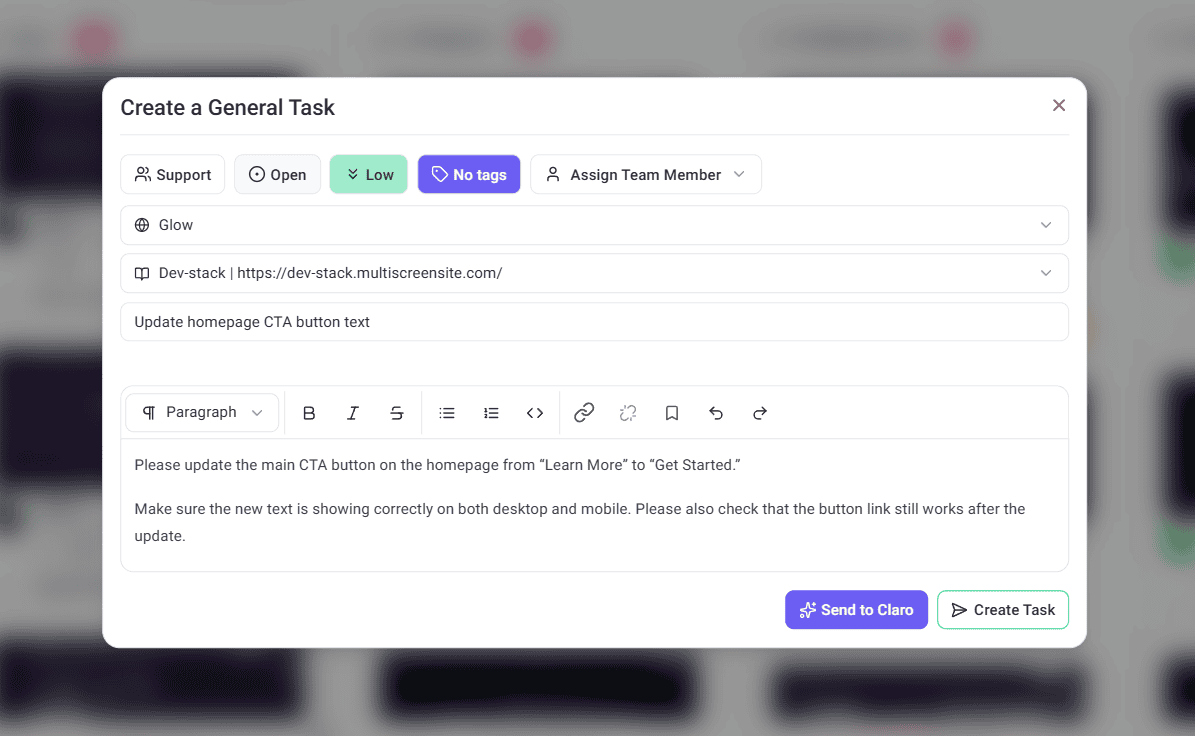
Method 4: From the Inbox
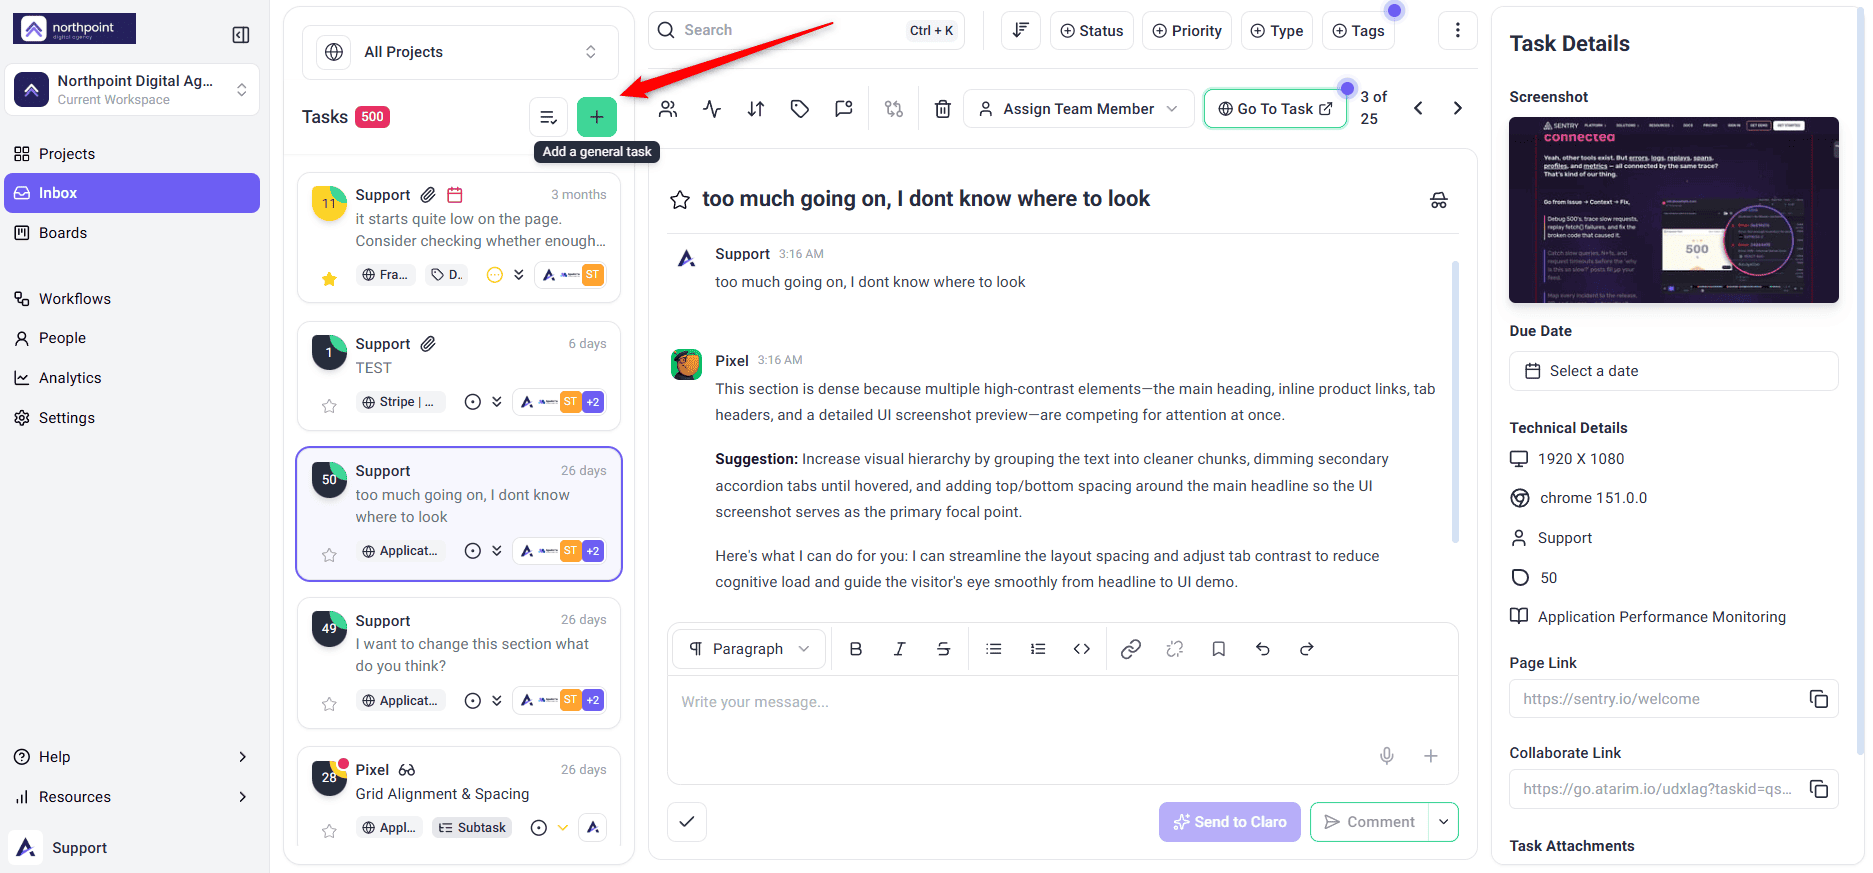
The Inbox has a built-in way to add a general task, handy for work that isn’t tied to a specific spot on a page or design.
Instructions:
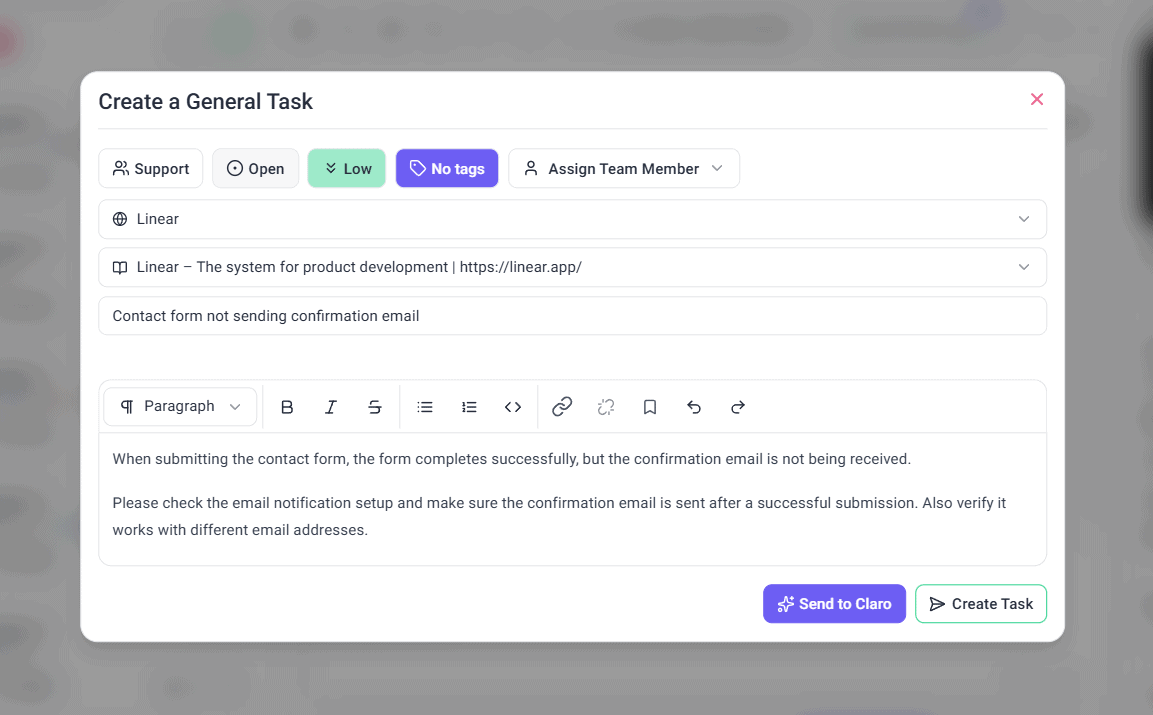
Creating the task
The Create a General Task window has up to two buttons in the bottom right:
- Create Task (arrow icon) creates the task and posts your message as its first comment. Everyone with access to the project can read it.
- Send to Claro (sparkle icon) creates the task the same way, then assigns it to Claro. Claro replies to your message inside the task. You’ll only see this button if your role has AI Chat turned on, and Claro only replies if the workspace has AI credits available.
Internal notes can’t be added while creating a task. To add one, create the task first, open it, then use the dropdown next to the Comment button and choose Add a note.
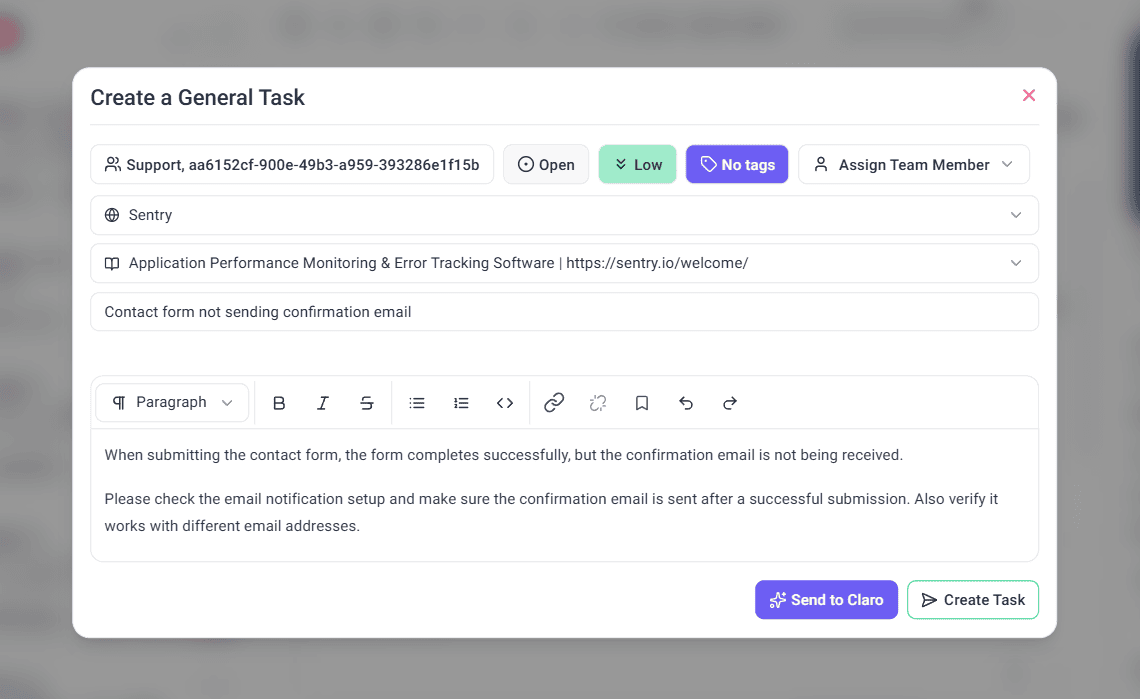

Method 5: From the Project Front End
On the project’s front end, you can switch an in-progress review panel to a general task directly.
Instructions:
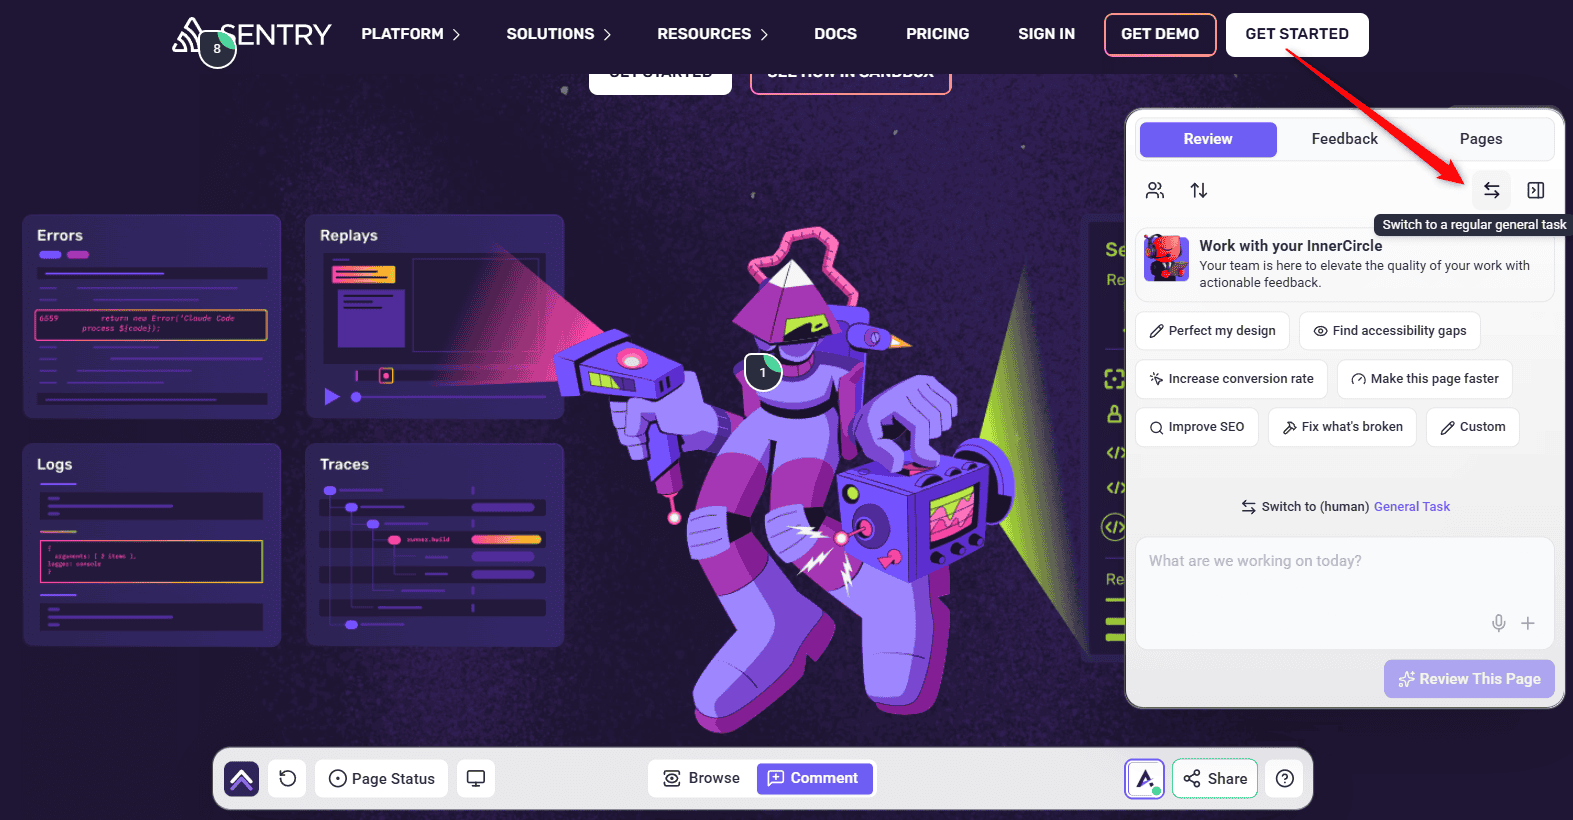
Method 6: As a Client or Guest, Without an Account
Clients and stakeholders don’t need an Atarim account to give feedback. Share a link to the page and they can create tasks straight away.
Instructions:
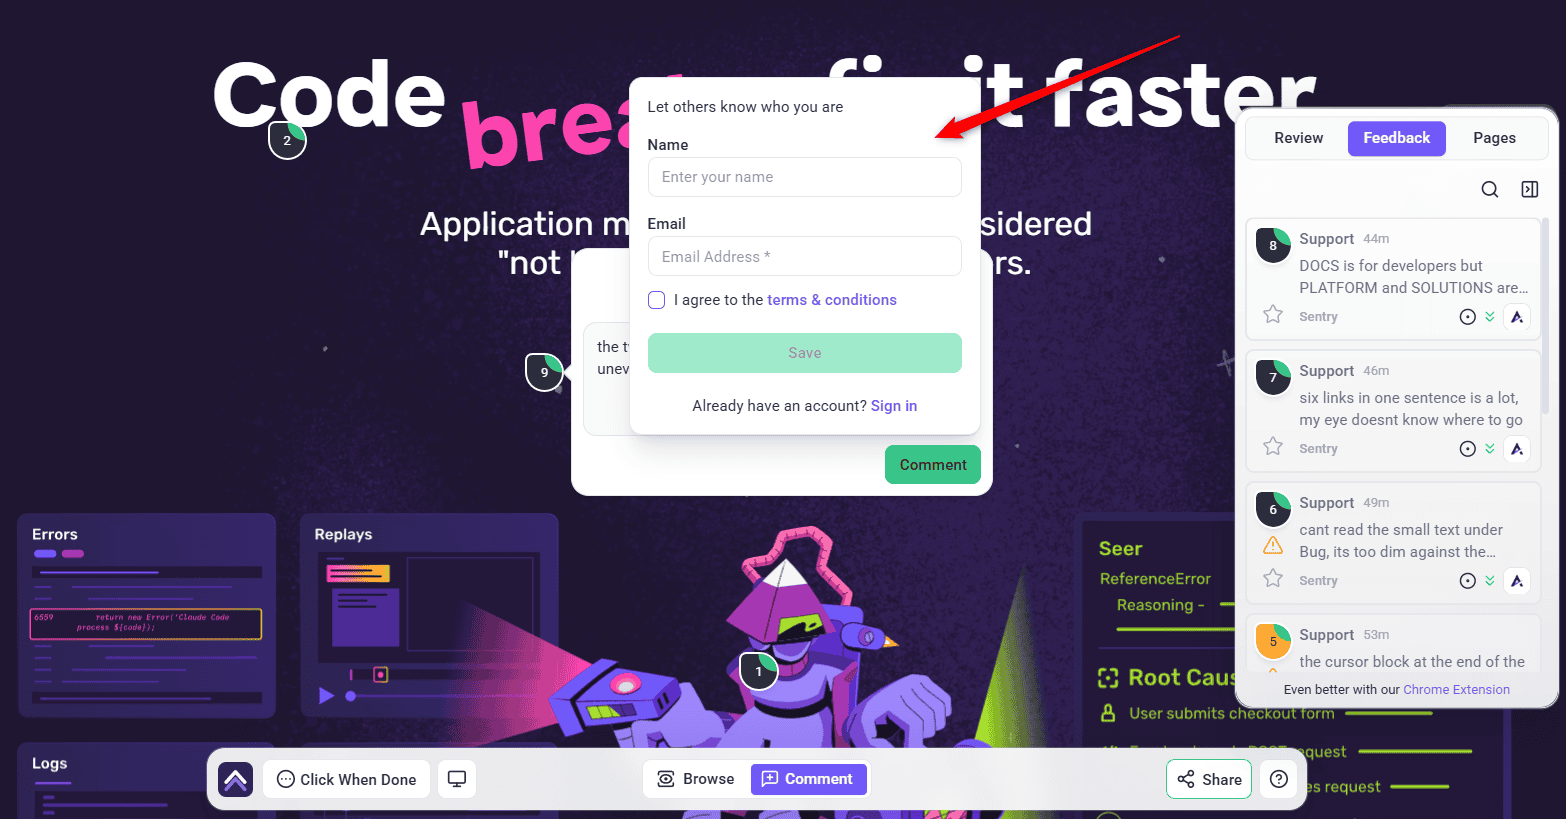
Method 7: By Asking the AI
In the AI chat you can simply ask for a task and it gets created — title, description, priority, status, assignee, and visibility all set in one go. The result comes back as a task card in the chat.
Instructions:

The AI can also pin a task to a specific spot on a page without anyone clicking it, and you can ask it to start the work as it creates the task. If you describe something too big for one task, it can break the request into a parent task with the individual jobs as subtasks beneath it.
From Tools You Already Use
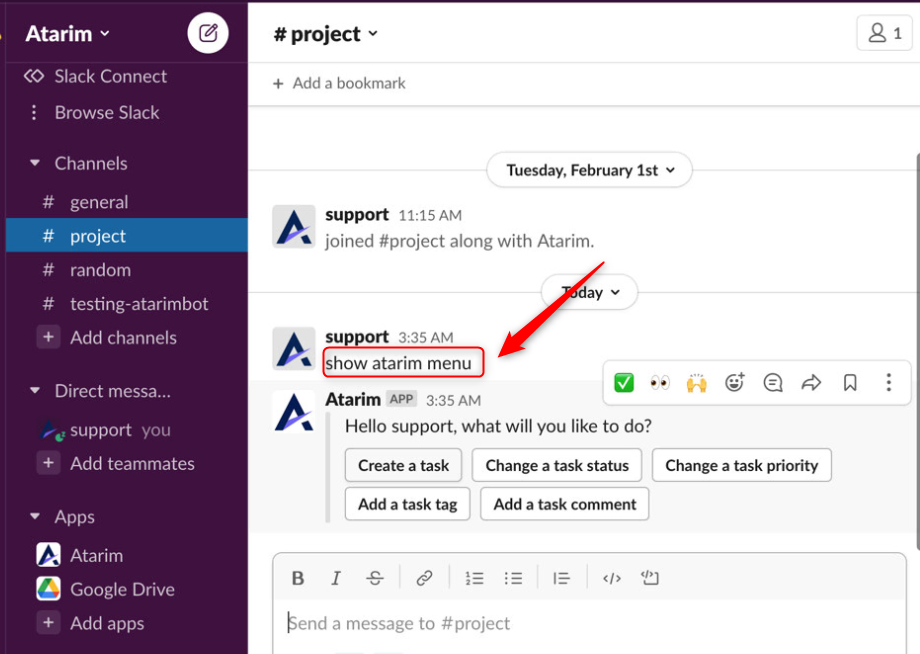
You can also create Atarim tasks from outside Atarim. Each of these has its own setup guide.
/atarim_create_task in any channel, or use the Atarim Menu, to open a window where you pick the project, set status and priority, and write the message. See Slack.Method 8: From an AI Page Review
A review doesn’t just report back — it files the work. Running one creates a task to hold the session, and each finding you accept becomes its own task underneath it, pinned to the element it found.
What gets created
You review the findings and accept or dismiss each one, so nothing is filed without your say-so. Findings you dismiss don’t create anything.

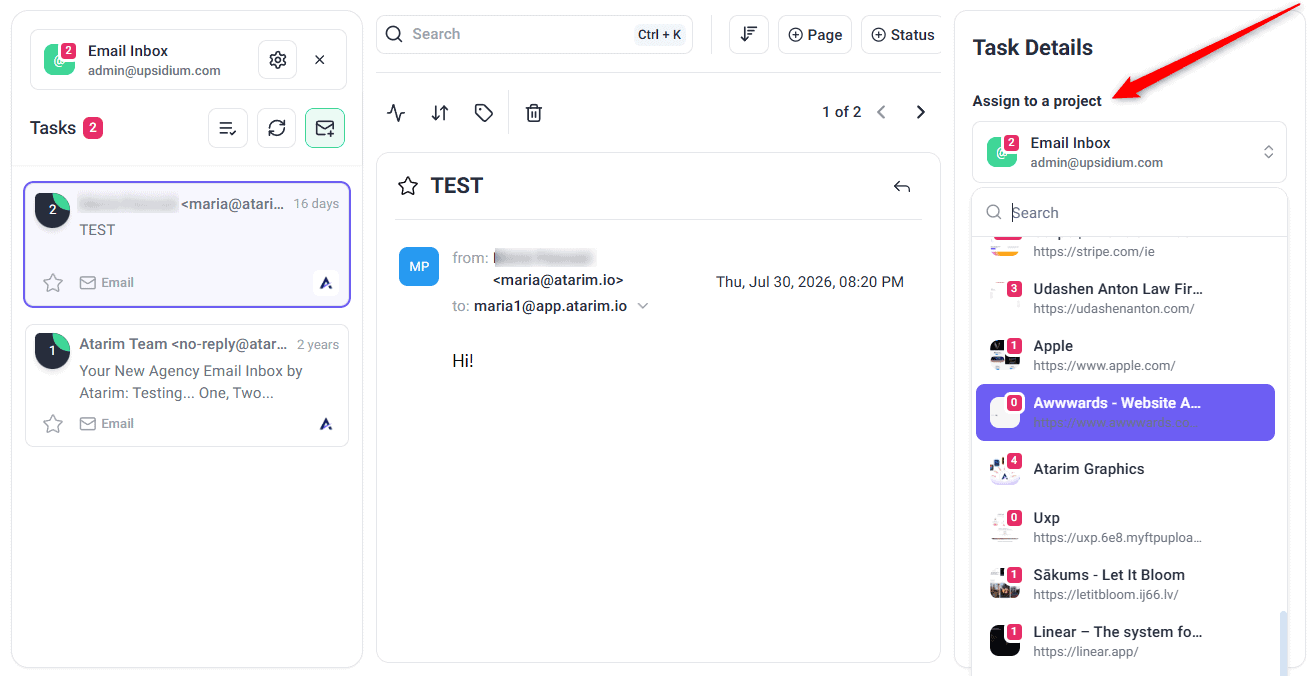
Method 9: By Forwarding an Email
Client requests that arrive by email don’t have to be retyped. Forward or CC your workspace’s Atarim address and the email becomes a task.
Setting it up (once)
Using it
Method 10: From an Automation
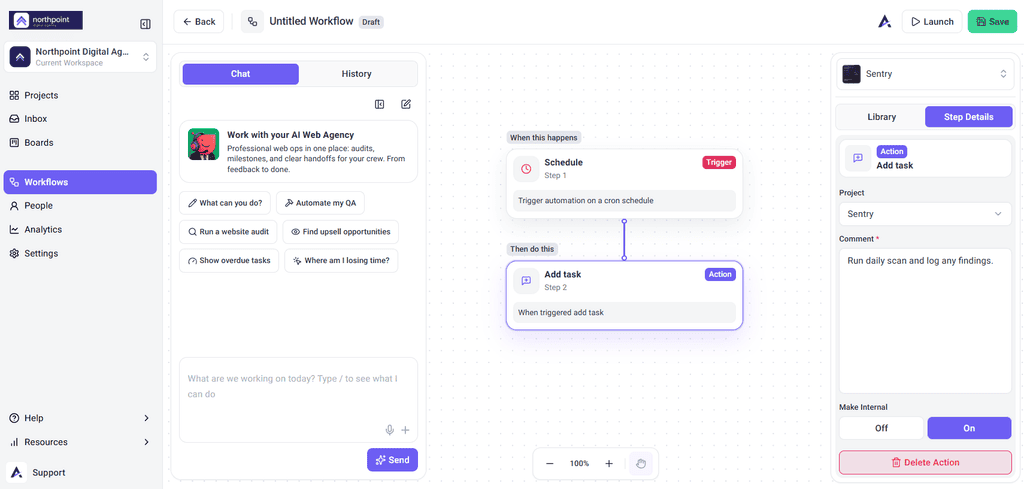
An automation’s Add Task step files tasks on your behalf, on whatever schedule or trigger you set. This is how recurring work — a monthly security scan, a weekly backlog sweep — turns into tasks without anyone opening the app.
Instructions:
Tasks created this way open at priority Low and status Open, and carry a comment noting they came from an automation.
An automation can also run an AI review as one of its steps. When it does, that review files its own findings as tasks exactly as described in Method 8 — so a single scheduled workflow can end up creating a whole set of tasks.
Refining a Task as You Create It
Separate from how a task starts, you can sharpen it before it becomes actionable work.
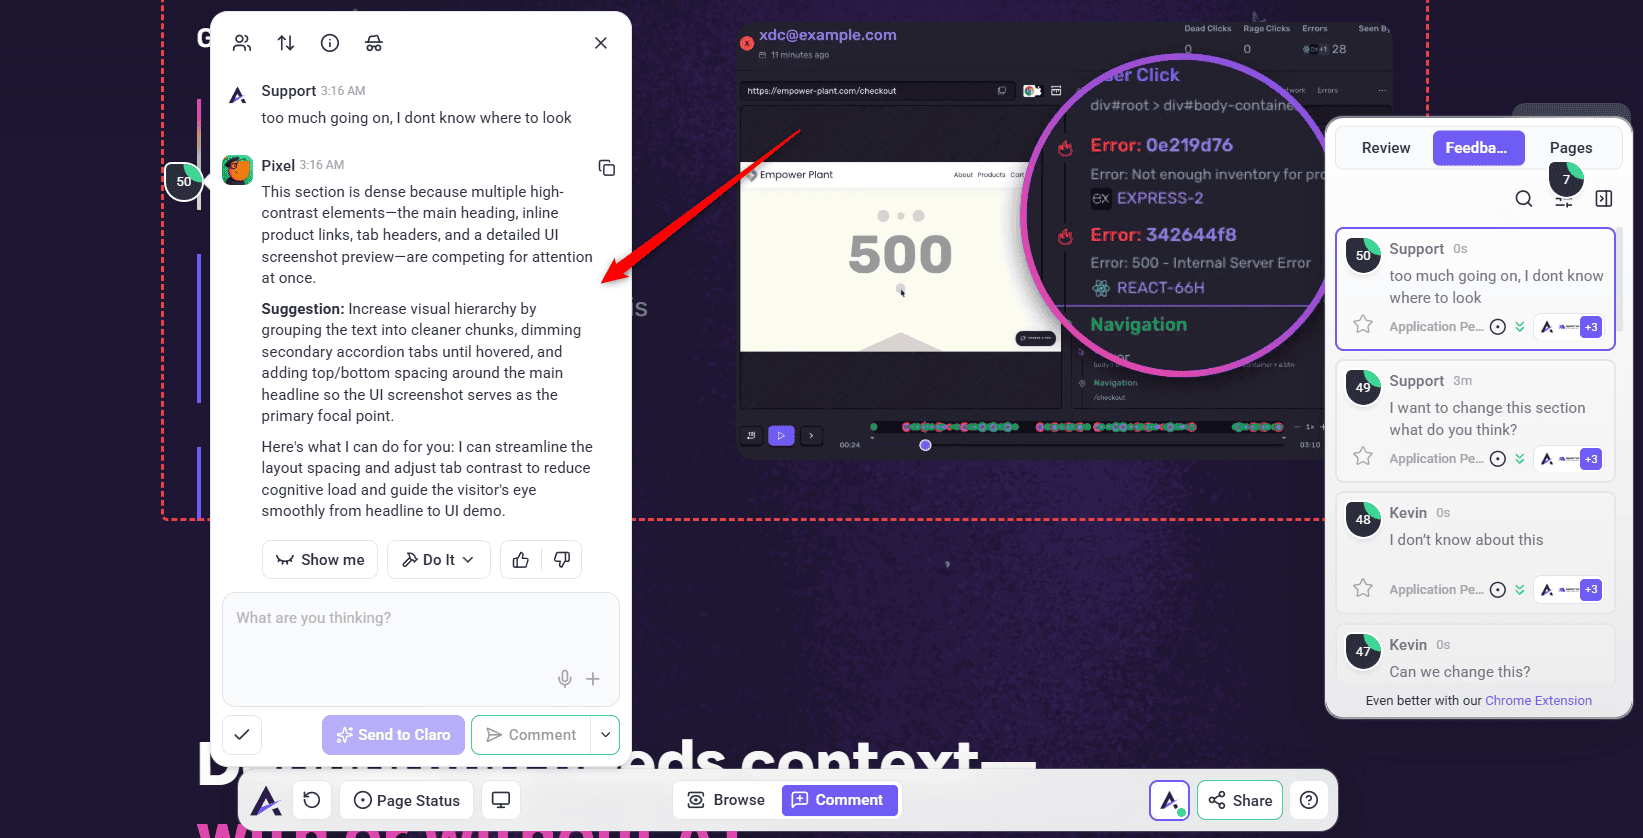
As you leave a comment on a page or design, the AI chat lets you get input from the InnerCircle agents right there — so instead of writing a task alone, you refine it in real time. The task itself is created the same way any comment is; the AI just helps you sharpen it first.
AI Collaboration helps you:
FAQs
Do I need to open the website separately to leave feedback on it?
No. Click the project on the Projects screen and the page opens right there, in place of the project grid, ready for feedback. You stay on the dashboard the whole time — there’s no separate tab to open and nothing to log into. Design and image projects are the one exception; they open on their own canvas screen.
I clicked the page and nothing happened. Why can’t I leave a comment?
The page opens in Browse mode so you can navigate it normally. Switch to Comment using the toggle in the Collaborate bar below the page, then click the element you want to comment on.
Do my clients need an Atarim account to give feedback?
No. Send them a link to the page and they enter a name and email to start commenting. Everything they create arrives in your Inbox and Boards as a normal task.
Can I leave feedback on a website that isn’t set up as a project yet?
Yes, using the Chrome extension. It lets you comment on any site without adding it first and without installing anything on the site itself.
Do I have to install something on my client’s website?
Not necessarily. Working inside the dashboard needs nothing installed. The WordPress plugin and Chrome extension are options, not requirements.
Can I create a task without leaving Slack?
Yes. Type /atarim_create_task in any channel, or use the Atarim Menu.
We already track work in Trello. Do we have to start again?
No. Connect Trello and import the board — each card becomes an Atarim task, and its existing comments come across too. The same works for Asana, ClickUp, Monday.com, Teamwork, and Basecamp.
Can I create tasks without attaching them to specific elements on the website?
Yes. General tasks aren’t tied to a specific element. Create one from a board column, from the Inbox using the + button, or from the project front end via Switch to a regular general task.
Can I add files to tasks while creating them?
Yes, you can add files like images or documents by clicking the attachment icon in the task view, or simply drag and drop the file into the comment area.
Does clicking on a page really create a task on its own?
Yes. In Comment mode, clicking an element places a pin, and when you type a comment and submit it, that comment is saved as a task automatically. It receives a task number and appears in the Feedback panel and in your Inbox and Boards.
Is a screenshot captured automatically?
Yes. When you create a task on a live page or a design, Atarim captures the surrounding area and highlights the exact element you clicked. You can also mark up that screenshot before submitting if you want to add more detail.
Do I need to describe where the problem is in my comment?
No. The pin lands on the element you clicked, so write about what needs to change, not where it is on the page.
Can I dictate a comment instead of typing it?
Yes. The comment box has a voice input control — start it, speak, and stop it when you’re done.
A task appeared that nobody created. Where did it come from?
Check three things, in this order: an active workflow with an Add Task step, a completed AI review that filed its findings, and your email forwarding address. All three create tasks without anyone opening a create-task window.
Can clients create tasks using AI?
The InnerCircle chat you use while composing a task is team-only. But Claro automatically clarifies vague feedback with whoever wrote the comment — clients included — so clients do interact with AI in that clarification flow.
Conclusion
However a task starts — a live-page comment, a design annotation, a Figma thread, a manual entry, a client with nothing but a link, a Slack message, an import from another tool, a forwarded email, an automation, or an AI review finding — it lands in the same underlying task system, so assignee, priority, due date, and visibility all work the same way regardless of origin.
For what to do with a task once it exists, see How to Manage Tasks in Atarim.
Tips & best practices
- Set a default assignee so a task created any of these ways never lands with no one responsible for it.
- Decide visibility as you create the task, not afterwards. It’s easier than explaining to a client why they can see an internal note.
- Priority defaults to Low on every automated route — reviews, automations, and email. If you rely on priority to sort your queue, plan a triage pass.
- Check for an automation before assuming an unexplained task was a mistake — a workflow’s Add Task step creates tasks silently by design.