
Discovery: How Atarim AI Learns Context
Atarim AI builds context through a layered discovery process. This hierarchy ensures the AI combines your brand identity, project data, and individual expertise before providing insights.
Global (Workspace Level):
Defines your company-wide brand rules, tone, and uploaded files that guide all AI behavior across projects.
Project (Local Level):
Adds or overrides context for specific projects, campaigns, or clients — ensuring the AI matches that project’s unique voice and goals.
User (Personal Level):
Customizes how the AI communicates with you based on your role, skills, and experience level.
Tip: Atarim AI reads these layers from top to bottom — starting globally, refining per project, and finally adapting to your personal expertise.
Step-by-Step Guide
1. Auto-Generate Brand Guidelines from a URL (Global Workspace Level)
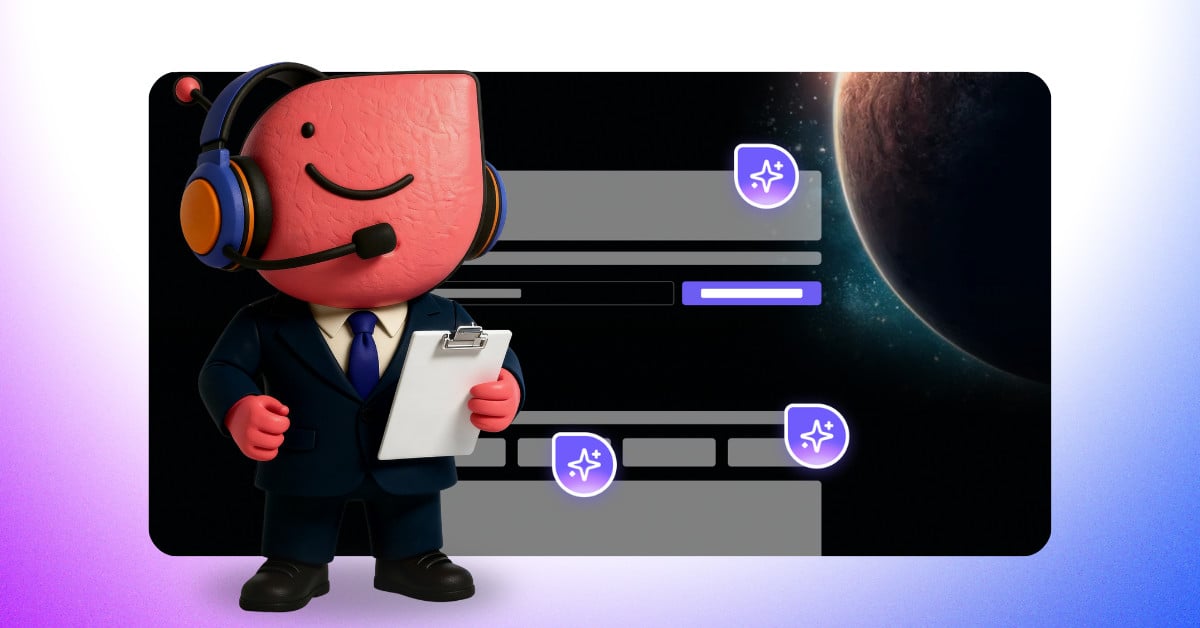
Use AI to automatically detect and populate brand context from any public website. The system scans the site you provide and extracts key details such as the brand name, product or service offered, project type, target audience, tone of voice, and custom guidelines. These insights are then pre-filled into your Brand Guidelines, giving you a ready-to-use context layer without needing to enter everything manually.
Instructions:
- Go to Settings → Define Your Brand → Brand & Audience
- Paste your website URL (e.g. webflow.com)
- Click Generate
- Atarim AI will detect:
- Brand name
- Project type
- Target audience
- Tone of voice
- Key context (goals, focus areas)
Note: This becomes your workspace’s global AI context, used for all projects unless overridden.
2. Customize Global Context Manually
You can also define these settings yourself. Instead of relying only on AI to populate brand context, you have the option to manually enter or adjust fields such as brand name, product, project type, audience, tone of voice, and custom guidelines. This ensures your Brand Guidelines reflect the exact positioning and messaging you want, whether at the project or global level.
Instructions:
- Navigate to Settings → Project Overview → Project Brief.
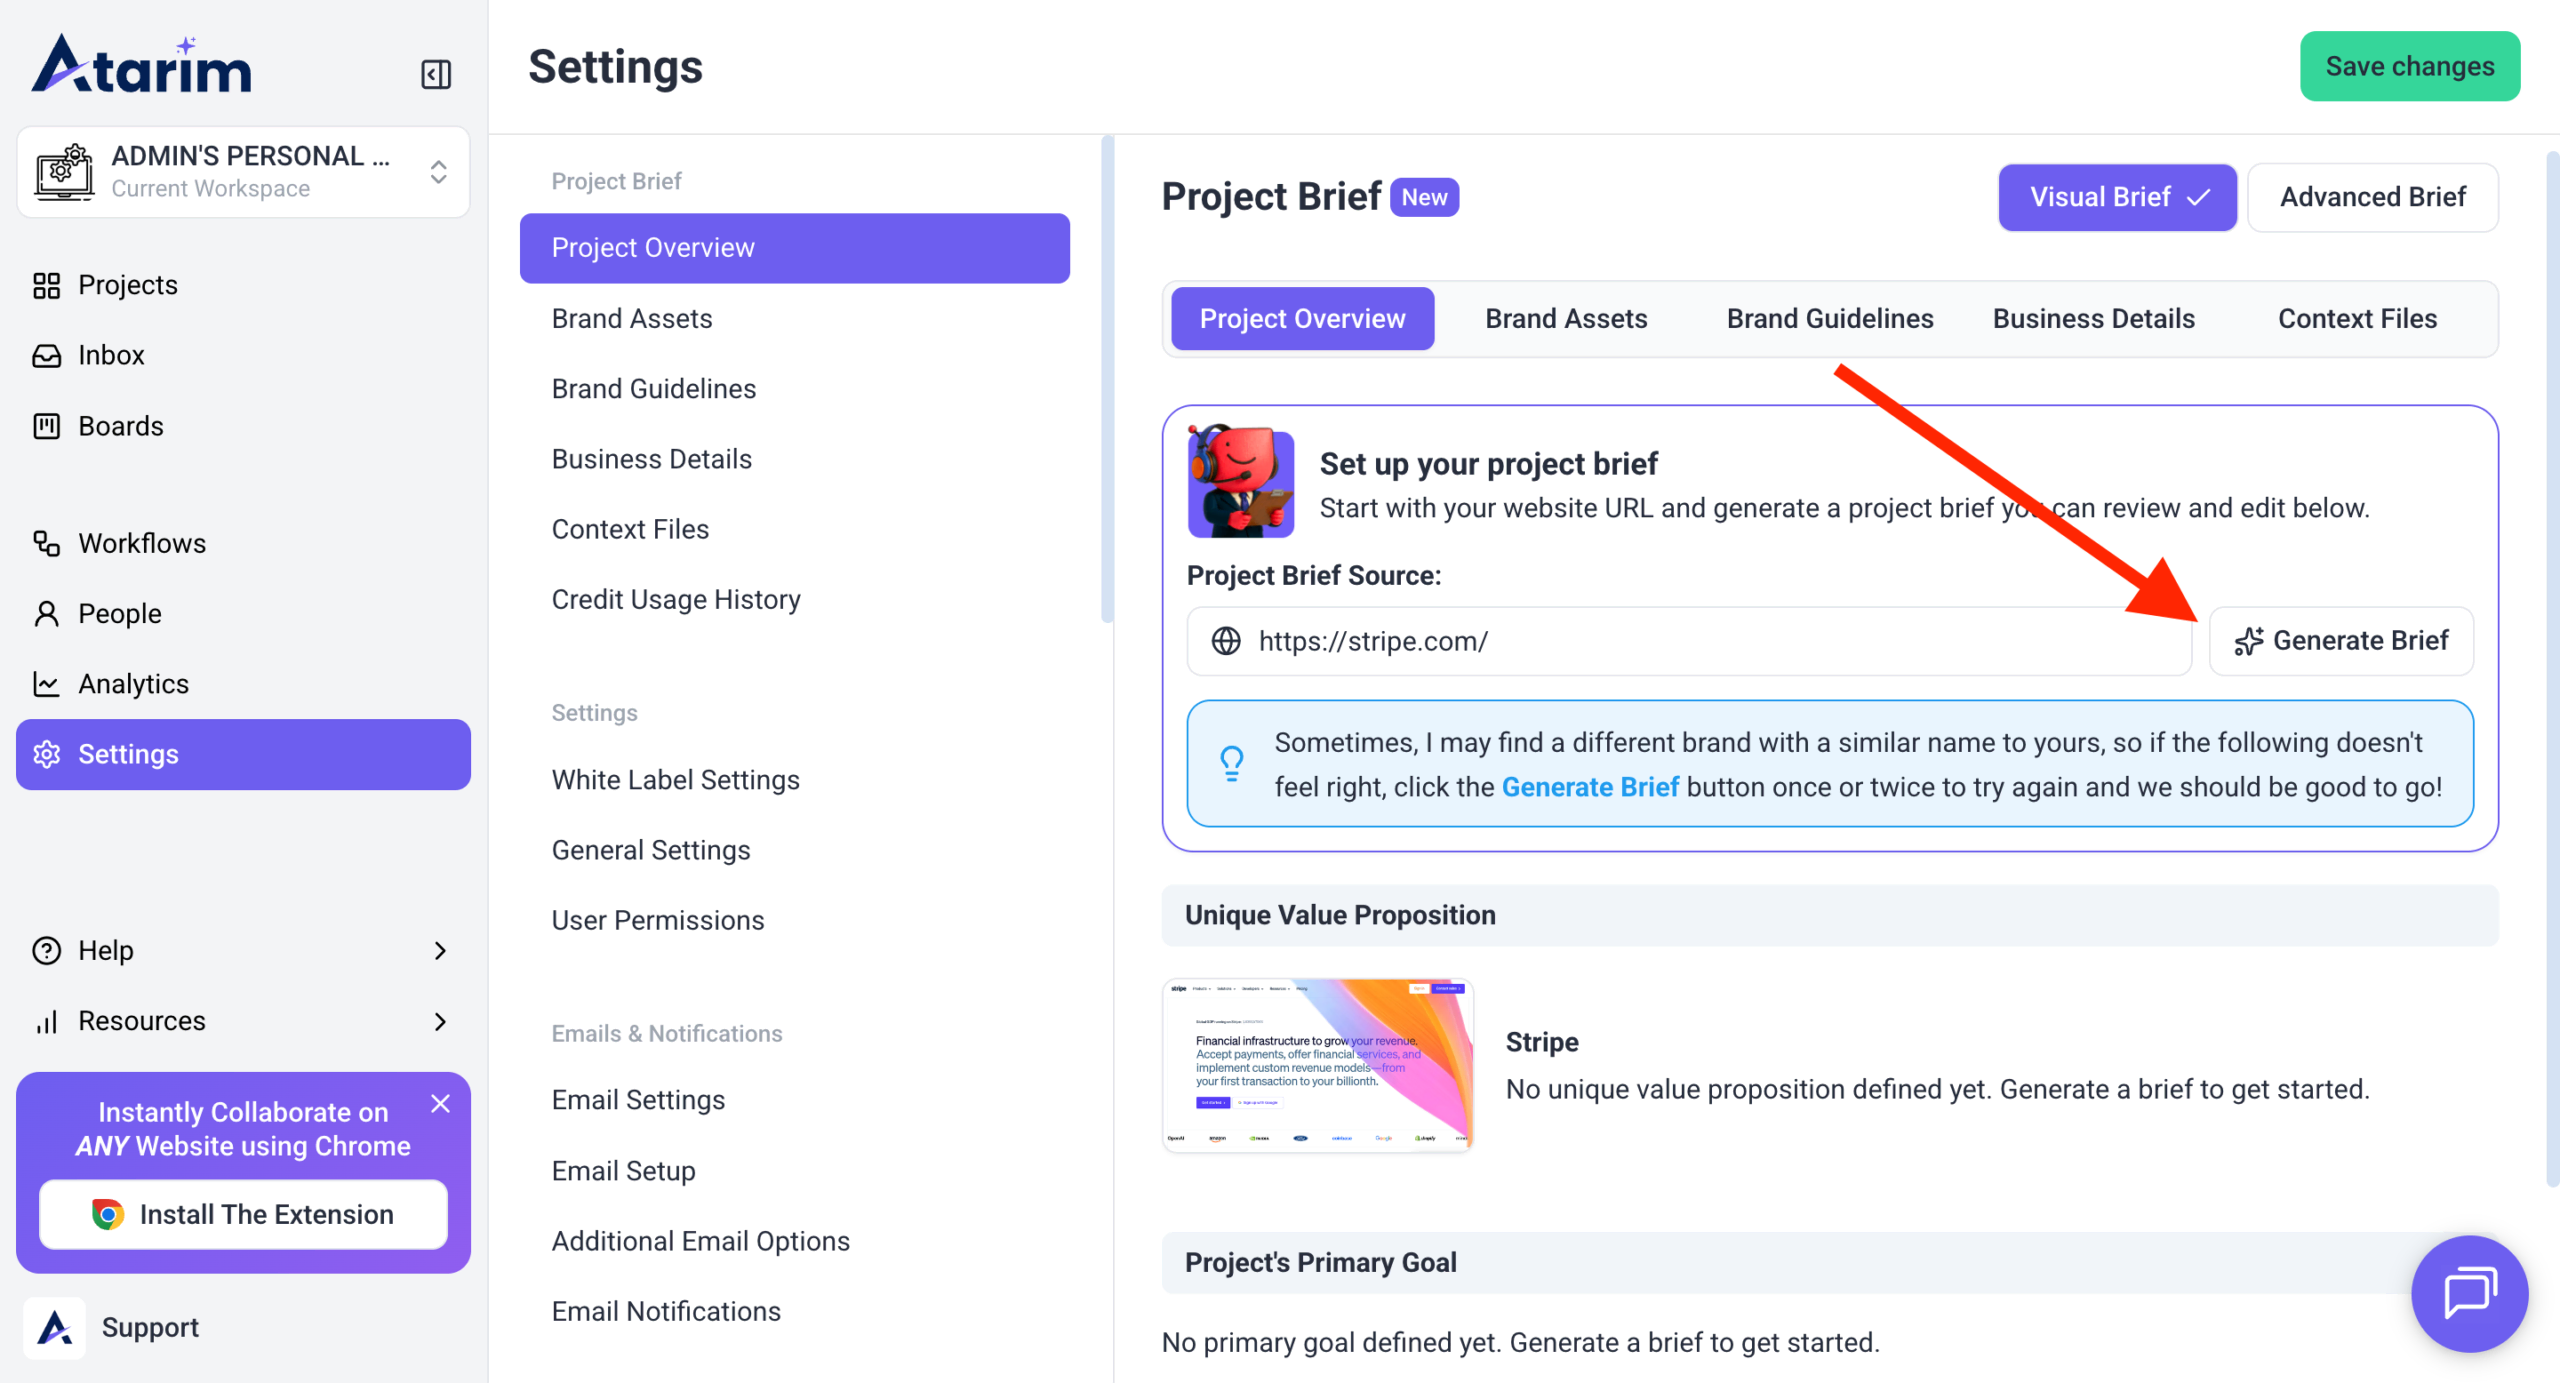
- Click the Primary Goal field to open the Business Details tab, then complete the available fields shown on screen:
- Business Overview
- Project’s Primary Goal
- Unique Value Proposition
- Secondary Goals
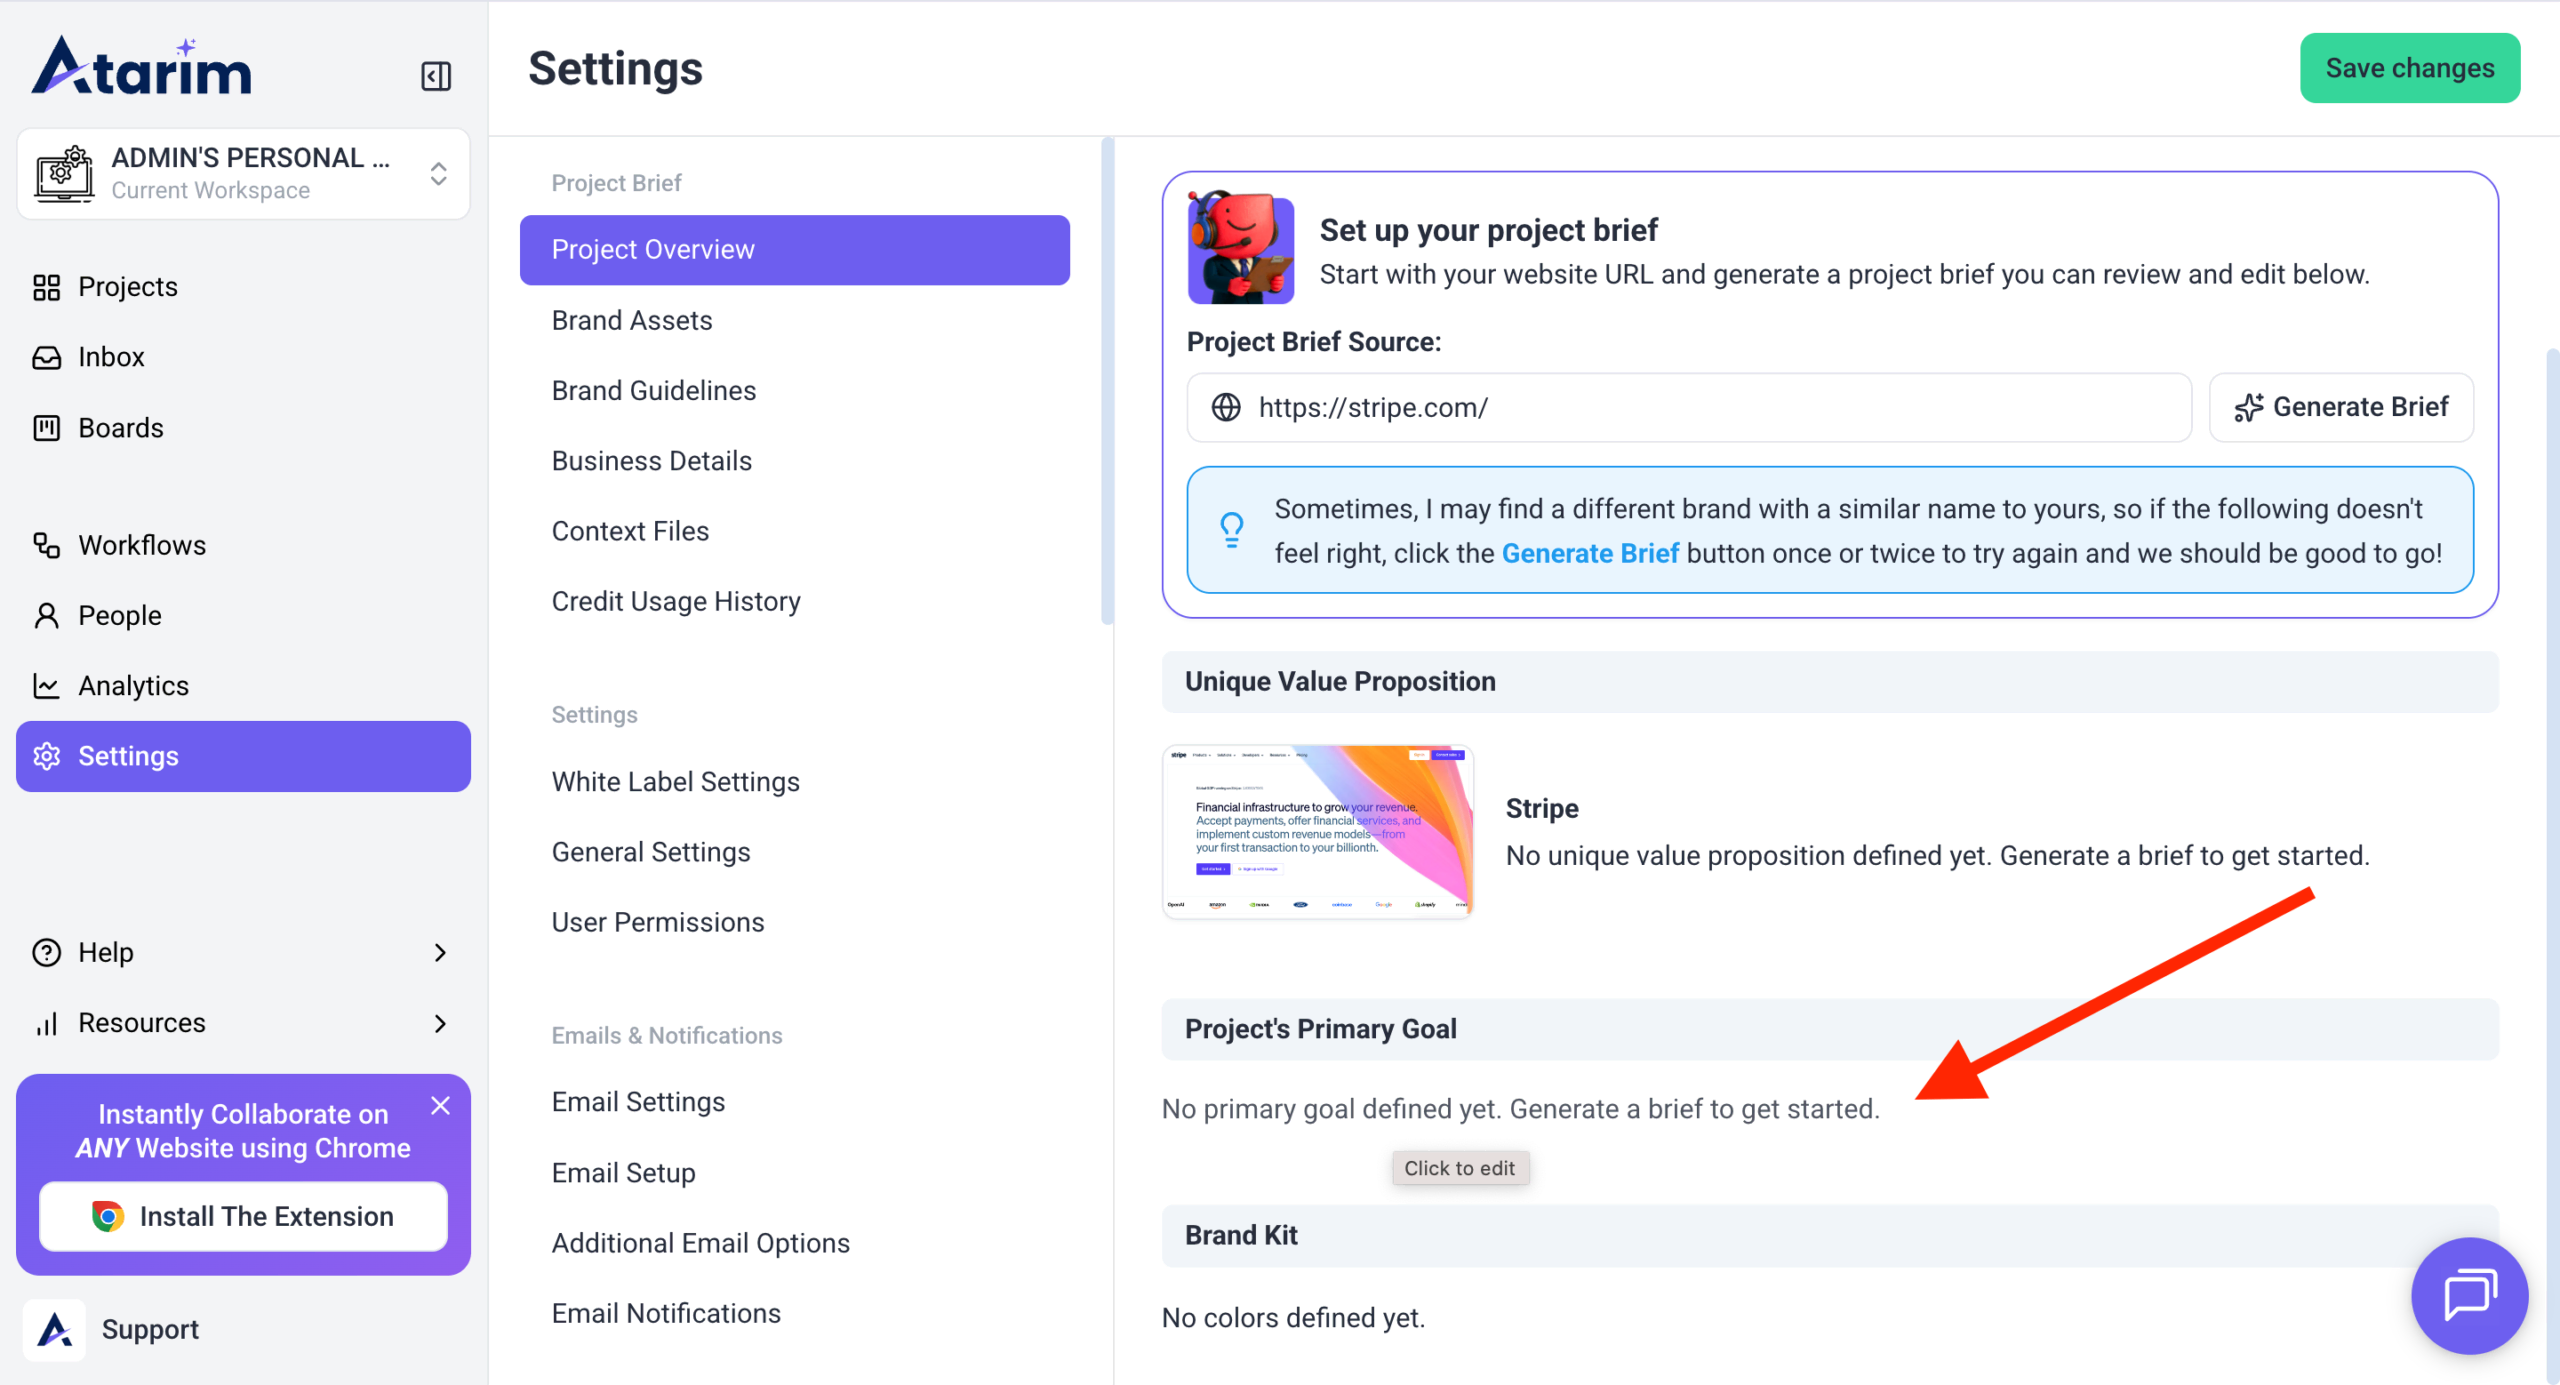
- Products & Services
- Target Audience
- Success Metrics
- Click Save after making your changes.

Note: These will apply to all projects unless a specific one is customized.
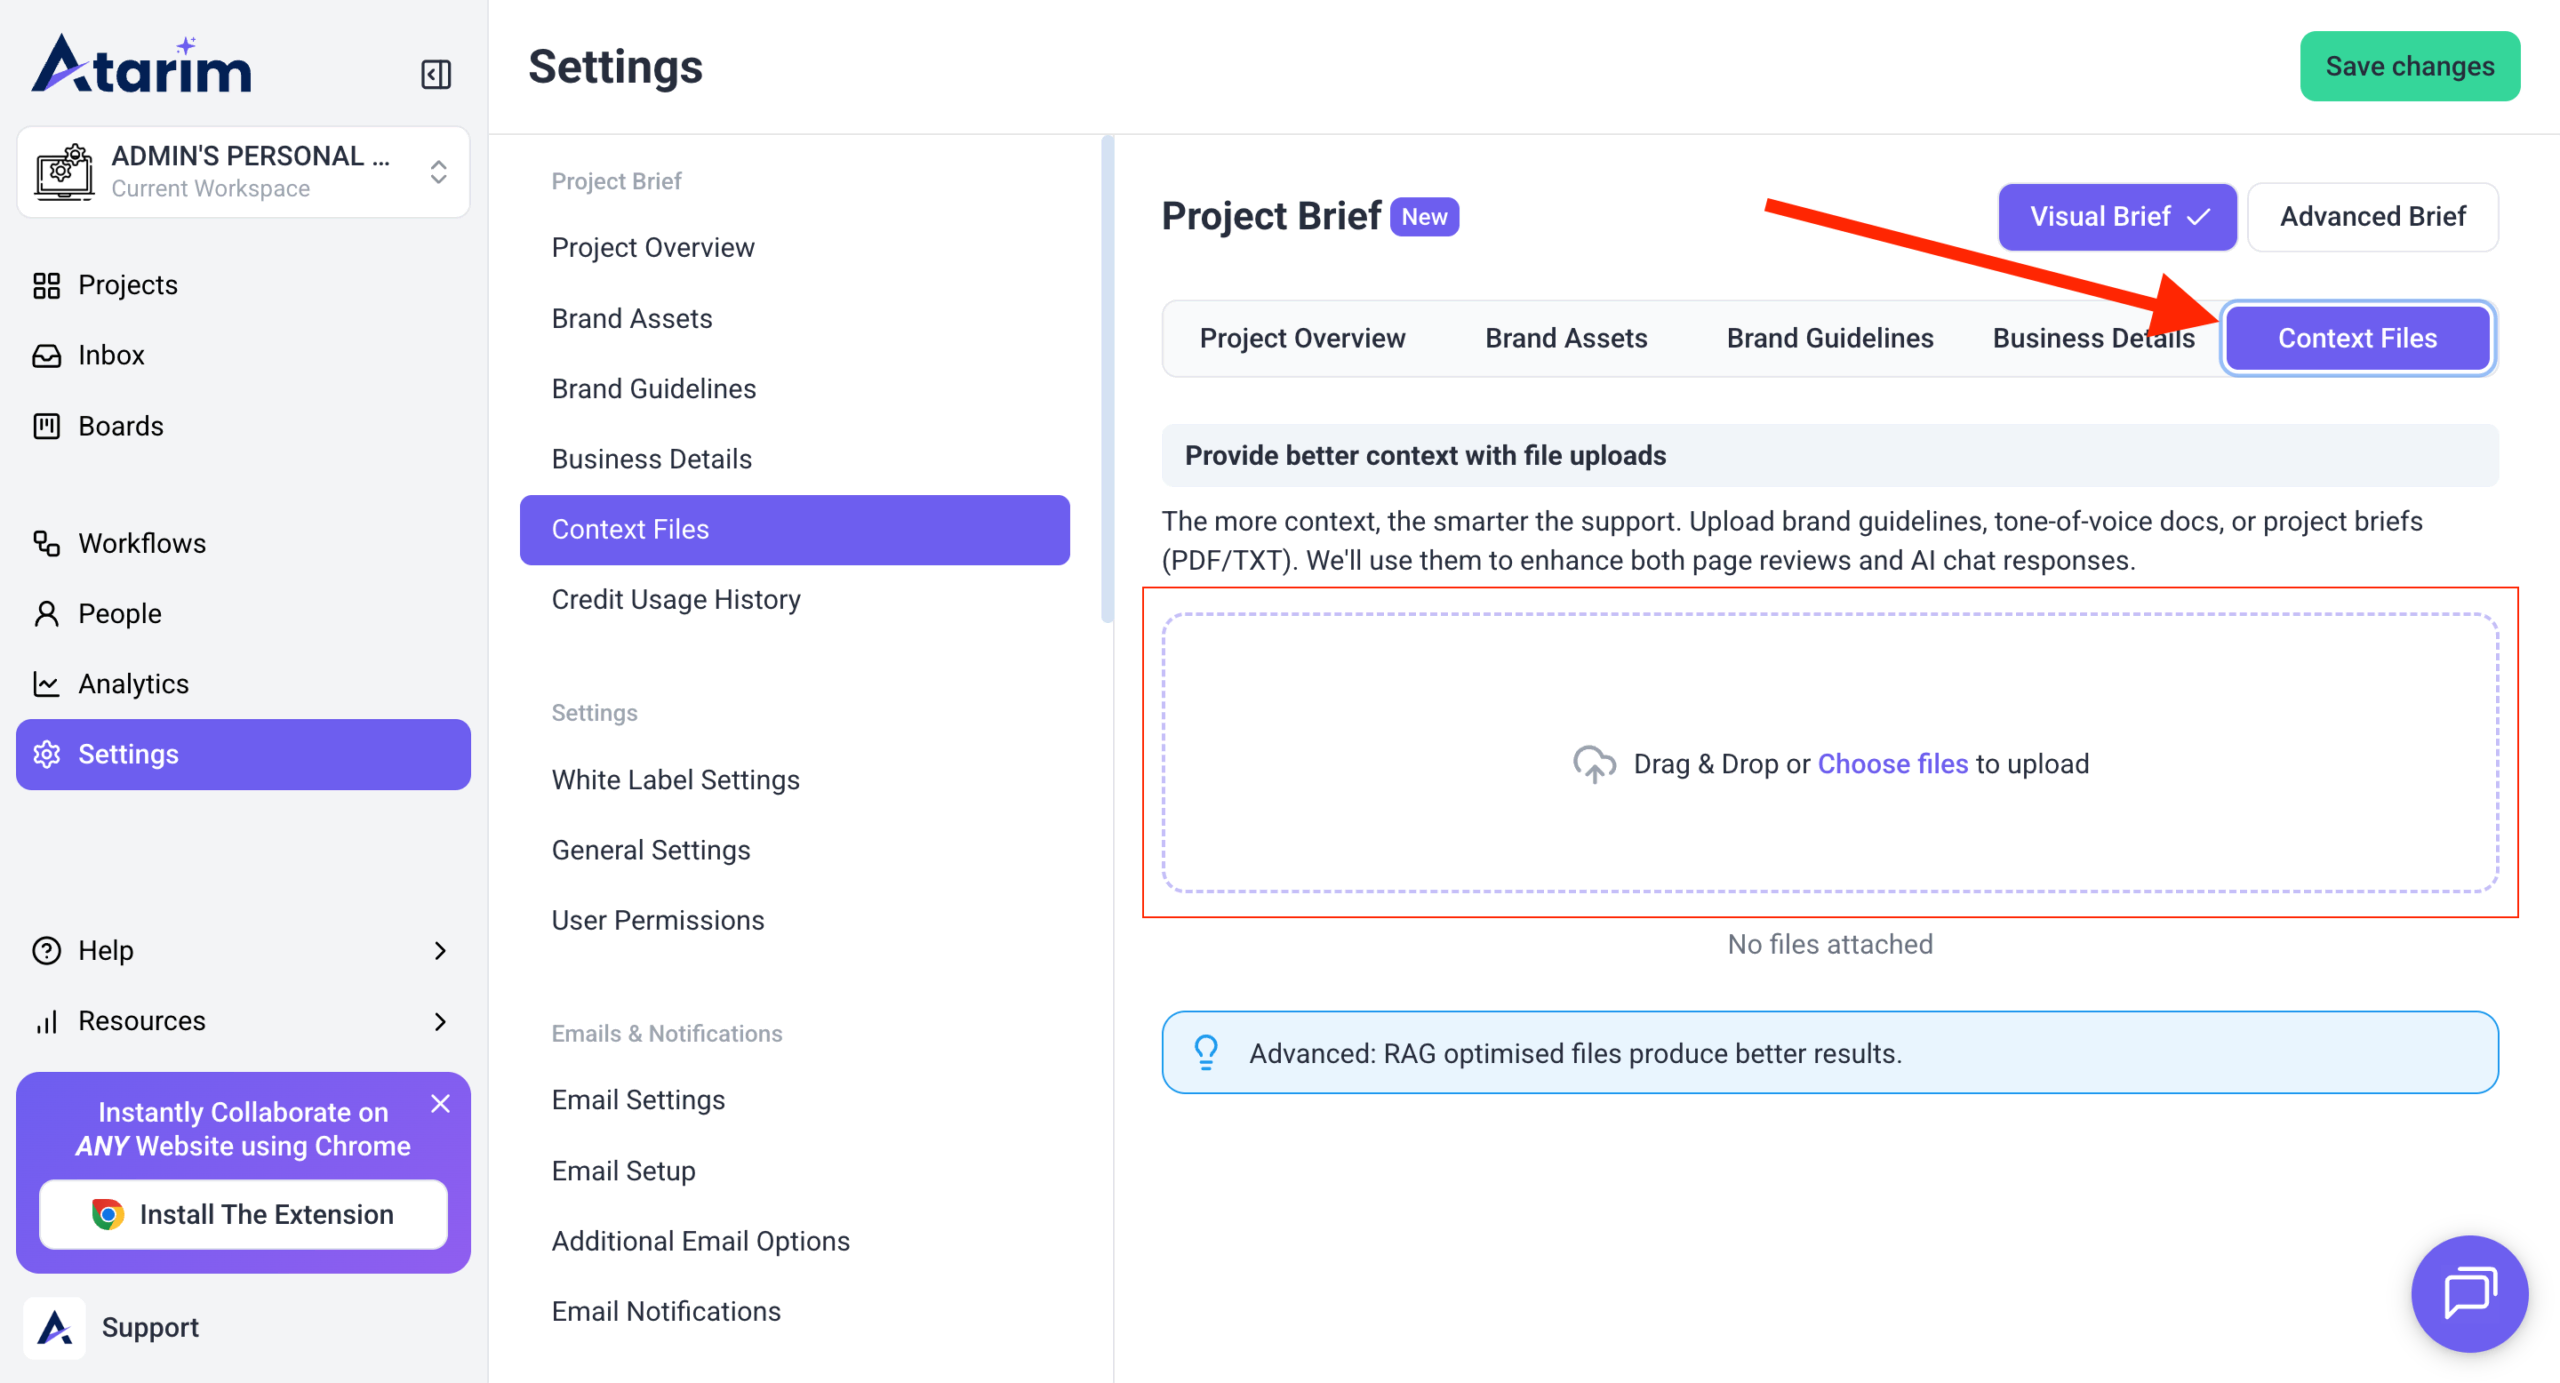
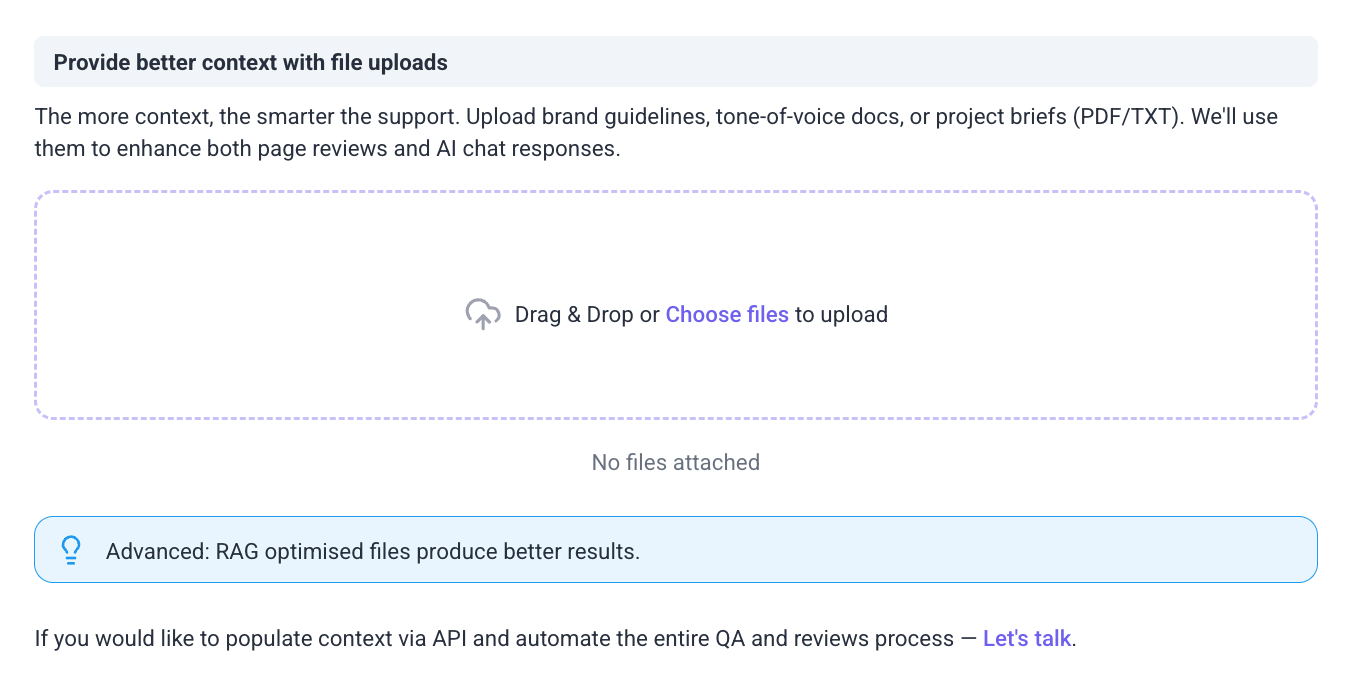
3. File Uploads For Context
Upload files to give the AI better project context during page reviews and AI chats. Files added in Project Brief → Context Files are used as background reference, so you do not need to repeat your brand standards, workflows, or business details each time.
Supported files shown in the interface include PDF and TXT.
Recommendation: Include your brand tone, QA process, or visual identity guides to ensure AI consistency across your team.
Instructions:
- Navigate to Settings → Project Brief → Context Files
- In the upload area, either drag and drop your file or click Choose files to browse your device.
- Select your TXT or PDF file from your computer
- Select the file you want to upload, wait for it to finish processing
- Once uploaded, confirm the file appears in your list of context files
- Click Save to apply changes
Why It’s Useful?
- Consistency: Your brand guidelines, tone, or QA standards are always applied.
- Compliance: Policies like accessibility or data protection can be reinforced automatically.
- Efficiency: Upload once, and every review benefits—no need to paste guidelines manually.
Examples Of Usage
- Upload a QA checklist or brand guidelines and the AI can reference them automatically.
- Upload a privacy policy and ask the AI to evaluate how well your page communicates user data practices.
This makes reviews more tailored to your workflows and ensures the AI has the right context for every project.
Note: Files uploaded here become “AI training” for your company context. Any new project without local overrides will inherit these defaults.
File upload is only available in the Global Settings, not in the Project Settings
Brand Guidelines
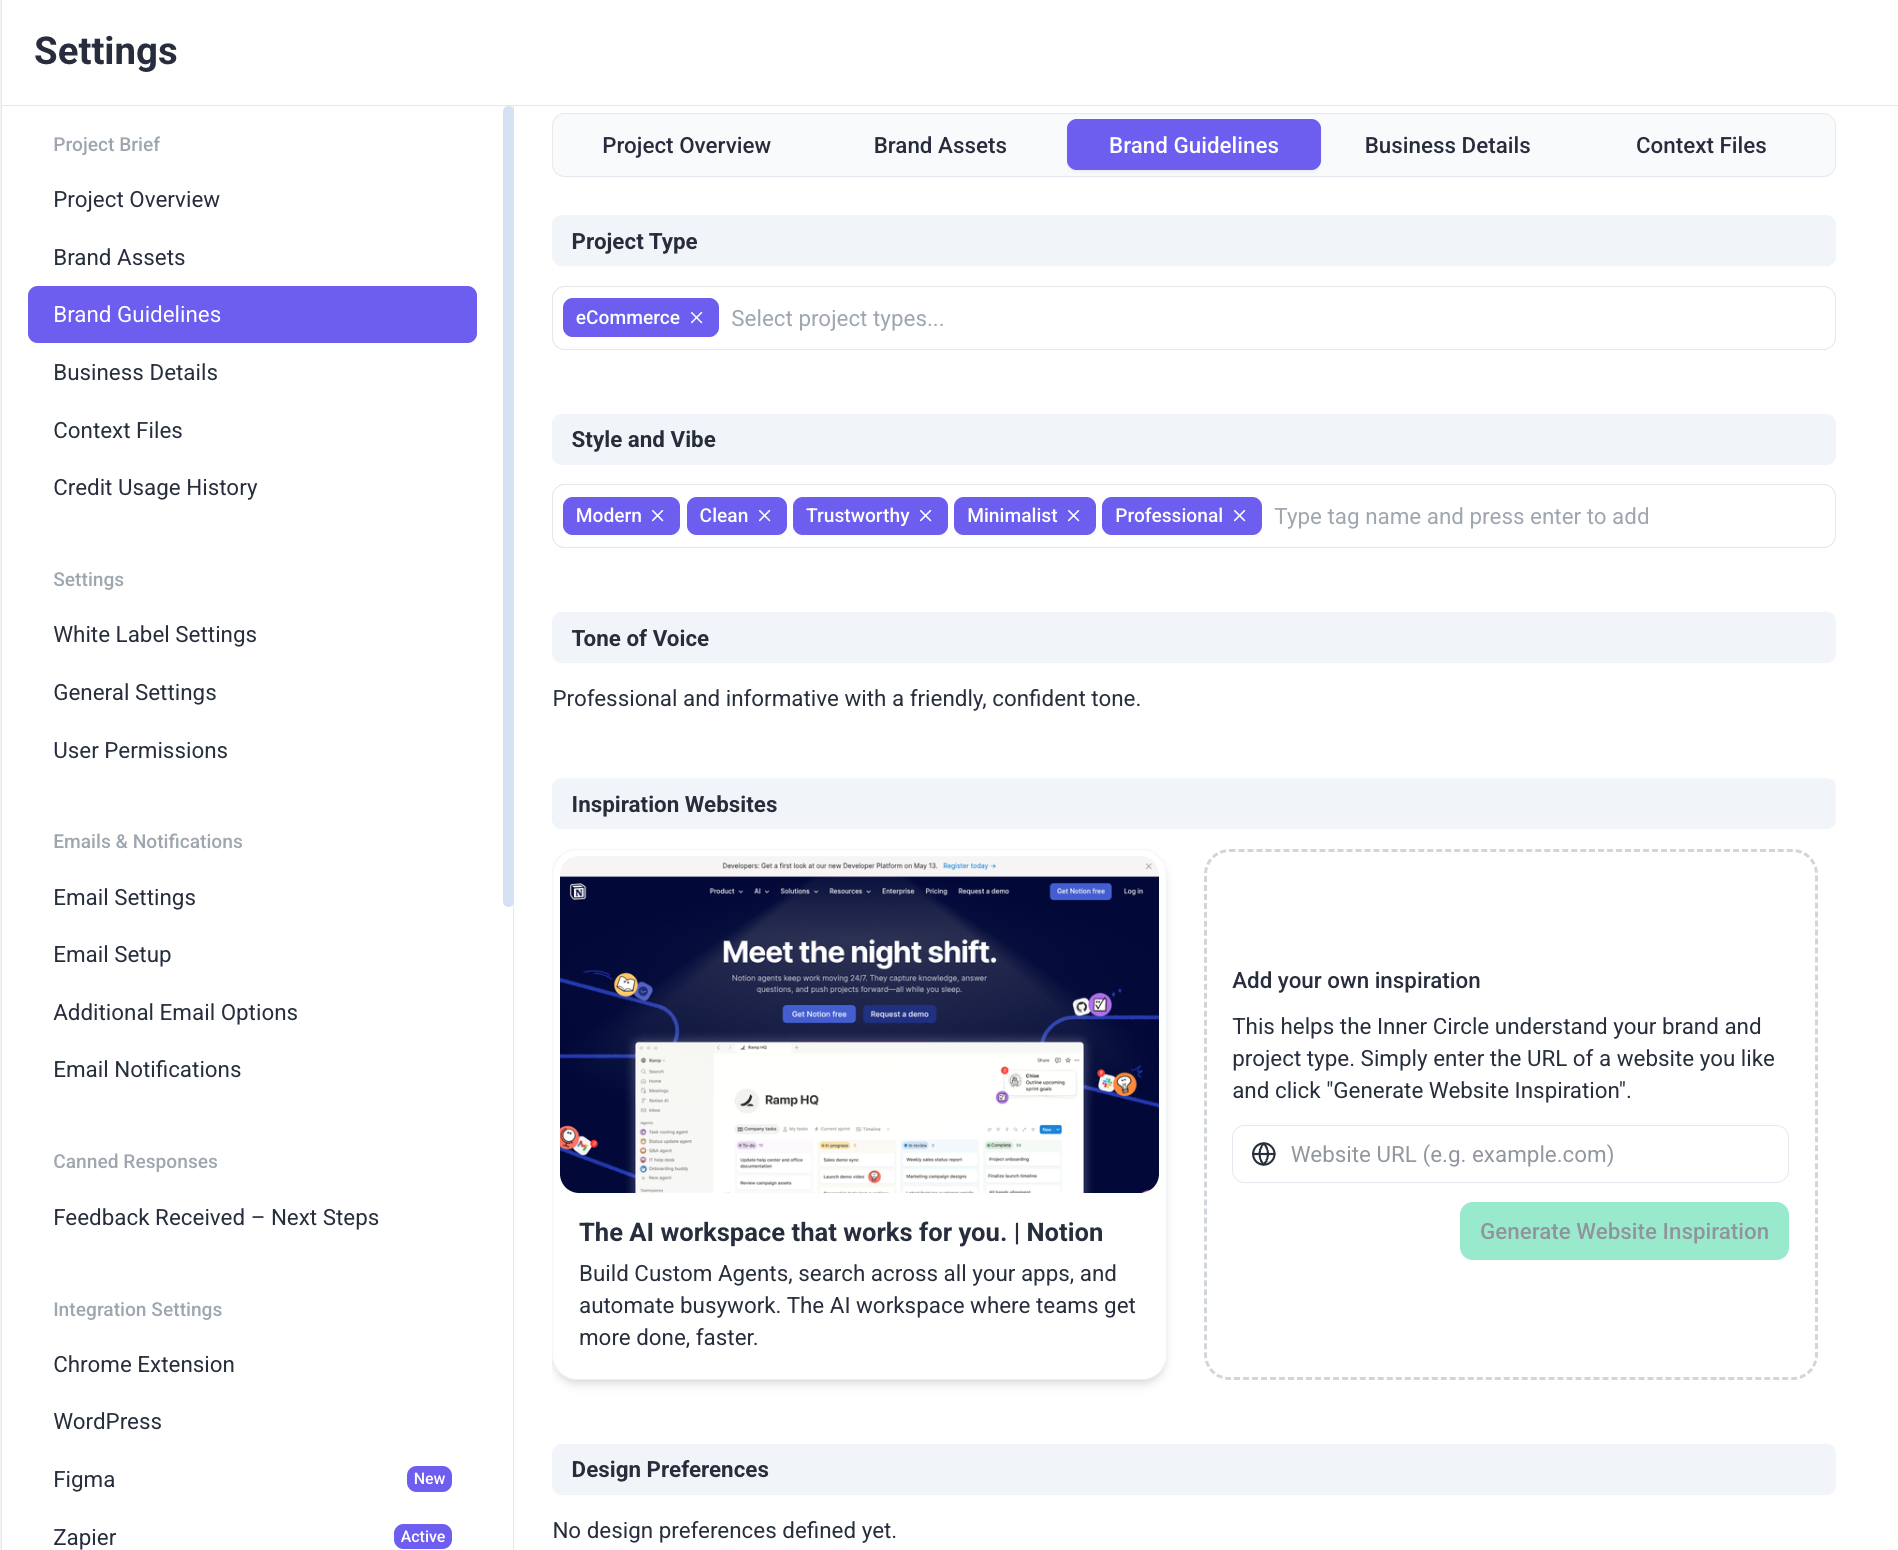
The Brand Guidelines section in Project Brief helps define your project category, brand personality, communication style, design direction, and visual boundaries. Completing these settings gives your team and AI tools stronger context for page reviews, content suggestions, and design recommendations.
Instructions
- Navigate to Settings → Project Brief → Brand Guidelines.
- In Project Type, choose the category that best matches your website or business.
- In Style and Vibe, type a keyword and press Enter to add each tag.
- In Tone of Voice, enter how your brand should sound and communicate.
- Under Inspiration Websites, enter a website URL and click Generate Website Inspiration.
- Add your preferred visual direction in Design Preferences.
- Add any styles or elements to avoid in Visual Constraints.
- Click Save changes.
What Each Field Does
Project Type
Select the type of website or product you are building.
Examples: Corporate Website, eCommerce, SaaS Platform, Landing Page, Web App
Style and Vibe
Use keywords that describe your brand personality or visual style.
Examples: Modern, Clean, Trustworthy, Bold, Minimalist
Tone of Voice
Define how your brand should sound in written communication.
Examples: Professional and informative, Friendly and casual, Confident and expert
Inspiration Websites
Add websites you like to help guide design direction and style references.
Design Preferences
List the layouts, UI elements, or visual choices you prefer.
Examples: Spacious layout, rounded buttons, strong CTA contrast, minimal navigation
Visual Constraints
List anything that should be avoided or limited.
Examples: No autoplay videos, avoid clutter, no excessive animations, avoid dark backgrounds
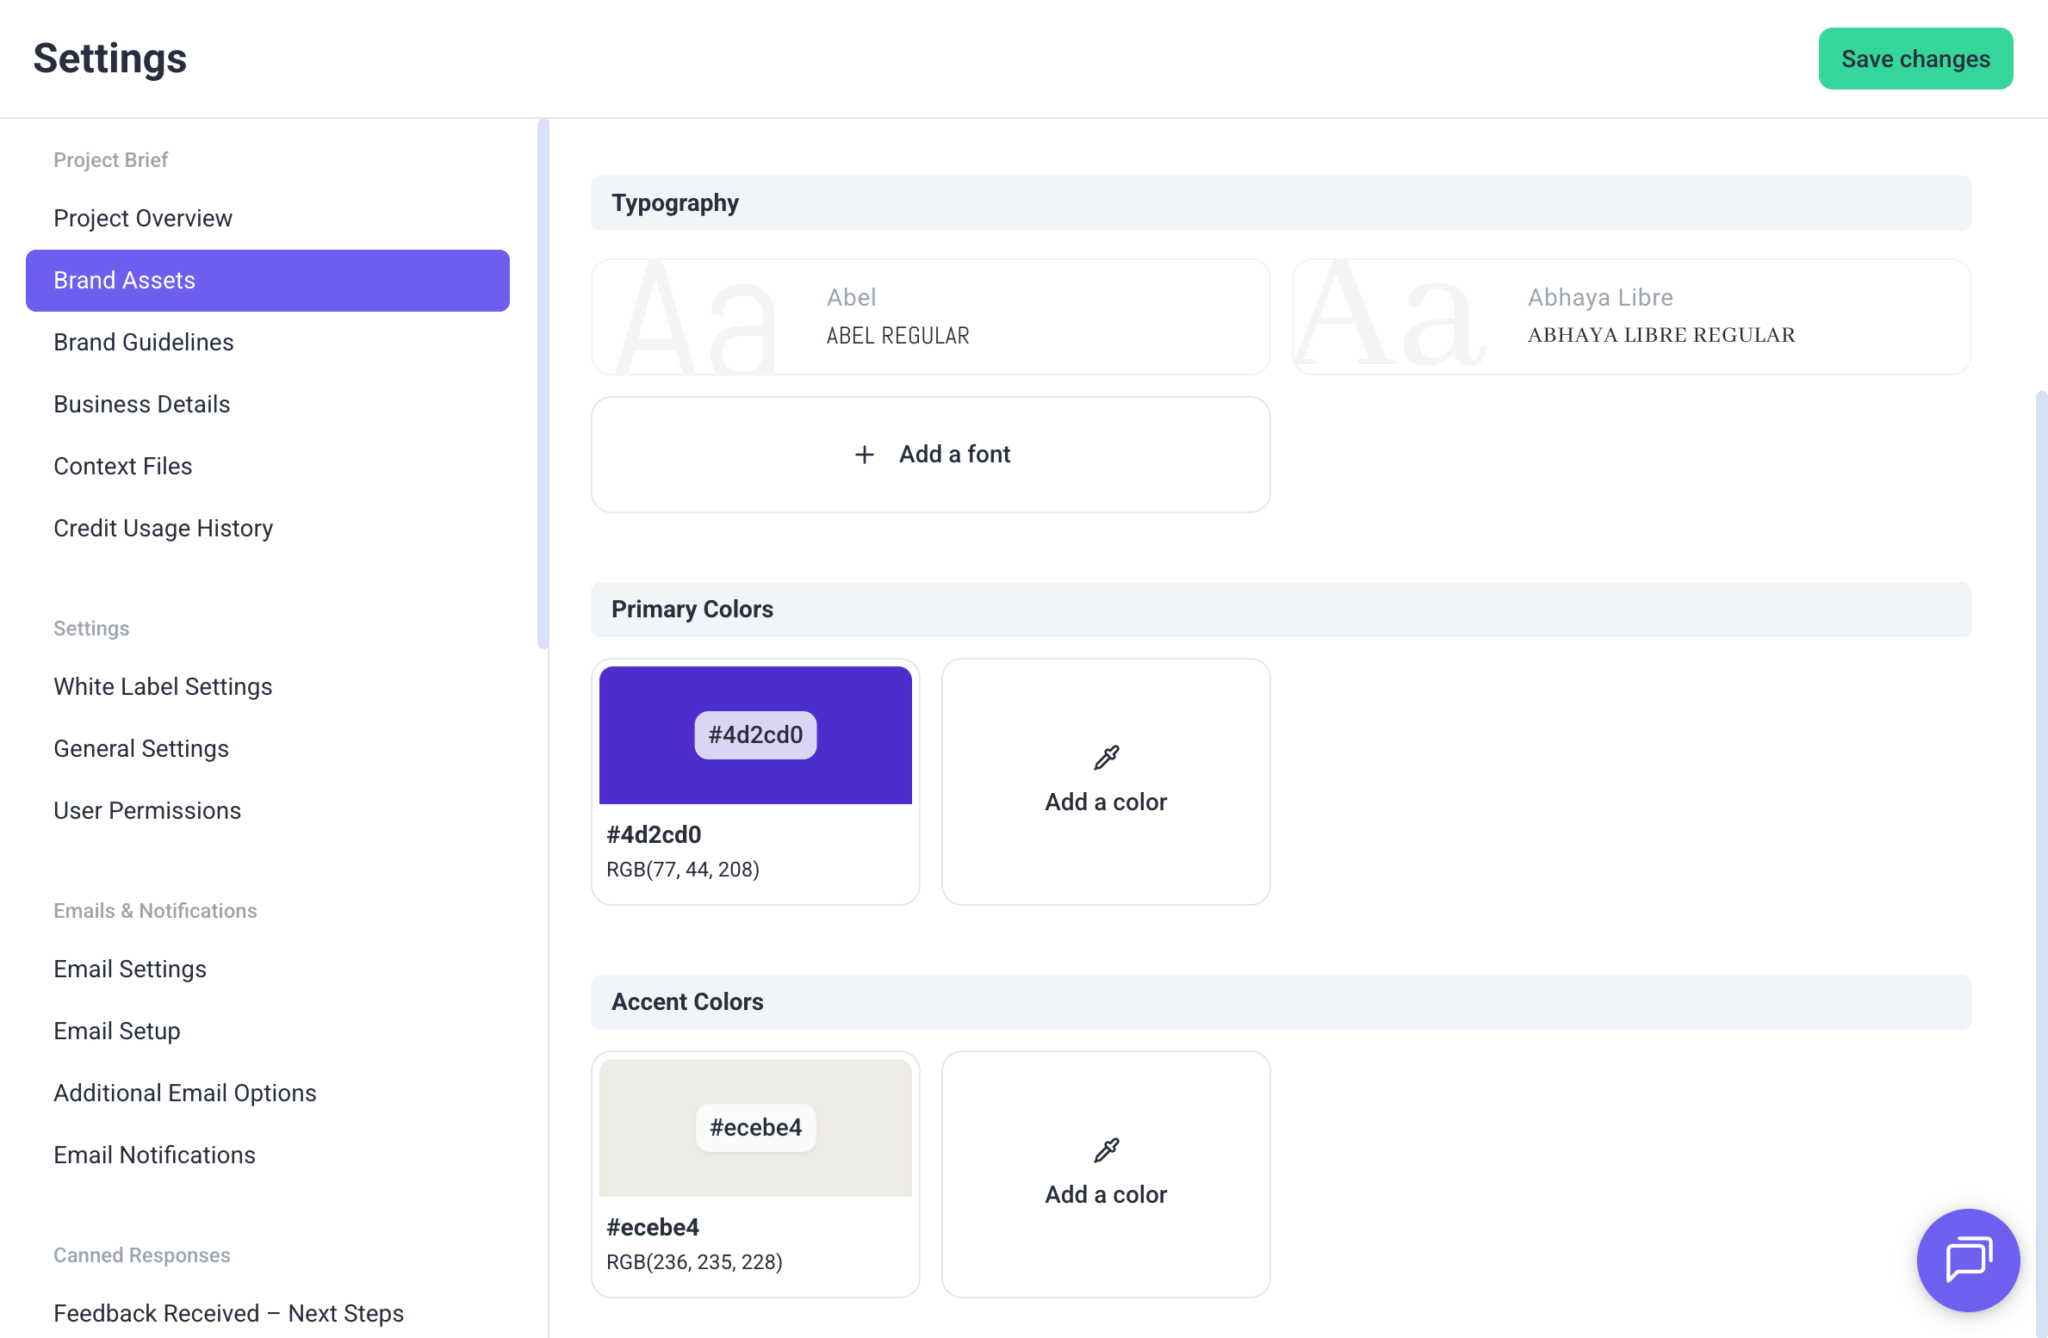
Brand Assets
The Brand Assets section in Project Brief allows you to store your visual identity elements in one place. Add your logo, favicon, fonts, and brand colors so your team and AI tools can better understand and align with your brand.
Instructions
- Navigate to Settings → Project Brief → Brand Assets.
- Upload your Logo & Favicon.
- In Typography, click Add a font and add your brand fonts.
- In Primary Colors, click Add a color and enter your main brand colors.
- In Accent Colors, click Add a color and enter supporting colors.
- Click Save changes.
What Each Field Does
Logo & Favicon
Upload your main logo and favicon for brand recognition and consistency.
Typography
Add the fonts used across your website, product, or marketing materials.
Examples: Inter, Poppins, Roboto, Helvetica
Primary Colors
Add your main brand colors used in logos, buttons, backgrounds, and core UI elements.
Examples: #635BFF, #0A2540, #FFFFFF
Accent Colors
Add supporting colors used for highlights, icons, badges, or secondary UI elements.
Examples: #00D4FF, #36CFC9, #F5F7FA
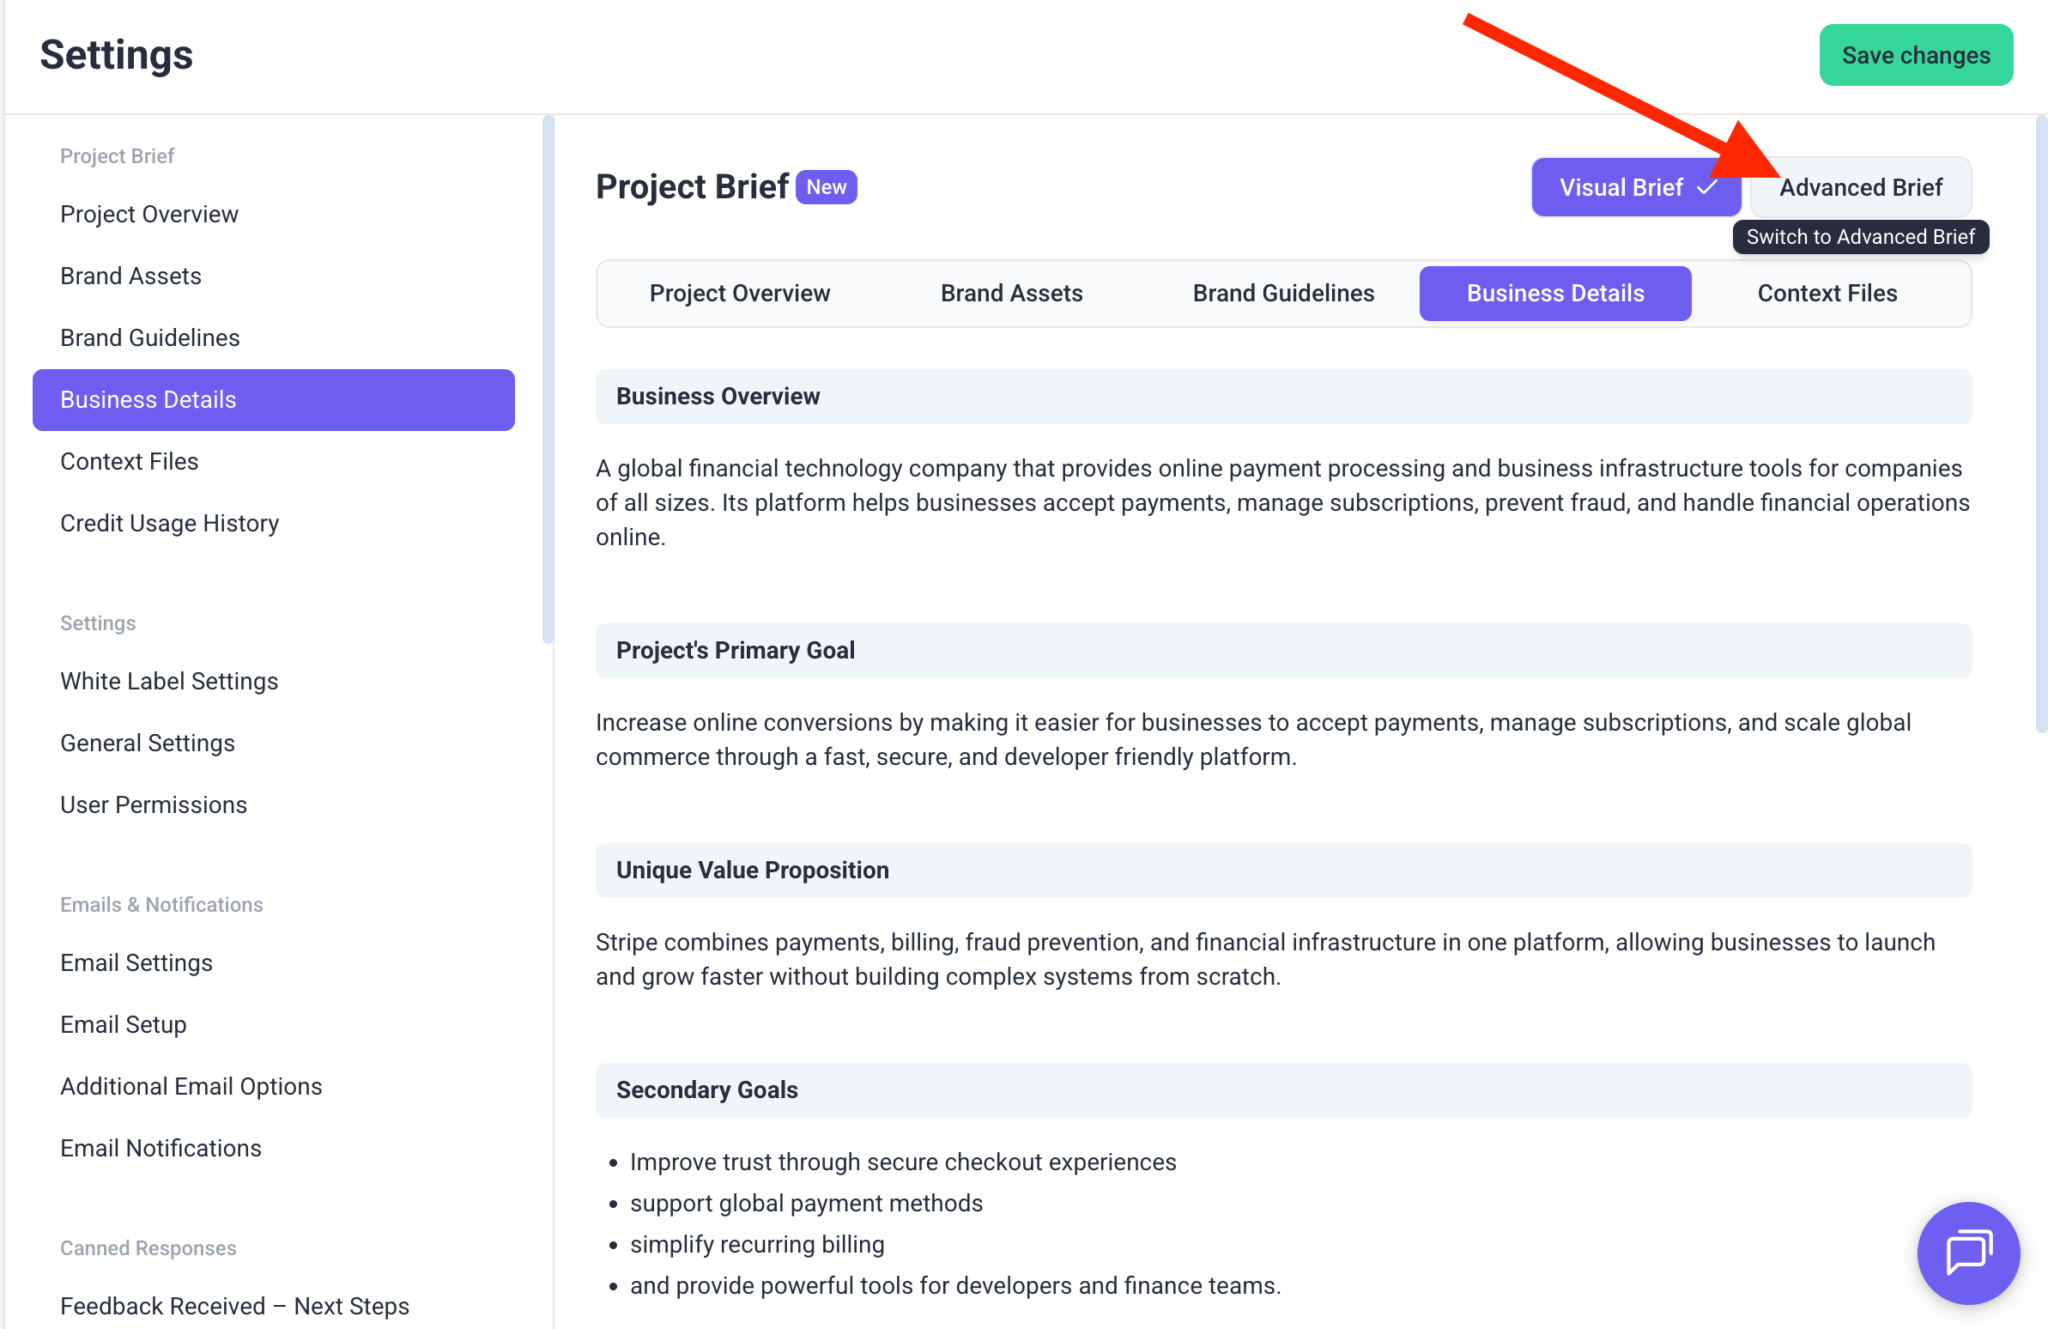
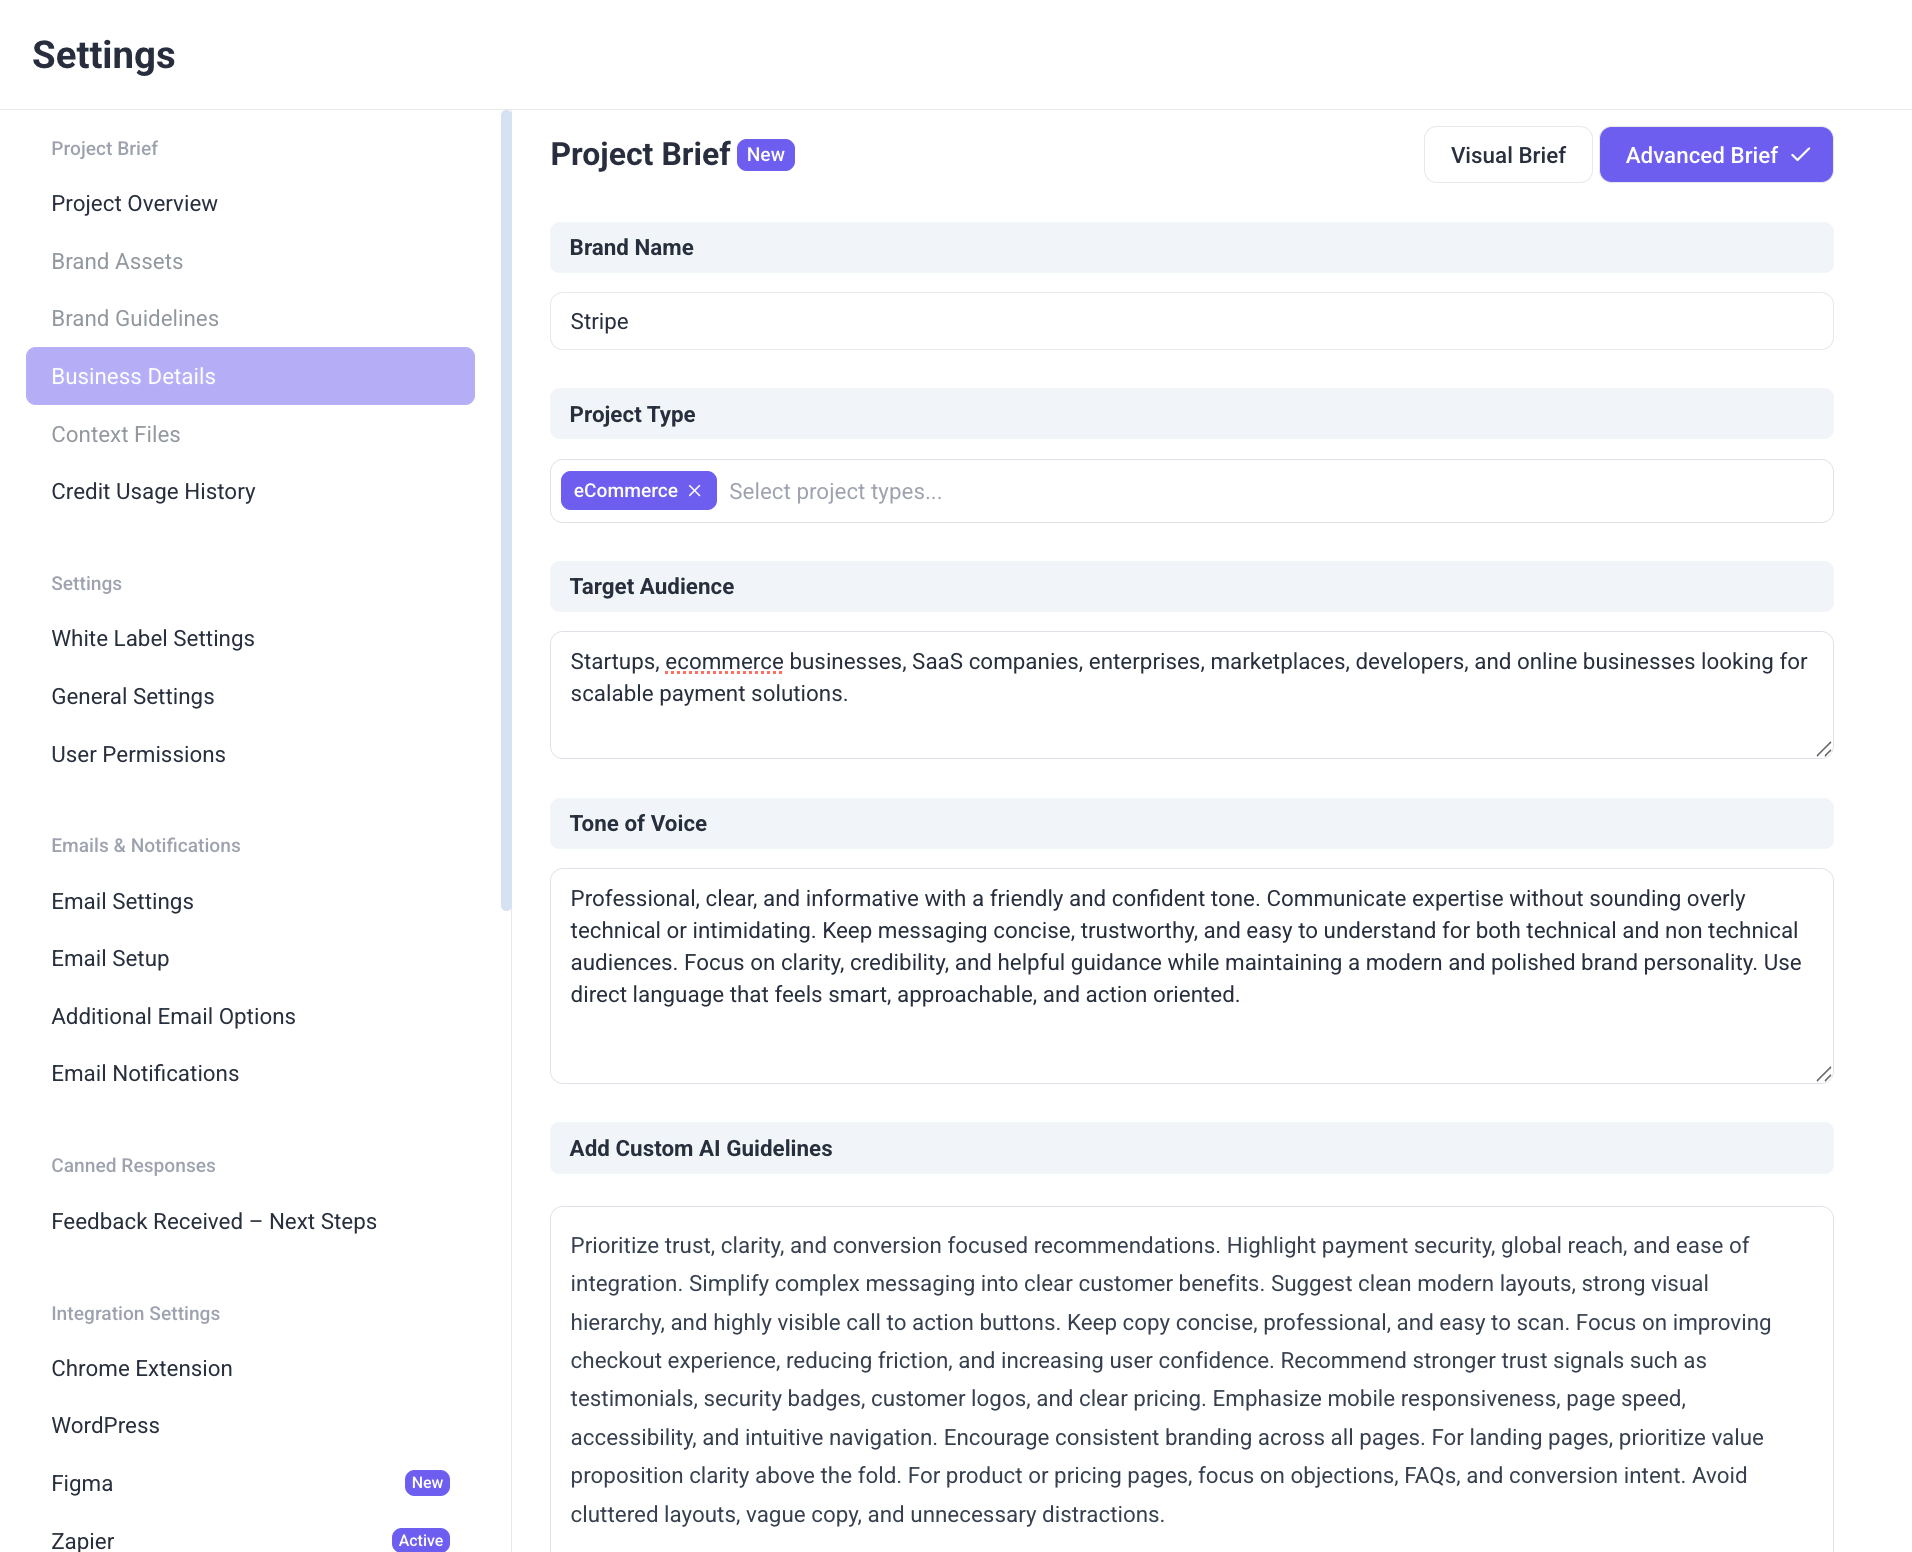
Advanced Brief
The Advanced Brief mode allows you to manually define detailed brand and business context in a structured format. Unlike Visual Brief, which uses separate guided sections, Advanced Brief lets you enter direct custom inputs that AI can use for page reviews, recommendations, and chat responses.
Instructions
- Navigate to Settings → Project Brief.
- Click Advanced Brief in the top right corner.
- A confirmation message will appear explaining that the Visual Brief will no longer be displayed.
- Click Switch to Advanced Brief to continue, or Keep the Visual Brief to cancel.
- After switching, complete the available fields shown on screen:
- Upload supporting files in the file upload section if needed.
- Click Save changes.
Warning: Switching to Advanced Brief replaces the Visual Brief layout and uses Advanced Brief content for AI responses.
What Each Field Does
Brand Name
Enter your company or product name.
Project Type
Select the category that best matches your website or business.
Examples: eCommerce, SaaS Platform, Corporate Website, Web App
Target Audience
Describe the users or customers you want to reach.
Tone of Voice
Define how your brand should sound in communication.
Add Custom AI Guidelines
Add custom instructions or important notes for the AI to follow.
Example: Focus on conversion clarity, keep messaging concise, prioritize trust signals.
File Uploads
Upload PDF or TXT files to provide additional brand or project context.
Tip: Use Advanced Brief when you want more direct control over AI guidance.
4. Override Context Per Project
Use this when a project has different branding or tone from your global setup. Project-level Brand Guidelines let you override the global defaults so the AI follows the correct style, audience, and messaging for that specific project. This is helpful when working with multiple clients, sub-brands, or campaigns that require a unique voice distinct from your global brand context.
Instructions:
- Open the Projects screen
- Click the three-dot menu → Project Settings
- Switch the Enable Global Settings option to Off.
- Go to the AI Project Settings tab.
- Click Generate From URL OR input custom details
- Click Save Changes to apply the updates.

Recommendation: Ideal for managing white-label clients, separate brands, or campaign-specific tones.
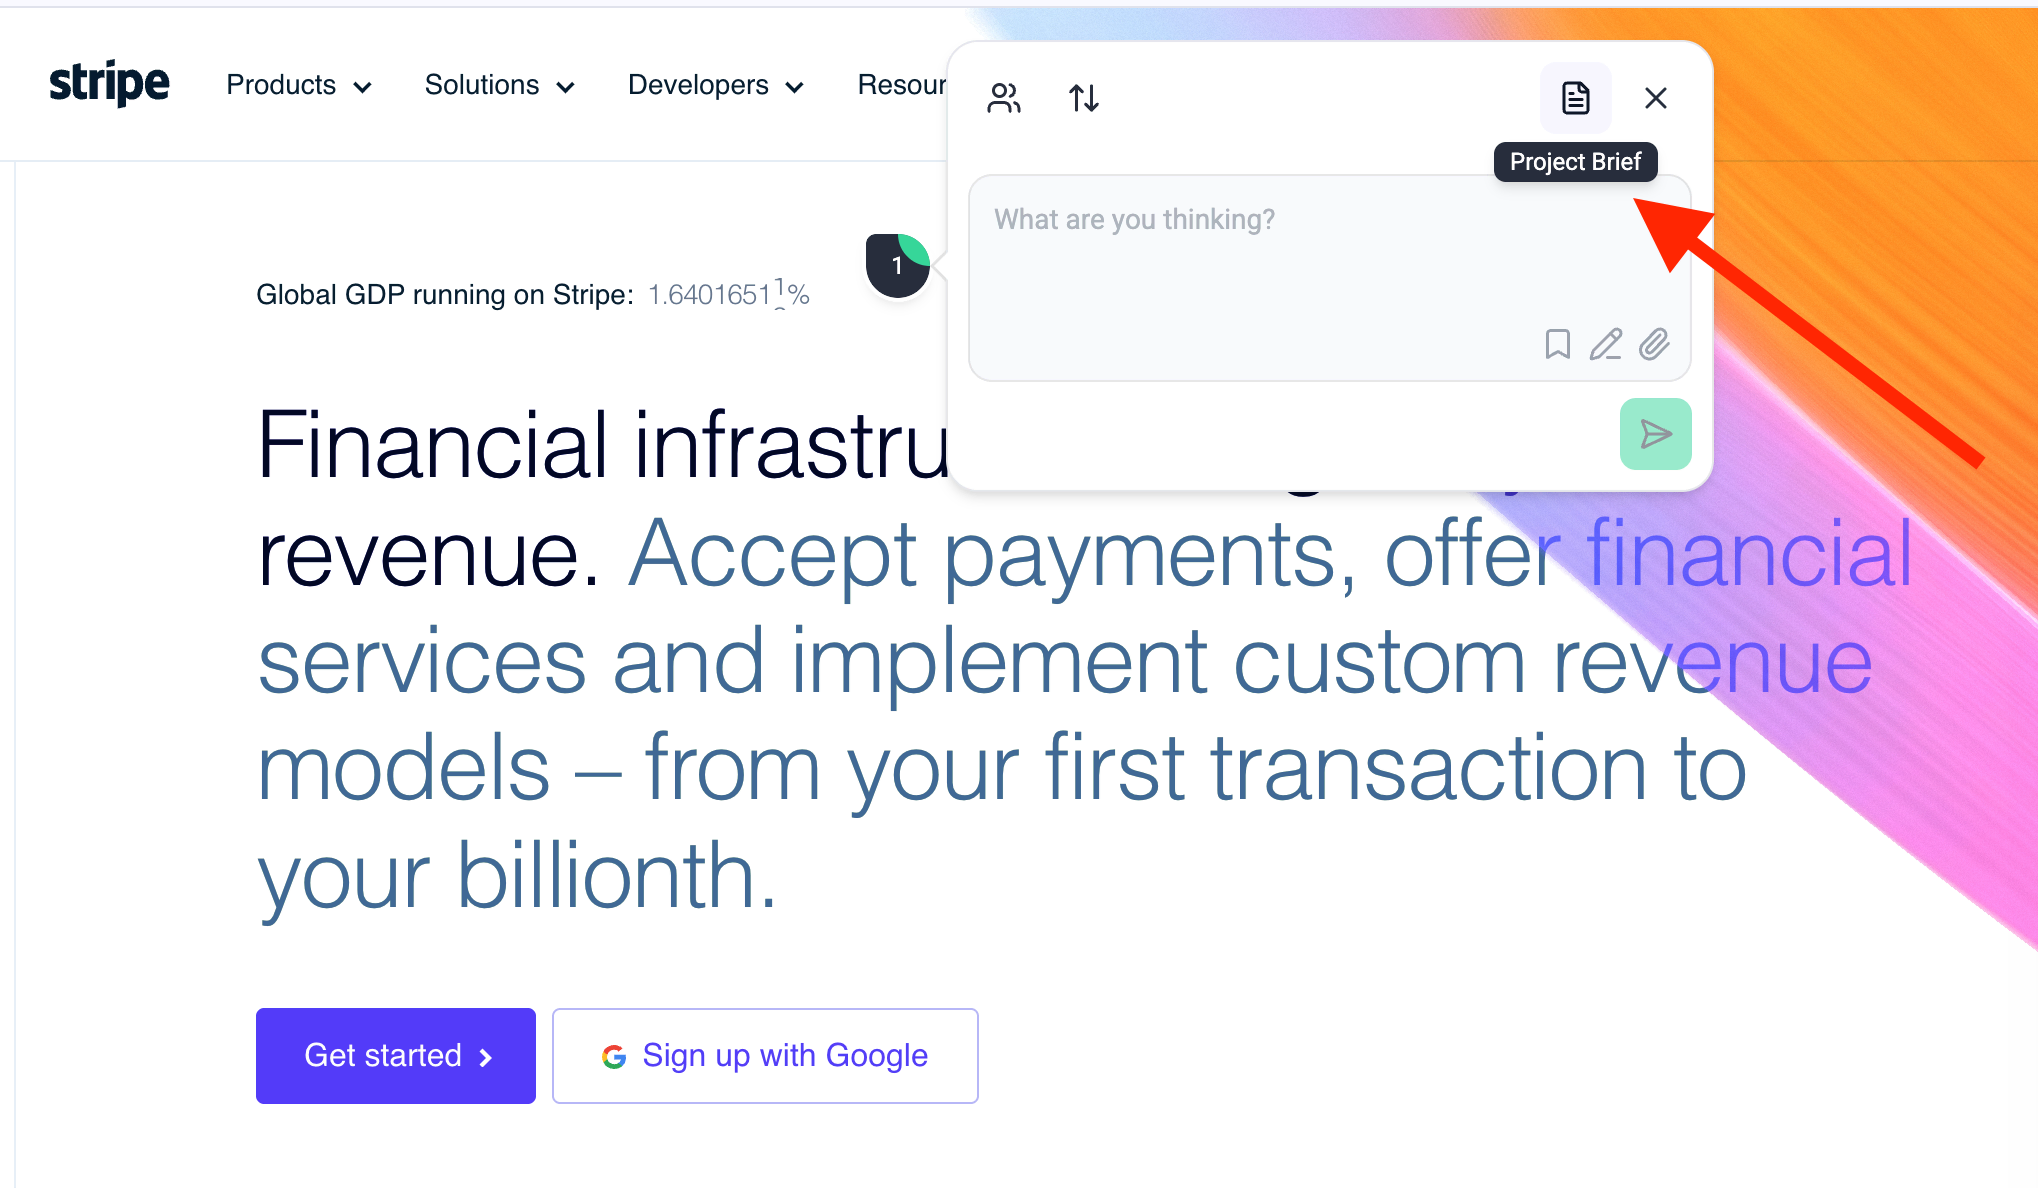
Tip: When creating a task in Collaborate Mode, you can open the Project Brief directly from the task panel. This gives you instant access to your brand, business, and project context without leaving the page. Use this when you need to review goals, tone of voice, audience details, or AI settings before submitting feedback.
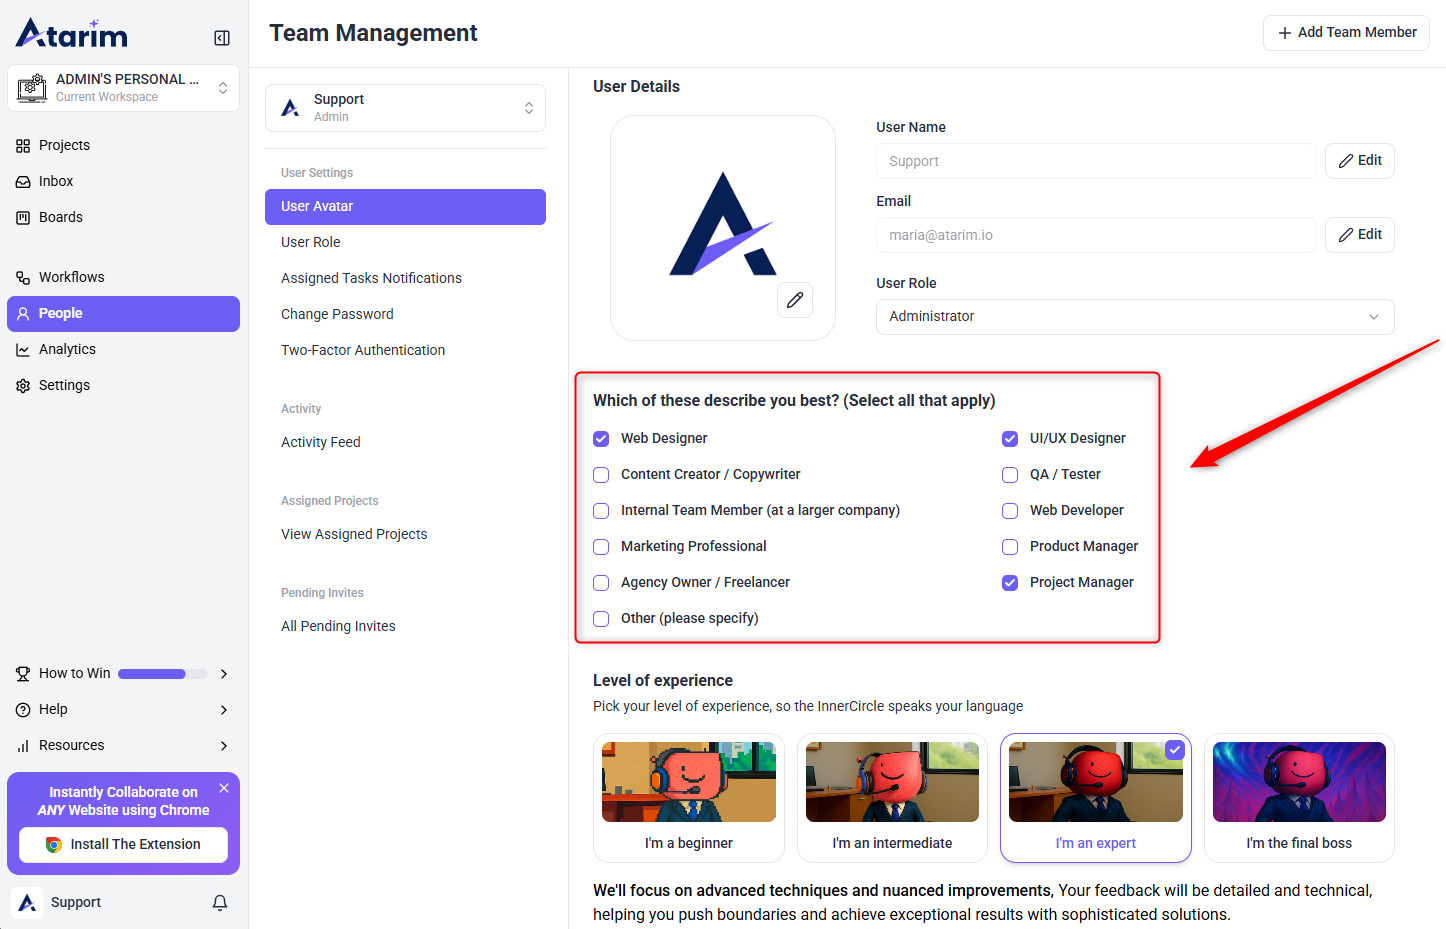
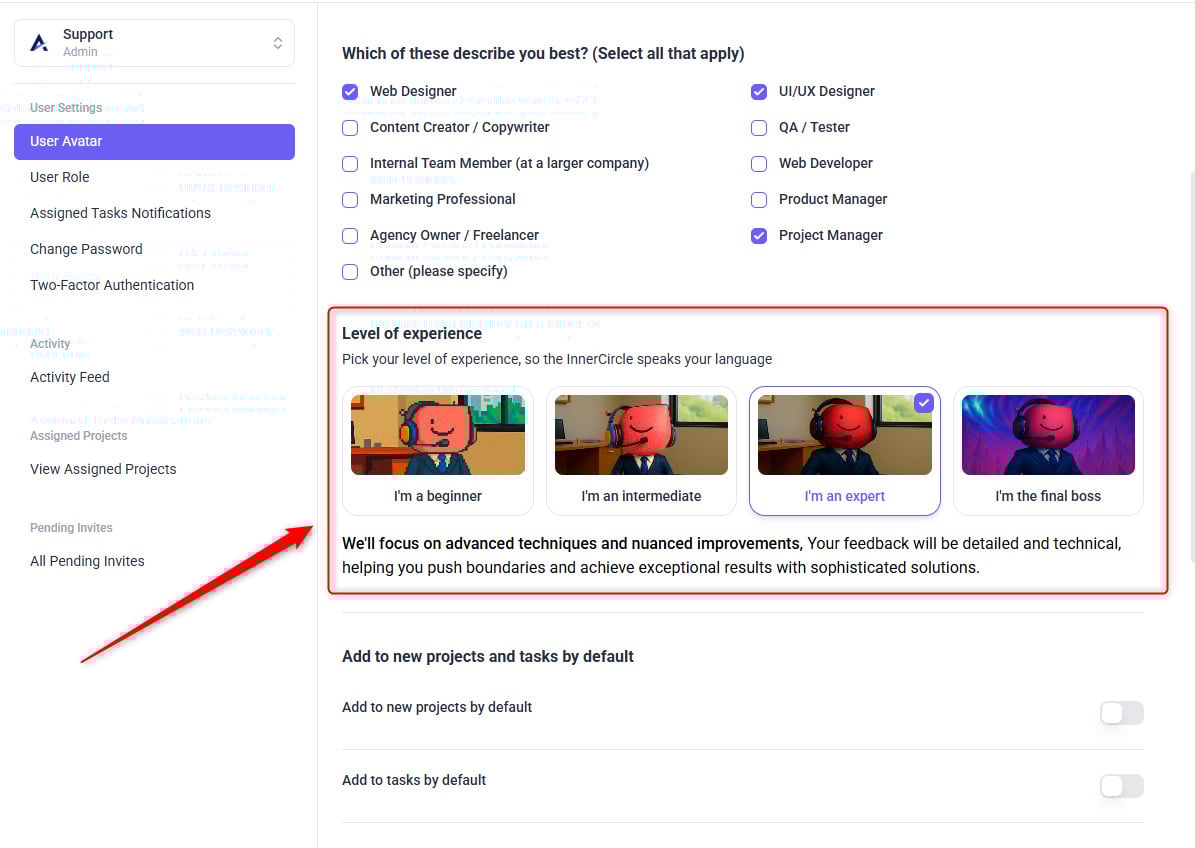
5. User-Level Context – Define Who You Are
Your User Profile helps Atarim AI personalize how it communicates with you. By selecting what best describes your role and your level of experience, the AI adjusts its tone, detail, and recommendations — so every agent speaks your language.
Note: These settings personalize your communication experience only — they don’t affect other team members.
Instructions:
- Click People from the left navigation panel.
- Select your User Name from the list.
- Under Which of these describe you best?, choose all roles that apply.
- Web Designer
- Content Creator / Copywriter
- UI/UX Designer
- QA / Tester
- Web Developer
- Product Manager
- Project Manager
- Marketing Professional
- Agency Owner / Freelancer
- Internal Team Member (at a larger company)
- Other (please specify)
- Scroll to Level of Experience and pick one:
- I’m a beginner – Clear, supportive feedback with detailed “why” explanations.
- I’m an intermediate – Balanced and practical advice that builds on existing knowledge.
- I’m an expert – Advanced, detailed feedback with technical depth.
- I’m the final boss – Concise, high-level insights and strategic recommendations.
- That’s it — your selections auto-save automatically.
Tip: You can update these anytime to help Atarim AI fine-tune how it communicates with you during reviews and chats.
FAQs
Yes. You can modify the AI-detected fields anytime.
That project will ignore global settings and use its own context.
No. Context is for internal use and AI feedback accuracy only.