
1. Connecting Your Email to Atarim
To start using the Email Inbox, follow these steps:
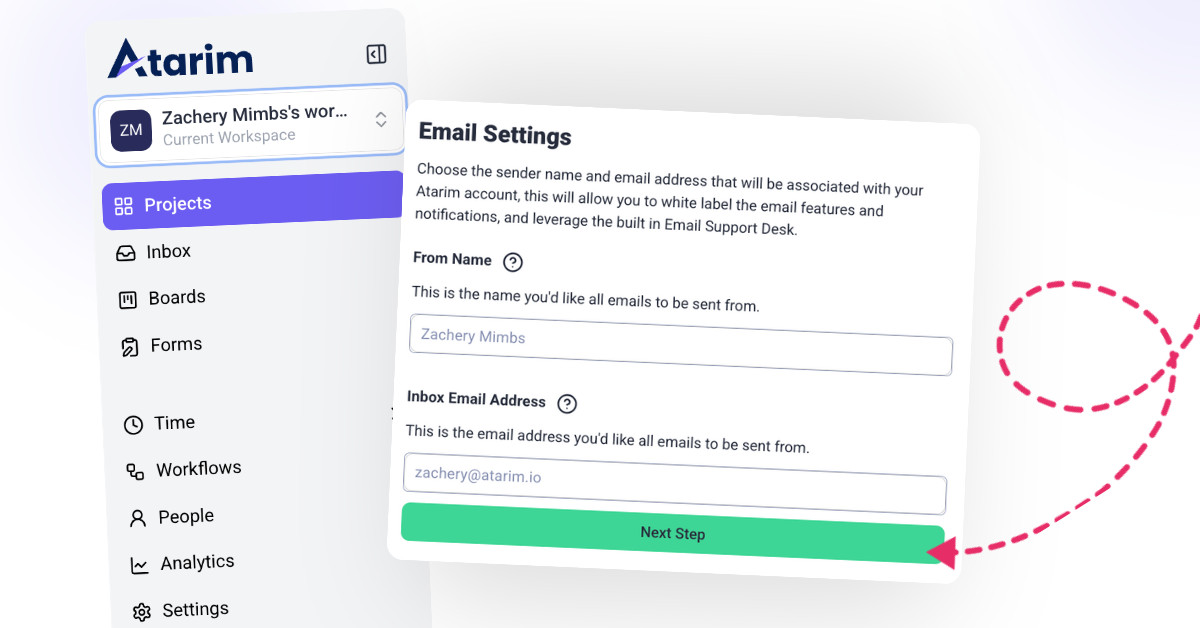
- Navigate to Settings → Email Settings in your Atarim dashboard.
- Click Connect Email and enter your email address.
- Configure your inbox email settings:
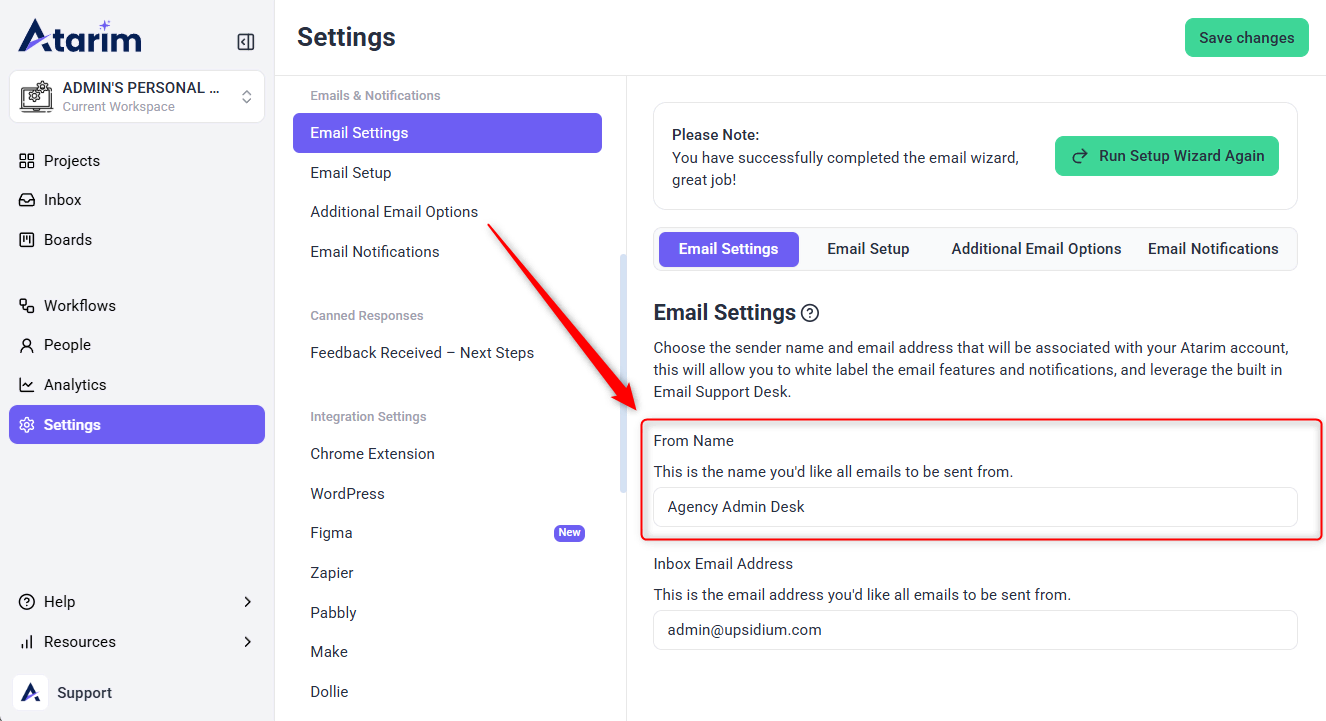
- From Name: This is the sender name that clients will see.
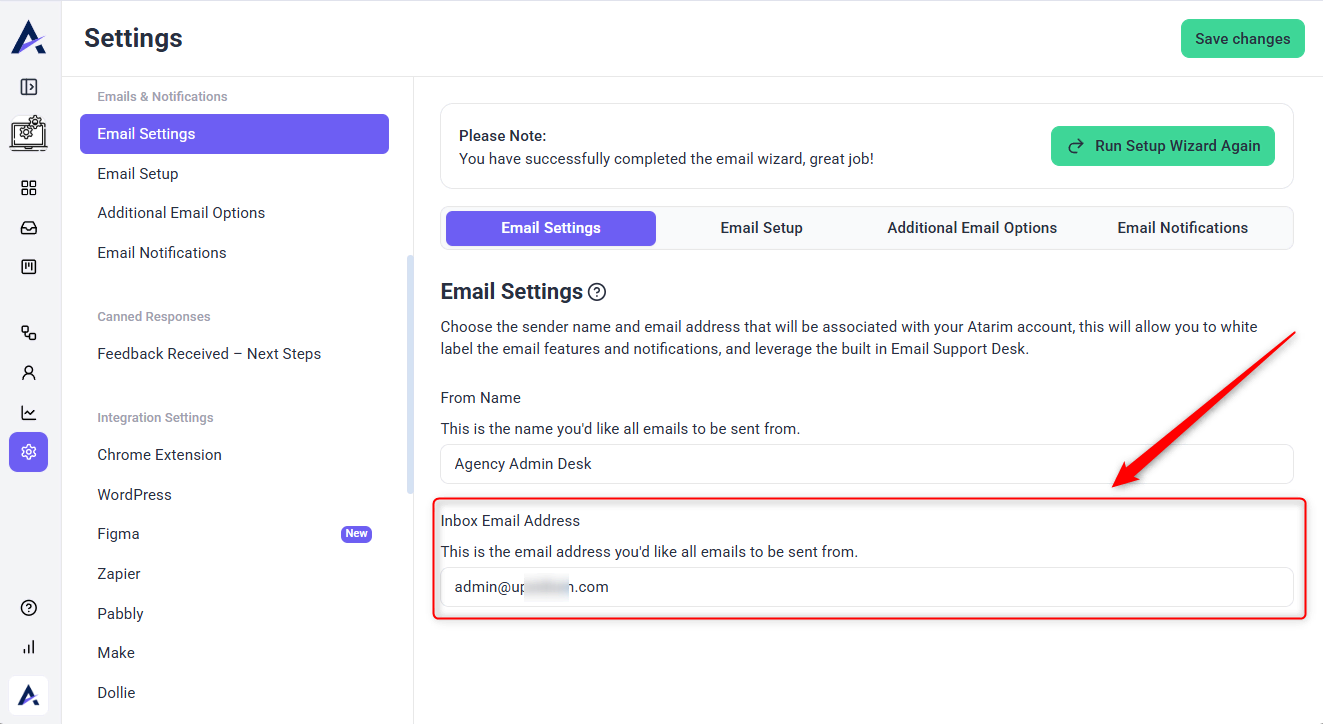
- Inbox Email Address: The email that will be used for sending and receiving messages.
- Click Save Changes to finalize the connection.
Tip: Use your agency email (e.g., support@youragency.com) instead of personal emails for a professional touch.
2. Setting Up Email Forwarding
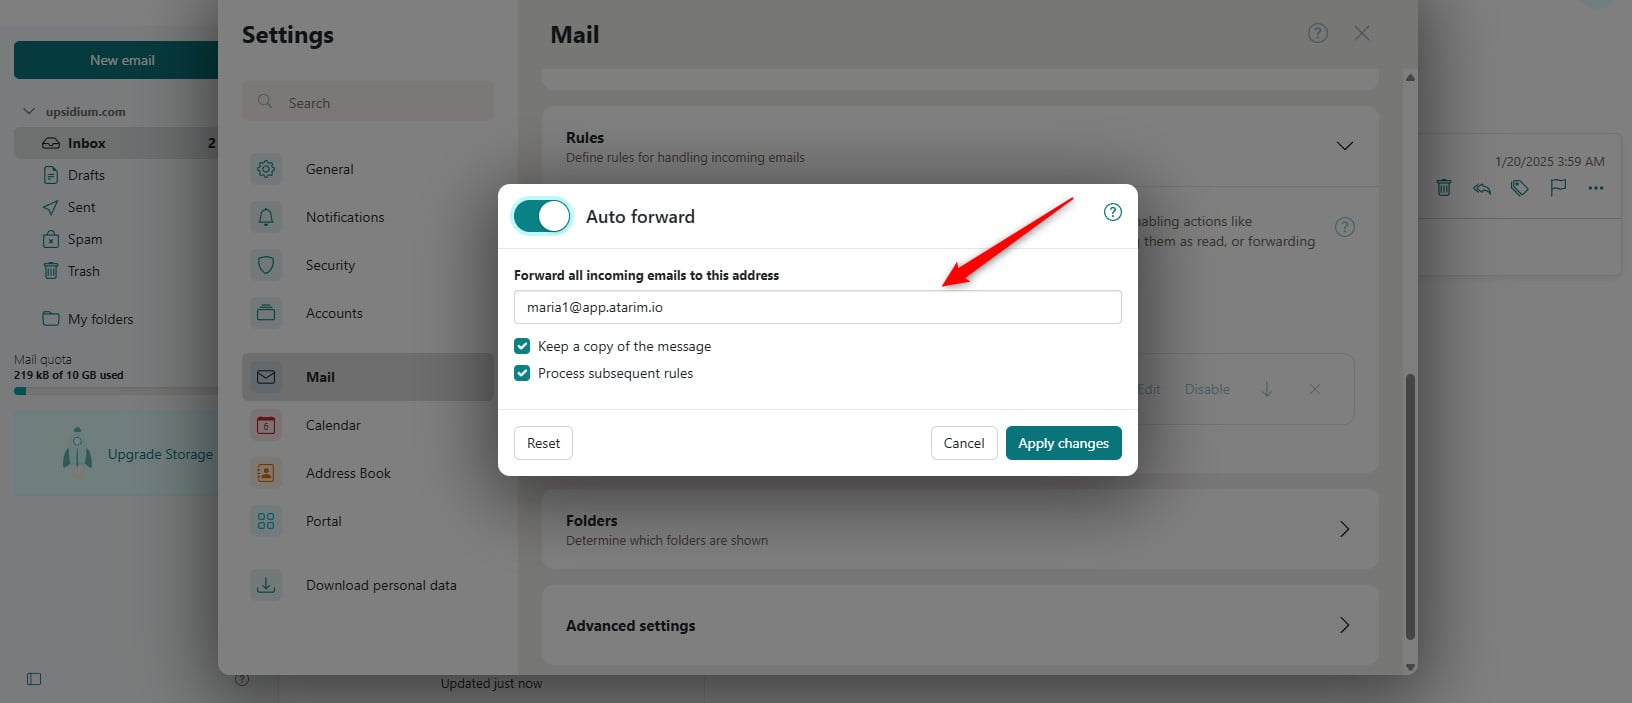
If you use Google Workspace, Outlook, or another email provider, you need to forward incoming emails to Atarim:
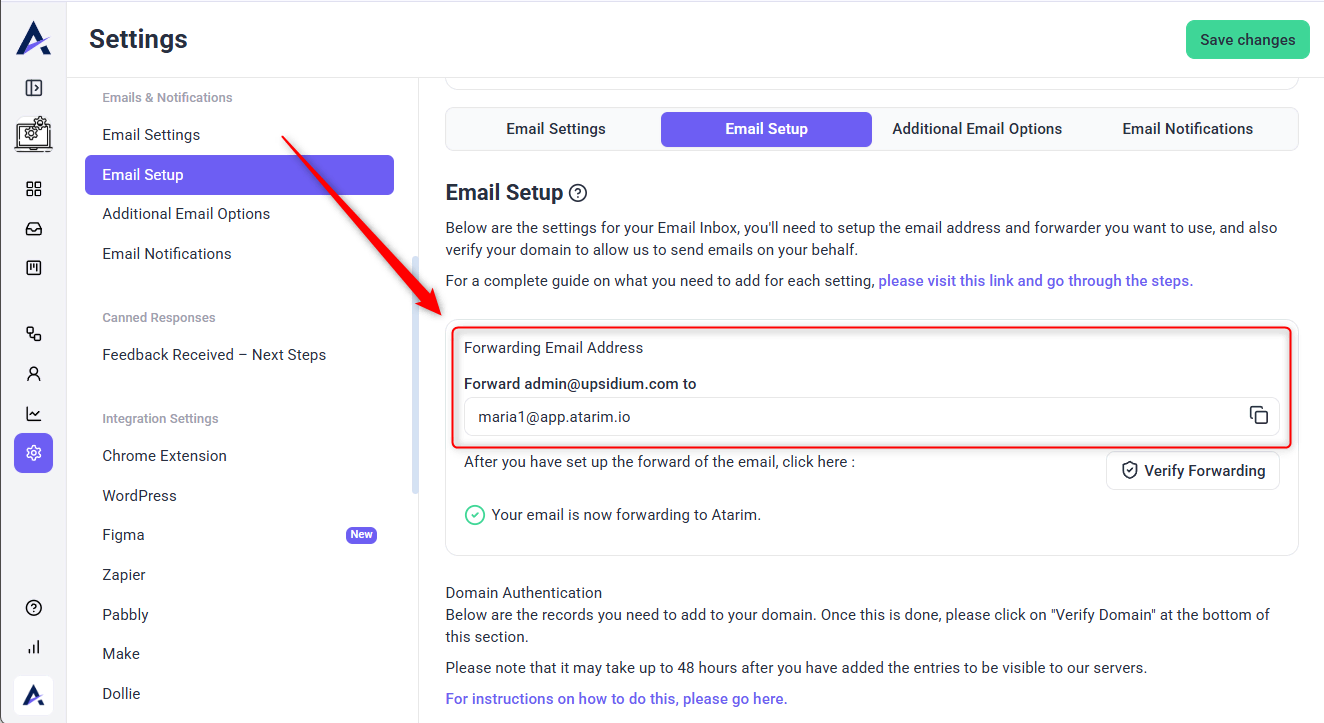
- In your email provider settings, locate the Forwarding & POP/IMAP section.
- Add your Atarim forwarding address (provided in the settings).
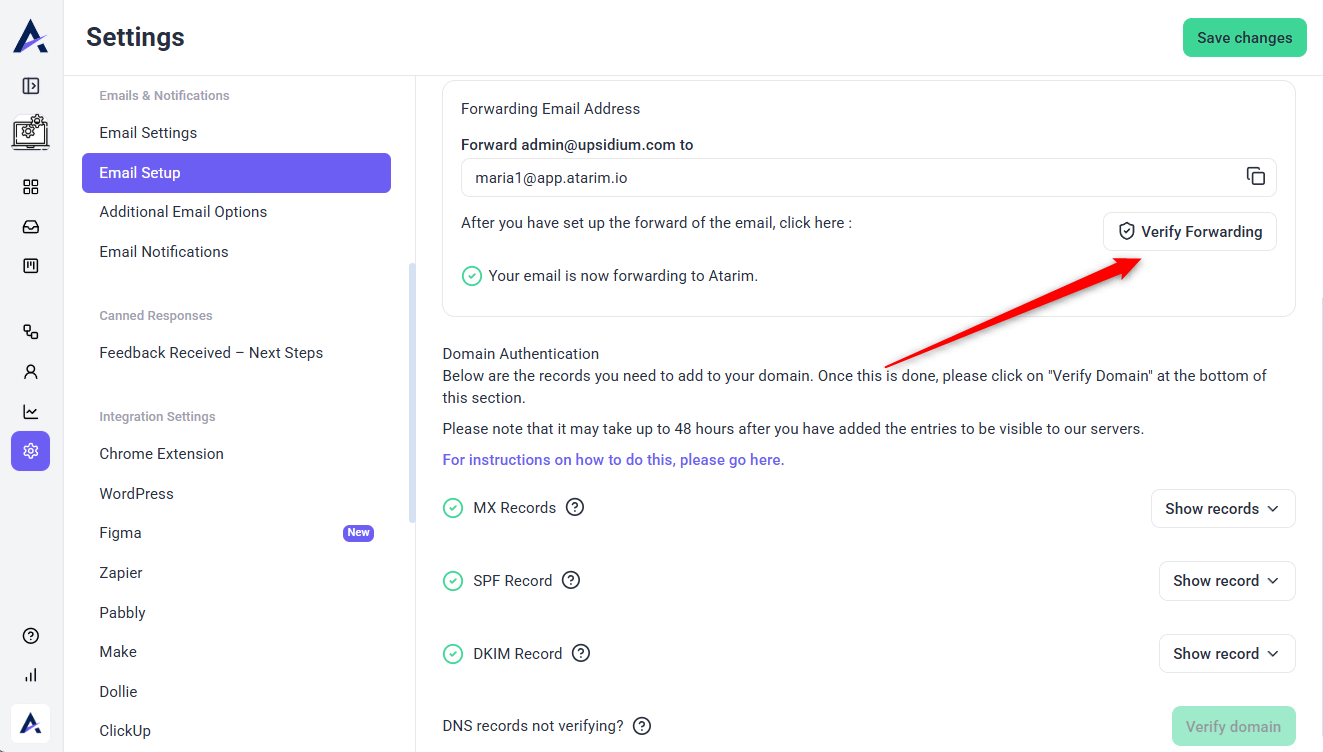
- Save and confirm forwarding by clicking the Verify Forwarding button in Atarim.
This allows you to manage your email communication entirely from within the platform. This step requires domain authentication, which you can learn more about by reading our article: Verifying domains on Atarim.
Note: Once verified, all client emails will be automatically routed to your Atarim inbox!
3. Check Your DNS Hostname Before Verifying
When setting up email forwarding or domain authentication, Atarim may ask you to add DNS records such as SPF, DKIM, MX, or TXT records in your domain provider.
Some DNS providers automatically add your domain name to the end of the hostname. If this happens and you enter the full hostname, your domain may be added twice, which can cause verification to fail.
Example
If your domain is: yourdomain.com
And Atarim provides a hostname like: example.yourdomain.com
Your DNS provider may automatically add .yourdomain.com at the end. If you enter the full hostname, it may be saved as: example.yourdomain.com.yourdomain.com
Warning: This duplicated hostname will prevent the DNS record from verifying correctly.
What To Do
Before saving your DNS record, check how your domain provider handles hostnames.
If your provider automatically adds your domain name, enter only the first part of the hostname instead of the full value.
For example, instead of entering: example.yourdomain.com
You may only need to enter: example
Note: This can apply to SPF, DKIM, or other TXT records used during email setup.
Warning: Always review the final saved hostname in your DNS provider before verifying the setup in Atarim.
4. Verifying Forwarding
- Once you’ve configured the forwarding, you can use the “Verify Forwarding” button to check your settings.
- Once you click the button, an email will be sent to the inbox address you set up, which will let you know that you’re good to go!
Note: Verification may not work immediately after updating DNS records or forwarding settings. DNS changes can take time to propagate depending on your domain provider. Wait a few minutes, then click Verify Forwarding again. In some cases, propagation may take longer, so allow additional time before retrying.
If verification still fails, check the saved hostname in your DNS provider and make sure your domain name has not been added twice. You can also take a screenshot of the DNS or forwarding records saved in your provider and share it with support for review. How to Get Help and Support with Atarim
FAQs
No, Atarim acts as a centralized email management system but does not replace providers like Gmail or Outlook.
Yes! Replies will be received inside Atarim, keeping all communication in one place.
Unrecognized emails stay in the inbox until manually assigned to a project.